Hi Gardeners
 |
| Sedum Autumn Joy and zinnias |
After a scary night of howling wind and rain, the day
has emerged partially sunny although it’s still quite windy out there. The oaks have now lost most of their leaves,
I’ll be raking them into the flower beds and running the mower over the rest. The maples are now coloring up beautifully. Fall color seems slow this year.
Even though we have had some frosts and freezes there
are still things blooming in my garden.
Petunias, snapdragons, some of the salvias and wax begonias shrug off
the cold. The anemone is still blooming and so are the landscape roses. I
rescued another geranium that was still blooming in the front bed.
Inside the pomegranate is blooming, some of the
hibiscus are in bloom and a potted penta is still in bloom. The red dipladenia is blooming and a yellow
canna. The streptocarpus are in bloom and a “Thanksgiving”cacti is beginning to
bloom. The geraniums I brought inside and the cane type begonias, as well as
some fibrous ones, are blooming. I even have a gerbera daisy in bloom.
Some of the plants I brought inside are dropping
leaves, the floor is looking a bit like the lawn outside. But plants dropping leaves when moved inside
is normal. They lose the leaves that are adjusted to high light levels outside
and grow leaves more suitable for lower light levels. And some plants got just enough chill and
shortened daylight to trigger a normal response of leaf shedding before dormancy.
All of these plants will be fine. In a few weeks they will all have adjusted to
their new conditions. I am hoping for a bright cheerful late fall and winter
but I have back up grow lights to help both me and the plants survive.
I was out planting bulbs this weekend. I still have
some to plant. I know I’m crazy to plant more tulips, but I skipped planting
them last year because of the deer and I knew unless I planted some this fall,
I wouldn’t have many tulips next spring.
So, they went in, but close to the house and hopefully I’ll be able to
protect them.
I participated in the ebird count this past Saturday.
It bothers me that only myself and one other person represented my county in
the count, although we have many known bird watching hotspots in this county.
In neighboring Lapeer county only 4 people participated. If you are concerned
about the loss of bird species, and like watching birds consider joining the
next bird count, which happens around Christmas.
Ebird, https://ebird.org/home
is run through the Cornell lab of Ornithology. You can sign up to be a citizen
scientist and help with the bird counts. The counts help science determine what
is going on with bird populations. You don’t need to do anything fancy- you can
observe your own bird feeder if you want. The site also has lots of information
on birds and you can see what birds were counted in your county and state.
People around the world participate.
 |
| Downy woodpeckers aren't all I see at my feeder. |
Fall may not seem like the time to think about
peonies, but since it’s the best time to plant them, I wrote an article about
them this week. Hopefully it will
inspire you to buy one and quickly get it planted if you don’t have a peony in
your garden.
Growing peonies
 Peonies are the grand dames of the late spring
garden. In fact, what is a garden
without a peony? If all goes well the peony in your garden may outlive you, it
may even outlive your home. I have seen
peonies blooming where only piles of ruble remain to signify what was once a
home. But these extremely long-lived plants do give gardeners some grief. The usual complaint is failure to bloom, but
if you plant them carefully in the right spot this is seldom a problem.
Peonies are the grand dames of the late spring
garden. In fact, what is a garden
without a peony? If all goes well the peony in your garden may outlive you, it
may even outlive your home. I have seen
peonies blooming where only piles of ruble remain to signify what was once a
home. But these extremely long-lived plants do give gardeners some grief. The usual complaint is failure to bloom, but
if you plant them carefully in the right spot this is seldom a problem.
Peony species are native to Asia, Europe and Western
North America. While there is some
disagreement about the number of species of peony, there are at least 33
species. Peonies come in three basic types, herbaceous, the most common garden
peony which dies to the ground each year, tree peonies which have a woody
structure that goes dormant in winter, and hybrids of the two, called Itoh
hybrids.
The most common garden peony, the herbaceous Paeonia
lactiflora is native to northern China. It was brought to Europe in the mid
1700’s and turned into the many cultivars that now exist in peonies. Paeonia
officinalis, is probably a natural hybrid of two other species. It’s native to Southern France, Switzerland
and Italy. It is the peony of herbal medicine and there are ornamental
varieties. Another herbaceous peony sometimes found in gardens is the fern leaf
peony Paeonia tenuifolia, which is native to Russia.
Tree peonies Paeonia rockii , (synonym Paeonia suffruticosa), and Paeonia delavayi are native to
China. In Asia they are the peony
most often found in gardens. They are often crossed, and many ornamental
hybrids exist. A hybrid of the two was then bred to the herbaceous P.
lactiflora to produce what is known as the Itoh hybrids.
Itoh hybrids have leaves like tree peonies, and a strong upright structure but
they lose their leaves and some branches, leaving a woody stem to go dormant.
Peonies have compound leaves, with 5 or more leaflets
depending on species. In the fern leaf
peony, the leaves are finely divided.
Many peonies have reddish foliage in the spring. Others have red veins
in the leaves.
Herbaceous peonies send up a number of shoots from
ground level. The shoots live one season
and die to the ground in the fall. A
mature plant can make quite a large clump, about 3 feet high and 3-4 feet wide.

Tree peonies have a branched structure with several
main stems. They look more like a shrub than a tree. Leaves fall off in winter
but most of the woody structure survives. In warmer places tree peonies can get
6 feet tall. Most will slowly grow to 4-5 feet tall and wide. Some tree peonies
are grafted plants. Itoh peonies have a
branched structure but die back somewhat
over winter. They are generally shorter than tree peonies at around 3 feet
high.
Peonies have thick roots that store food as well as
fibrous roots. This makes peonies one of the plants that can be sold bareroot
and in fact, most herbaceous peonies and many tree and Itoh peonies are sold
this way.
Peonies produce flower buds on the ends of
stems. Flowers can range in size from
the size of a quarter to 6 inches or so across. Flowers are often smaller in
younger plants than they will be when the plant is mature. They can be single, semi-double or
double. There is a mass of yellow
stamens in the center of the flower.
Flowers may close in cloudy, wet weather.
Colors range from white through pinks, corals and
reds in herbaceous types. In tree and Itoh peonies colors include the above
plus yellow and purple shades. Most peonies are fragrant, but there are some
that aren’t.

When choosing a type of peony to buy take into
consideration the type of weather your climate typically has when peonies bloom
in late spring-early summer. The large double flowered types can look like a
soggy mess in wet weather and often end up laying on the ground unless
staked. The single flowered types handle
wet weather better.
Peony flowers can produce seed pods with several
“arms” filled with round black seeds about the size of a pea. These seeds can and do produce new plants,
either where they drop or when collected and planted in pots. However, seed grown peonies seldom have
flowers that look like the parent plant.
That’s ok since you can get some interesting plants- although it takes
about 5 years before the seed grown plant will bloom.
Location
When you plant a peony make sure you place it where
you won’t have to move it in a year or two.
Move them only when absolutely necessary. Every time a peony is moved or
divided it can take a year or more before it blooms again and several years
before it becomes a large plant again with numerous blooms. And don’t dig up
and divide your peonies every few years either. They are best left alone, and
they do not need dividing to keep blooming, in fact dividing will inhibit
bloom. If you do have to move a peony do it in the fall.
There are peonies that will grow from zone 4 to zone
9. They like a soil that’s around neutral in pH- about 7 but will adapt to
slightly higher or lower pH. They like
well drained spots, peonies will not grow in wet spots. And some protection from wind is good, such as
in front of a fence or wall.
Peonies prefer full sun. Some will grow in partial shade, but they
won’t bloom as well and fungal disease is more common on shaded plants. Often as trees around them mature the peonies
get more and more shade and stop blooming. Notice where the trees are when you
plant and plan for the future shade the trees may provide.
Peonies are a plant that thrives without much
fertilization. See care below. In fact,
if they get too much nitrogen, they can stop blooming. This can be a problem if
they are planted in a lawn that is heavily fertilized, as lawn fertilizer is
high in nitrogen.
If the peonies are in the path of automatic overhead
sprinklers, while they are in bloom particularly, they may be more susceptible
to botrytis and other fungal disease.
And water on the blooms often ruins their looks. You may want to plant
them where sprinklers can be turned off while they are in bloom or use drip
irrigation.
Space the peonies about 6 feet apart. That seems like
a lot when they are small, but is about right for mature plants, and remember,
you don’t want to be moving them often. They need good air circulation so don’t
crowd them. Peonies are often planted in back of mixed flower beds, but make
sure larger perennials don’t shade and crowd them.
I’m going to be honest here and say that sometimes
peonies don’t look that ornamental after bloom has faded. If they weren’t caged
or staked herbaceous types may look floppy.
You can trim off dead blooms and seed pods, but you shouldn’t trim the
plants foliage down until it yellows naturally in fall. Peonies need their
foliage the whole season to make enough energy to set next year’s blooms. The
only exception is if the foliage is infected with botrytis, see below.

The fact that peonies might not look as attractive as
you would like later in the season may impact your site selection. That’s why
peonies may be better planted in back of other flower beds or in other areas
where attractive foliage in summer isn’t crucial. Tree and Itoh peonies are
somewhat more attractive later in the season.
Planting – it’s crucial to get it right
Peonies are best planted in the fall and in a dormant
state. Bareroot clumps are fine and are the common way peonies are sold. The second-best time to plant is in very
early spring, when potted plants may be offered for sale. Small potted plants are better than large
blooming pots, if you have the choice. Larger plants greatly dislike
transplanting.
Peonies planted too deeply will not bloom. Peonies
have small red/pink bumps or “eyes” on the top of root clumps even when
dormant. Look at your bare root clump carefully. You should see those eyes or buds. Dig the hole so that these buds will be just below
the soil surface, only an inch or so underground. If for some reason you see no buds the top of
the root clump should be just below the soil surface, no more than 2 inches.
When planting a potted peony or transplanting a peony
make sure the peony is planted at the same level it was growing in the pot or
in its former location (unless you are trying to correct a too deep planting).
There is some debate among experts as to whether a
peony you suspect was too deeply planted should be dug up and replanted. Over time many plants have the ability to correct
the depth of their roots, the plant pushes upward or downward as needed. This
may take years and the peony may not bloom during that time. But if you dig it up and re-plant it, the
peony could also take years to bloom again. You might try carefully removing a
few inches of soil from around the peony.
Or just dig it and replant it and hope for the best.
After planting the peony in the fall water it, but
then water again only if fall is very dry.
If you are planting in spring, water after planting or transplanting and
water every few days if it doesn’t rain.
Even if the plant isn’t showing signs of leafing out, water if the soil
gets dry.
What to expect after planting
It takes 3-5 years from seed to the first
flower. But most peonies are sold as
root divisions and while these root divisions technically come from an older,
blooming plant it can also take a year or more after you plant a peony before
you get blooms and a few more years before you get a full, mature plant full of
blooms.
Expect to see a few stems of foliage the first year
after you plant a herbaceous peony. Occasionally one will have a few blooms the
second year, usually in the third year there will be some blooms. If the plant
is in a good location, you should see it get larger and have more blooms each
year.
Tree peonies are notoriously slow growers. You may only see a few tiny leaves on the
branches the first year. Some plants
won’t even leaf out. Continue to water
and care for them even if you think they are dead. (If there are no leaves the
second year it probably is dead.) By the third year after planting, you may get
a few small flowers. Each year the plant
should get larger and the flowers will become larger and more abundant as the
plant ages.
Itoh peonies fall somewhere between these two- expect
some foliage the first spring after planting but slower growth than herbaceous
peonies. They do die back somewhat each
year to the main woody stem parts.
 |
| Itoh peony 'Bartzella' https://www.dutchbulbs.com/ |
General care
While peonies don’t like a lot of fertilizer a light
fertilization in fall can improve bloom.
After herbaceous peony foliage has been removed or tree and Itoh foliage
has dropped, (you can remove tree and Itoh leaves after a frost), you can add a
light layer of compost, or aged manure around the plant. Keep it from touching
the stems of tree and Itoh peonies. You can also fertilize with a commercial
fertilizer for blooming plants, according to label directions.
Do not pile compost or mulch too deeply around
peonies. Remember they need those eyes
to be near the soil surface to bloom well.
Experts say do not use wood-based or bark mulch around tree peonies as
this might promote artillery fungus growth, a fatal disease.
Peonies are very hardy, even tree peonies. In planting zones 4-9 they do not need winter
mulching or wrapping to protect them. In
zones 2-3, if anyone is growing peonies there, they should be mulched with
straw heavily for winter.
Do not prune tree and Itoh peonies unless they are
dormant and it’s a very light pruning to remove crossing, broken or diseased branches.
Dead branches can be removed when noticed. There may be some die back in Itoh
and tree peonies over winter. Once other parts of the peony have sprouted
leaves and you can tell what has died you can remove the dead areas.
Herbaceous peonies should not be cut back until the
leaves have yellowed or turned red in fall.
Then cut them to the ground. Take
the stems to the compost pile, which should be a good distance from the
peonies. This helps prevent disease spores from overwintering
Late in the fall, after a hard freeze, experts
recommend removing any leaves that remain on tree and Itoh peonies. Be very careful doing this because the buds
for next years flowers will be right there at the tip of the branches and you
don’t want to damage them.
Most herbaceous peonies will do best if they are
staked or caged before buds get very large.
The nicest way to do this is to use one of the supports that look like a
grate on legs-stems grow up through them and the grate is hidden. There are
cages for peonies also and if they are in place as soon as sprouts show above
ground the cage is usually hidden by foliage. These devices keep the stems from
flopping when the heavy flowers get wet.
Tree and Itoh peonies usually do not need staking.
Peonies are not plants that need division to
bloom. In fact, one should avoid dividing
or transplanting peonies. Every time a peony is moved or divided it can take
several years to bloom again.
Peony problems
Sometimes failure to bloom may be caused by a common
peony disease, gray mold or botrytis blight (Botrytis paeoniae). This disease is prevalent when spring is wet
and cool, and some types of peonies are more susceptible than others. The
fungal disease can start at any stage, new shoots may get covered in gray mold,
rot and fall off, young buds blacken and shrivel up, older buds and flowers get
a gray mold, rot and fall off. Peony
foliage can get black and tan “bullseye” spots.
If the disease comes on early and affects shoots and buds, you are
unlikely to get blooms.
If you have had trouble with this disease in the past
you could use a preventative fungicide on the peony shoots as soon as they
emerge in spring and keep up a spray schedule according to label
directions. Once the disease starts it
cannot be cured that year. However, the
plants probably won’t die and may be fine the next season if the weather is
different and you have practiced good clean up strategies.
During a botrytis outbreak remove infected buds,
flowers, and leaves and burn them or seal tightly in a plastic bag and discard.
Peonies also get powdery mildew on occasion. This looks like a white or gray powder on
leaves. It usually happens after the peonies bloom. While it makes the foliage look bad, it
rarely kills the plant. You can control
it with any garden fungicide.
One last thing to mention, ants and peony flowers. Peonies do not need ants to bloom and ants do
not harm peonies. Peonies and ants can have a symbiotic relationship, the ants
eat a sweet secretion from peonies and in turn defend the flowers from some
pollen stealing or petal munching insects.
But peonies don’t really need ants and since ants don’t harm the peonies
there is no reason to use pesticides to kill them. To get ants off peonies you
have cut for inside gently submerge the flowers in cold water for a few
minutes.
Peonies as cut flowers- amazingly long
lasting ones
Peonies are excellent cut flowers, lasting a week or
more in a vase. Florists love using peonies in arrangements, but the growing
season is short. Alaska is now growing
peonies for the florist market as their peonies open a month or so later than
peonies grown in the lower states. But did you know florists can hold peony
buds for up to 6 months before using them in an arrangement?
Gardeners who want to extend the “bloom” time of
their own peonies have two methods they can try. For the first you’ll need an old-fashioned
refrigerator, one that isn’t humidity controlled. Maybe that beer frig in the
garage can work.
Cut the peony flowers as buds that are just beginning
to split and show color. They should feel like a marshmallow when gently
squeezed. When you are cutting peony flowers from the plant try to leave as
much foliage behind as you can. It doesn’t
hurt the plant to lose all the flowers, but if more than a third of the foliage
is removed the plant may not bloom well the following year.
 |
| Peony bud ready to be cut Pixaby |
Immediately place the cut stems in cold water. Lightly
wrap the buds with tissue paper or a paper bag to help protect them from injury
and place vase and all in the refrigerator.
Change the water in the vase each week. Temperatures should not be lower
than 40 degrees. This method can keep buds at least a month, maybe longer.
When you want to use the peony flowers in an arrangement
take some of the buds out of the refrigerator a few days before you need them.
Keep them in water in a vase in a warm, light place and the buds should open up
into beautiful, fresh looking flowers.
In the second method you can use any
refrigerator. Pick buds at the same
marshmallow stage as above. Remove all
the leaves from the stems. Wrap the
peony bud stem and all in plastic wrap (not too tightly), making sure to seal
the ends by twisting or taping. Lay the buds flat on a refrigerator shelf. Make sure you dedicate a shelf to the buds;
you don’t want to set things on them. Any buds that mold during storage should
be discarded.
Wrapped like this the buds will last many weeks. Some people have kept peonies cut in June
until Thanksgiving. They may look wilted when you take them out to use. Cut a ¼
inch off the stems and place them in warm water in a lighted spot and they
should rehydrate and open in a day or so.
There’s no guarantee that your peony buds will all
survive storage but it’s a fun thing to try. Some peony types hold in storage
better than others. Experiment, maybe
you can amaze guests at Thanksgiving with peonies from your own garden!
Herbal uses for peony
Yes, they are not only beautiful, but peonies have
some uses in herbal medicine. Usually it is the root that is used in herbal
preparations. In herbals you may see the term red peony and white peony. This
refers to root color, not flower color. Different species have different
colored roots.
Scientific studies have found peony root might be
useful to help muscle cramps. It may also be helpful in arthritic complaints,
RH, Osteo, and gout. Peonies contain a compound called paeoniflorin, which may
help remove facial wrinkles and is used in some cosmetics.
In herbal medicine peony root is also used in “women’s
complaints”, PMS, cramps, and to cause an abortion. Pregnant women should not
use any peony product if they want to remain pregnant.
Peony is also used for epilepsy, migraines, to cause
vomiting, and for liver problems in herbal medicine. It is also used in ointments
to heal cracked skin and hemorrhoids.
Every garden needs some peonies. This fall why not plant one?
Collecting and storing garden seeds
Frugal gardeners like to collect seeds and start
their own plants. Sometimes it may be the only easy way to get some plants. But if you want to be successful in
harvesting and then growing the seeds you need to know certain things about
collecting and storing seeds.
First determine what plants you want to save seeds
from. Many flowers and vegetables are
hybrids. When you save seeds from them
you won’t get fruit or flowers that are identical to the parent plant. And even if the plants in your garden were
not hybrids, if you had several varieties, they may have cross pollinated, and
once again the plants you grow from seed won’t be like the parents.
That may be fine with you. Some people like to breed plants and to do
that you need to collect seeds. Others
just want to see what they can grow with the seeds and are happy with any
results. As long as you realize that
some seeds won’t produce plants identical to the parent you can collect seeds
as you like.
Some seeds may be difficult to grow, with exacting
needs for germination. You may like a challenge
and are able to research the needs and follow the steps to get the seed to
germinate. For other people knowing what
plants are difficult to grow from seeds may mean they won’t want to collect
seeds from that plant.
 |
| Cleome seed pod splitting |
Research any plant and what the seeds need for
germination before you collect seed. I
can’t list all the germination needs of every garden plant’s or wildflower’s
seeds but here are some plants that aren’t worthwhile to grow from seed or are
hard to grow from seed.
Roses- they do grow but almost always rose seed
growing is a crap shoot, garden roses do not produce true to seed and most seeds
won’t produce anything nice. You will wait years for them to bloom before you
see what you have also. Unless you are attempting to breed roses don’t save the
seeds. Also don’t buy rose seeds online,
that’s a scam. You won’t get blue roses or rainbow roses sometimes you won’t
even get rose seeds but something else.
Glads, tulips, daffodils, crocus, calla and other
bulb forming plants will start from seed but are better propagated by the
bulblets that form on an older bulb. Begonias are better started from cuttings.
Many hybrid lily seeds are infertile. Most
sedum and succulents are easier started from cuttings.
Apples, pears, peaches and many other fruits can be
started from seed, but you usually won’t get a plant that has the same kind of
fruit as the parent, especially in apples.
Since it can take many years for the plant to produce fruit, only to
find it’s worthless, it’s better to buy fruit trees rather than plant
seeds. Many fruit trees aren’t hardy
when grown on their own roots and need to be grafted on to hardy trees.
Strawberries are best started from root
divisions. Carrots, beets, onions,
cabbage, broccoli and other garden vegetables take two years to make seed, so
most gardeners won’t find them. But even if you do these plants are better
grown from seed you purchased, instead of saved.
Seeds that are easy to collect and grow
The seeds of many annual flowers and some perennials
are fairly easy to collect and grow. You may not get the same flowers the
parents produced, especially if the parents were hybrids but many older garden
favorites are open pollinated and will be like the parents. Easy to collect and grow are Amaranthus, bachelor’s
buttons, calendula, cosmos, cleome, four o clocks, hollyhocks, marigolds, morning
glories, nasturtium, nicotiana, strawflowers, snapdragon, statice, sunflowers,
and zinnias.
Collection method
In most cases you want to collect the seed when the
seed pod or fruit surrounding the seeds is fully ripe. Since we eat some
fruits before they are fully ripe, like cucumbers, you must know what a ripe
fruit looks like for that plant and wait to harvest the seeds. Corn
should turn dry and hard on the stalk before saving seeds. Melons should
be mushy ripe and the seeds black or dark brown for watermelon before harvest.
Peppers must be fully ripe- and they can be many
colors when ripe- and soft. Green
peppers aren’t ripe enough to save the seed. Most seed pods or seed heads
turn brown and dry when the seeds are ready to harvest. The opening of pods
means the seeds are ripe.
 |
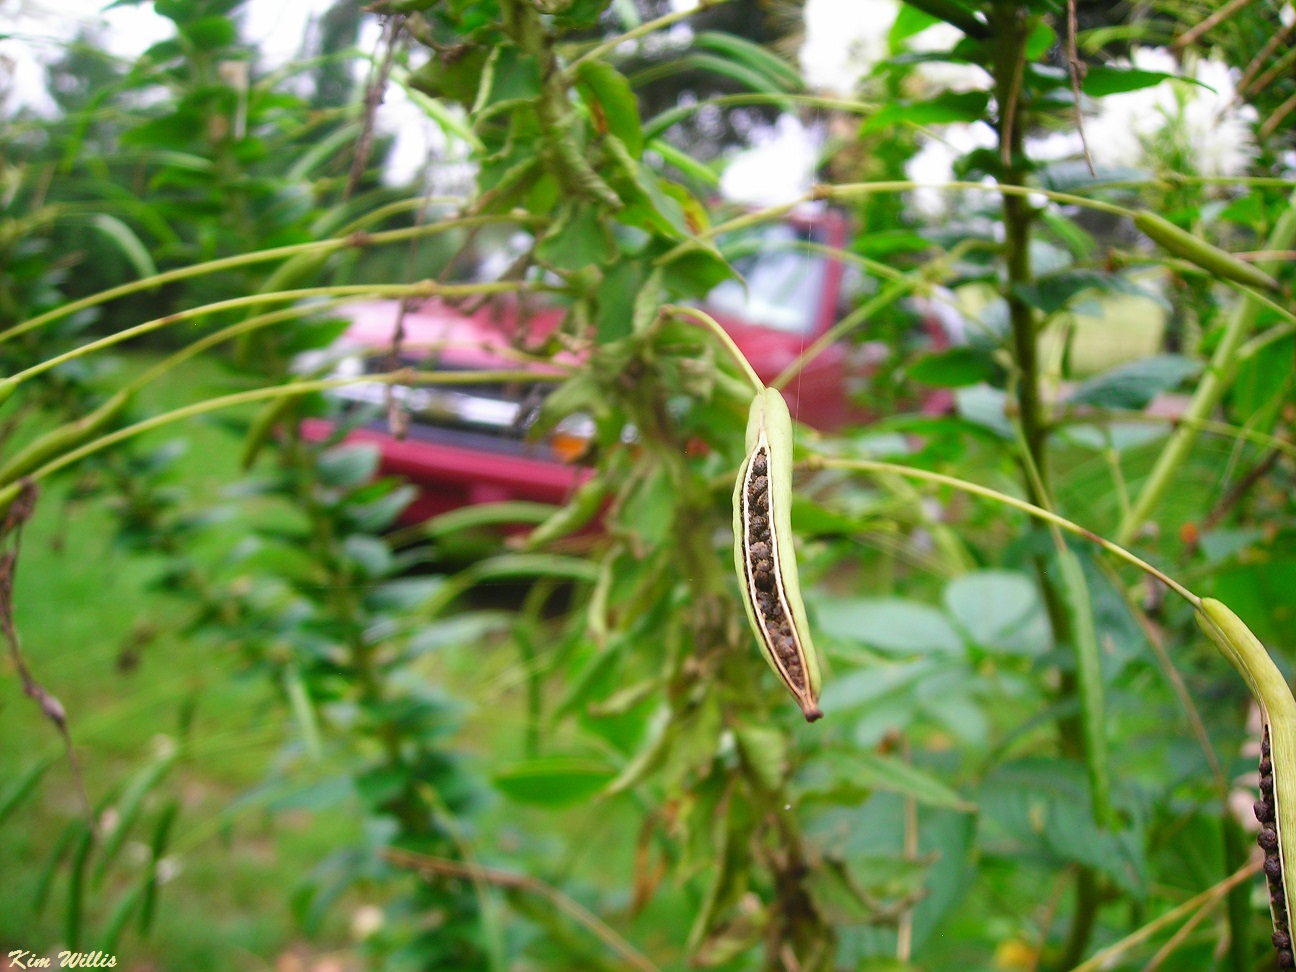
| Milkweed pod |
Collect seeds on a warm, sunny dry day if at all
possible. It’s best to collect most types of seed before a heavy frost or
freeze but collection after that can still work for many seeds. The trick
in collecting seed pods and seedheads to get the seeds is to not let them split
or otherwise disperse the seeds before you collect them, but still be
mature. Keep a close eye on ripening pods and seedheads. On a warm
day a closed pod in the morning may have shot off the seeds or dropped them on
the ground by evening.
If seed pods and seedheads are almost dry and nearly
ready to harvest you can cut them and put them in paper bags in a warm dry
place to finish drying. Or you can surround seed heads or pods with paper
bags and tie them right on the living plant. Separate the varieties and
species. Label your bags!
Sometimes gardeners have a hard time distinguishing
the actual seeds from the seed pods, or remnants of flowers and fruit. Put
the ripe seed heads or pods in paper bags close and shake them. You may see
loose seeds in the bottom. In most cases a ripe pod or seed head will split or
otherwise open or drop its seeds, but in some cases even ripe pods must be
opened. Some flowers like Echinacea, rudbeckia, zinnia and others with daisy
like flowers will have a bit of dried petal attached to the seed. Even when dry
some of these flower heads must be pulled apart to separate the seeds.
Sometimes fruit needs to rot
In some cases, for seeds to be properly stored and
then sprout, the fruit must first rot or ferment. While you can cut open
a very ripe tomato and extract the seeds for storage, it’s better to let the
tomato turn to a rotting, fermenting mush before separating out the seeds,
drying them and saving them. Germination rates will be higher.
Rotting fruit keeps seeds moist for a while. And chemicals caused by the
decomposition process may be necessary in some cases to soften the seed
coat. The most common garden plant that really needs fermentation is the
tomato.
Many seeds are prepared for germination in nature by
passing through some animal’s digestion system. You can ferment or rot
fruits in a nicer way though. Simply place a ripe fruit in an open container
and let it sit for a while. You can cut the fruit in pieces if
needed. Label the container if you have several varieties of something
like tomatoes to ferment. You’ll want to put the containers somewhere
where you don’t smell them and the flies they attract won’t bother you.
Make sure animals can’t eat them.
Let the fruit rot until it’s a watery, smelly unrecognizable
mass. Then put the contents in a fine wire mesh strainer and gently rinse
with clean water until clean seeds are left in the strainer. Spread the seeds
on a piece of screen and let them dry in a warm, dark place until they look and
feel thoroughly dry before storing. If you spread the seeds on newspaper
or paper towels they often stick to the paper as they dry and can be hard to
remove.
Storing seeds
When you do have the seeds separated from pods and
fruit let them dry for a few more days in a warm dark location. Most seeds need
to be thoroughly dry before storing, so they don’t mold or rot. Clean out
pieces of stem, pod and other debris before storing. It’s best to place seeds
in paper packages, even a twist of tissue or fold of newspaper, before placing
them in sealed glass or plastic containers. This absorbs moisture. You can
add a bit of powdered milk wrapped in tissue to each container to absorb
moisture too. Once again- label containers, there’s nothing worse than
forgetting what kinds of seeds you carefully saved.
After your seeds are packaged store the seeds of most
common garden plants in the refrigerator crisper drawer or another cool dry
dark spot. Most plants grown in temperate climates, both annuals and perennials,
need a period of cold dormancy before they germinate. Even if they don’t,
they will store better in a cool location.
Some tropical plant seeds may do better in warmer
storage and some seeds may actually need freezing temperatures to properly prepare
them for germination. A few types of seed need to be stored
moist.
Some plants need stratification to properly
germinate. In nature stratification occurs when seeds lay in moist soil
and are subjected to freezing and thawing. Then they are ready to quickly
germinate when warmer conditions occur- the amount of warmth to get them
sprouting will vary by species. The period that they need to be cold also
varies. In most cases cold stratification is needed, but in a few plants
the seeds must be stored in warm and moist conditions to get good germination.
Many common garden perennials need stratification. These
include; Aconitum, Alchemilla, Asclepias (Milkweed), Baptisia, Bloodroot,
Buddleia, Candytuft, Caryopteris, Chelone, Cimicifuga, Clematis, Chinese
Lantern, Delphinium, Eremurus, Evening Primrose, Filipendula, Fuchsia,
Gentians, Geranium species (Cranesbill Geranium), Helianthemum, Helianthus,
Heliopsis, Helleborus, Heuchera, Hardy Hibiscus, Hypericum, Incarvillea (Hardy
Gloxinia), Knautia, Lavender, Marsh Marigold, Mazus, Nepeta (Catmint),
Penstemon, Persicaria, Phlox (all types), Platycodon, Primrose, (all types),
Ranunculus, Rudbeckia (Black-eyed Susan, most types), Saponaria (Soapwort),
Saxifrage, Scabiosa, Sedums, Sempervivums (Hen-and-Chicks), Sidalcea, St.
John’s-Wort, Stokesia, Thalictrum, Tiarella, Tricyrtis (Toad-lily), Veronica,
Violas, Violets, Virginia Bluebells.
Many wildflowers/natives that a gardener might want
to establish also require cold stratification. Check with experienced
growers or it wouldn’t hurt to assume that most wildflowers that drop seed in
late summer and fall would need stratification.
You can store the seeds of the above plants dry and
cool for a while but before germination they will need to be stratified some
way. Seeds that need cold stratification are best stored planted in pots and
left outside, where they are subjected to normal weather. Or you can hold the
pots in a refrigerator, watering occasionally for about 10 weeks. You can also
plant the seeds where you want them to grow and mark the spots.
If you would like more information about seeds and
the special germination needs of some plants, you can go to this page:
Making your own apple juice
If all the talk about arsenic and other chemicals in
apple juice scares you and apple juice is the favorite drink of your family you
may want to consider making and canning some of your own apple juice. You may
have apples in your own yard or have an orchard nearby. And apples are a fall staple in farm
markets. Making your own apple juice
will take a little time but it isn’t hard to do.
Apple or cider can last a long time without
refrigeration, but it may turn hard or alcoholic through fermentation. And sometimes even refrigerated and
pasteurized apple juice will spoil. Because few of us want to have alcohol in
our children’s apple juice and we want to avoid food borne illness homemade
apple juice should be canned or frozen. The canned product can sit in the
cupboard and not take up freezer space. You’ll need a simple water bath canner,
and some quart or pint jars with lids to can your own apple juice. You’ll also need some cheesecloth, or an old
clean pillowcase, or some large coffee filters and a colander or strainer.
You can make apple juice at any time of the year, but
fall is ideal because apples are abundant, fresh and cheaper in the fall. The
apples don’t need to be perfect; you’ll want to avoid wormy ones but lumpy,
scabby ones are fine. A mixture of apple
varieties usually makes the best juice or cider. A small percentage of not
quite ripe apples can be used but most apples used in juice should be fully
ripe.
In some places you can buy organically grown apples
if you aren’t growing your own. (Wash
these apples before use because they can be contaminated with things other than
pesticides.) But conventionally grown apples are perfectly safe if washed
before using.
Using
cider to make apple juice
There are two main ways to make apple juice. The
easiest way is to start with cold pressed apple cider from a cider mill. This
method gives you less control over the juice as you did not select the apples.
It will also be more expensive. You may be able to find cider made from organic
apples, but chances are the apples will be conventionally grown. Cold pressed commercial cider will probably
be pasteurized but you will still need to heat and can the final product for
storage.
To make apple juice from cider simply let your cider
sit in the refrigerator undisturbed for 2 days. Then carefully pour off the
clearer fluid from the top of the jugs, leaving as much sediment as you can
behind. Strain that clearer juice through a colander lined with cheese cloth or
a coffee filter. Each gallon of cider
will give you about 3 quarts of strained juice.
Put your strained juice into a pan and bring to
boiling. Boil one minute. Then pour hot
juice into sterilized jars to a 1/4 inch from the top, add lids and screw bands
and process in a water bath canner for 5 minutes for pint or quart sized jars.
Making
heat processed juice
If you want the most control over the apple juice
contents or have an abundance of home raised apples to use this is a good
method to make juice. Cooking the apples
a little makes them yield more juice and you won’t need a mechanical press.
Wash the apples and then chop them in chunks. There
is no need to peel or core them. In a large pot combine 1 cup of water for
every 3 cups of chopped apples. Cover the pot and let the apples simmer for
about 25 minutes or until they are soft. Pour off excess water. You will then
need to mash or puree the apples. You can do that in the pot by hand or with an
electric beater. Or you can put small amounts at a time in a food
processor.
Pour the apple puree through a strainer lined with
cheesecloth or a coffee filter and collect the juice. If you have a lot of
puree you can put it in an old thin pillowcase and suspend that over a
collection pot. You can buy what is called a jelly bag for that purpose, but they
aren’t very large.
Do not press or squeeze the puree through the
strainer. Let it drip slowly for several hours. Take your collected juice and
bring it to a boil, boil 1 minute, pour into sterilized canning jars to a 1/4
inch from the rim, add lids and process in a water bath canner for 5 minutes
for both quarts and pints.
If you like sweetened apple juice, add sugar to your
taste preferences at the stage where you boil the juice just prior to filling
the jars. A suggestion is a 1/2 cup
sugar to every 3 cups of juice. Do not use artificial sweeteners as they will
turn bitter during heating.
Freezing
apple juice
After making apple juice in either method above it
can be poured into freezer containers instead of canning jars and frozen. If
your family likes a lot of apple juice this may not be the method for you as
the juice will need a lot of freezer space. The frozen juice may separate a bit
as it thaws but will just need to be stirred or shaken before use.
Uses
for apple juice
Besides a refreshing, natural drink apple juice can
be used to make gelatin, turned into jelly or used as a cooking fluid for meat
such as pork, to lend a delightful taste. It can also be blended with more
expensive juices. Always refrigerate
opened jars or defrosted containers of apple juice and use them within a week.
“October is the opal month of the year. It is
the month of glory, of ripeness. It is the picture-month.”
-Henry Ward Beecher
Kim Willis
All parts of this blog are copyrighted and may not be used without
permission.
And So On….
Find Michigan garden events/classes
here:
(This
is the Lapeer County Gardeners facebook page)
Newsletter/blog information
If you have a comment or opinion you’d like to share, send it to
me or you can comment directly on the blog. Please state that you want to have
the item published in my weekly blog if you email me. You must give your full
name and what you say must be polite and not attack any individual. I am very
open to ideas and opinions that don’t match mine, but I do reserve the right to
publish what I want. Contact me at KimWillis151@gmail.com
I write this because I
love to share with other gardeners some of the things I come across in my
research each week. It keeps me engaged with people and horticulture. It’s a
hobby, basically. I hope you enjoy it. If you are on my mailing list and at any
time you don’t wish to receive these emails just let me know. If you know
anyone who would like to receive a notification by email when a new blog is
published have them send their email address to me. KimWillis151@gmail.com
No comments:
Post a Comment