Tuesday, April 25, 2017

April 25, 2017, Kim’s Weekly Garden Newsletter

Hi Gardeners

Flowering quince
We’ve had some cool nights but fairly nice spring days and flowers are bursting out all over.  The flowering quince and the beach plums are blooming.  I was pleased to see the beach plums were covered with honey bees today, the first honey bees I have seen.  The apricot has just about finished blooming, but the redbud, pears and apples will bloom in a day or so.


I have windflowers, daffodils, early tulips, bloodroot and Spanish bluebells in bloom. Brunnera, perennial Forget me not-is blooming.  A few crocus linger on.  I see color on the lilac buds.  The yard is filled with yellow dandelions, purple violets and purple deadnettle.  (Dandelion recipes below).

I have been potting up the new bulbs I ordered.  I’m trying some new little bulbs I have never grown before, planting them in pots.  My bulb order arrived with 7 packages instead of the 8 it should have had. One of the things I have never grown before is Incarvillea (hardy gloxinia).  I had a package marked Incarvillea but it looked like dahlia tubers, which I ordered but that didn’t seem to be present.   I thought there might have been a mix up but after talking with the nursery I guess I do have Incarvillea, the dahlias I ordered are being re-sent to me.   Anyway it will be interesting to see what happens when the tubers sprout.  Anyone out there growing Incarvillea?

The potted bulbs are in my little greenhouse, along with lots of seedlings.  I like to give things like dahlias a head start before planting so they bloom sooner.  We’ve had a couple of nights with freezing temperatures but so far everything has been fine in the greenhouse even though it’s not heated.  I just wish I had a bigger one.

We’ve mowed the lawn for the first time and I have been busy weeding.  I ran into some little stinging nettles yesterday.  I hate those things, and I don’t care how great of an herb they are, in my garden they are compost material.

My big task will be weeding out the strawberries this week.  I can’t believe how fast the grass grows in a strawberry patch.  And I have to get in one of my front beds and weed out all the little alliums that are coming up, those things spread like crazy.  I think the whole allium family is a bit aggressive.

Still no hummingbirds here, but I expect them any day now that more things are in bloom. 
 
Beach or native plums

One more mosquito repellant that doesn’t work

After last week’s blog someone wrote to me asking about another mosquito remedy, this one for spraying around the yard.  It was a mixture of “cheap mouthwash”, Epsom salt and beer.  I don’t know where people come up with this stuff.  There’s no basis for any of those products to repel mosquitoes, in fact the smell of beer actually attracts some species of mosquitoes. 

The mention of Epsom salts in any home remedy for the garden should be a clue.  You can count on 99% of the remedies for the garden that use Epsom salt to be useless.  The only legitimate use for Epsom salt in the garden would be to correct a magnesium deficiency in soil, which is a rare problem most home gardeners will never encounter.  Oh, and it’s great for soaking your tired feet after a long day of hauling mulch around.

The article that was sent to me claimed the concoction kept mosquitoes away for 80 days!  What a joke.  Alcohol in beer and mouthwash would quickly evaporate.  Epsom salt would be washed into the soil in the first rain.  Even the best and most effective commercial mosquito repellants don’t last that long. Who dreams these things up? Don’t waste your money and time mixing up this mess.

I think some of these products seem to work because of the placebo effect.  You spend time and money making the remedy and you feel virtuous because you didn’t use any “horrible chemicals”.  You think you saved money but unless you got the products free you probably didn’t. So your mind tells you after you went around spraying the yard that there were fewer mosquitoes.  If your mind could keep mosquitoes from biting you that might help, but I haven’t seen any evidence that works with mosquitoes. 

There have been lots and lots of research on what repels or kills mosquitoes.  None of the mentioned products kills or repels mosquitoes.  If you don’t want to use chemicals in the yard, and I don’t fault you for that, don’t use them.   Keep all sources of standing water emptied or treat them with Bt, a natural product that kills mosquito larvae, so you don’t breed mosquitoes.  Wear long sleeves and pants when outside in the times of day when mosquitoes are most active; dusk, dawn and cloudy damp days.  Use a good mosquito repellant on your body and clothes.  A good strong breeze keeps mosquitoes away.  When sitting on the deck or porch a fan can be used to provide good protection without chemicals.

Sometimes we need to weigh the risks against the benefits.  Mosquitoes can carry serious life threatening diseases.  Some areas of the country have more problems with mosquito borne disease and some people are more vulnerable to complications of those diseases.  Modern mosquito control products for personal use carry extremely low risks to people using them. Make an educated decision based on that.

Moss

Do you have moss in your lawn or on your roof?  The good news is that moss isn’t harmful, and just indicates that suitable conditions for moss are present, which may not be the right conditions for your lawn or roof.  If you change the conditions the moss will disappear.

In lawns moss is most often a problem in compacted soil, shady areas, wet areas and in acidic soil with low fertility.  If you correct the conditions favoring moss it will disappear.  Aerate the soil and limit travel on those areas if compaction is a problem.  Have a soil test done to see if the soil is acidic or low in fertility and correct those conditions.  Improve the drainage in wet areas- or simply wait for drier conditions to happen. 

Shade is trickier.  You may not want to remove a nice tree to keep moss from growing under it.  But grass is not going to grow in shady places where moss grows anyway.  Moss doesn’t look bad and some people have cultivated it under trees instead of using mulch or ground cover plants.   Moss is easily removed by sliding a trowel or shovel under it and then you could replace it with mulch or find a ground cover plant for your shady conditions.
Moss in the lawn

Moss on the roof is also caused by favorable conditions, generally a roof that stays damp because it’s shaded.  If you can remove the shade and increase airflow by removing any tree branches hanging low over the house the moss will probably disappear.  There are products you can buy to clean moss off roofs but be very careful if you decide to use them.  Some can wash off and harm plants on the ground below.  Too vigorous scrubbing of moss can damage shingles too.  Soap and water solutions generally don’t work very well and one should never apply them while on the roof, since they are slippery.

Moss is actually a rather neat plant.  Each patch is like a miniature forest, take a look under a microscope and you’ll see tiny insects and snails living in it, the moss plants looking like tiny trees. Hummingbirds use bits of moss and lichens to line and hide their nests.  Moss provides nitrogen to some environments, through a symbiotic relationship with bacteria.  There are some 12,000 species of moss.

Mosses have their own special division of the plant kingdom, Bryophyta.  They are plants without a vascular system and reproduce by spores instead of seeds. There’s no real root system, moss absorbs water and minerals through its leaves.  Moss can grow on a variety of surfaces from soil to roofs to stones but a moist environment is crucial for moss.

Some people collect moss and use it in miniature gardens and terrariums. It’s been used as a lawn substitute. And of course gardeners know the value of peat moss, the dried mosses from bogs.  Native people used dried moss as diaper lining, as wound compresses and in shoes.  Moss is used on green roofs and was once used to fill the gaps in log homes.  Some northern cultures even made a type of bread from moss when food was scarce.  Its even used in the production of Scotch wiskey.

Layering as a propagation technique

If you are out in the garden this spring and decide you’d like to have more of a certain plant why not try a simple method of propagation called layering to get some new plants?

Layering is a method where a low branch of a plant, usually shrubby types of plants, is covered with soil while still attached to the plant.  Under the soil new roots develop and after the new plant is well established it can be removed and planted elsewhere.  Layering is a slow but pretty effective means of multiplying many plants.

Plants to try layering on include: roses grown on their own roots, forsythia, rhododendron, azalea, honeysuckle, honeyberry, boxwood, euonymus, privet, wax myrtle, lilac, spreading junipers, caryopteris, lavender, rosemary, blackberries, raspberries, grapes, and any plant with woody or semi-woody stems that are close enough to the ground that they can be bent to touch it. 

Don’t layer plants that are grafted, the roots of the new plant will not be hardy.  Don’t layer plants that are herbaceous, that is all the above ground parts die back to the ground each winter.  Most larger trees like maples and oaks cannot be layered.  Remember you can keep trademarked or patented plants you propagate  for yourself but you cannot sell them without a license.

The technique

When my grandmother wanted to propagate some plants she simply took a low branch, cut the underside with a pocket knife, pushed it to the ground and put a big rock on top of the cut area.  It worked for her many times.  But here’s a better way.

Layering is best done in early spring or fall but you can give it a try anytime.  In the spring look for a new green branch that’s close enough to the ground you can bend a good part of it down to touch the ground.  (I have mounded soil up on occasion to facilitate this.)  The branch should have buds or new leaves signifying it’s alive and growing. In the fall look for a branch that developed this year or a branch without heavy bark and layer it in early fall before it gets too cold.

The bending alone will cause some plants to put out hormones in that area to start root production, but wounding the branch makes root simulation more likely.  On the bottom of the branch where it will touch the ground take a sharp clean knife and make a small cut, not more than halfway through the branch.  Make the wound far enough down on the stem so that at least 4-6 inches remain to the tip of the branch.

Many times wounding is all that needs to be done.  Bend the wounded area just a bit so the wound gaps a little.  Sometimes a toothpick that’s moistened, rolled in rooting hormone, (which you can buy in garden stores), and placed crosswise in the cut to keep it slightly open, will help more stubborn plants make new roots.

Place the wounded branch with the cut side down on soil that’s been loosened.  The branch remains attached to the plant.  You’ll need to securely pin it to the soil in some way.  I use a piece of stiff bent wire over the stem and into the ground.  But the rock is an old and true method.  Place the pinning item just past the wounded area toward the main plant.

Bend the tip of the branch upward gently; you don’t need a sharp angle, just a gentle curve up.  Place a stake next to it and attach the branch tip.  Now you mound soil over the cut area, 6 inches deep is fine.  If you get heavy rains or the soil is very light you may want to cover the mound with a piece of netting or burlap to hold it in place.

Layering is a slow method of propagation.  Do not dig down or otherwise disturb the new roots for at least one year.  For example if you layered a rose in early spring, you may be able to remove and plant it the following spring.  If the branch was layered in spring it should develop leaves and grow over the summer but remember it’s still attached to the mother plant, so it may not be growing roots.  If the branch was layered in the fall, it may bud out in spring but not have roots yet also.

After a year carefully remove some of the soil mound and look to see if new roots have developed.  If they have you can cut the plant away from the mother plant and transplant it to where you want it to grow.  Make sure to keep it watered as it establishes itself.
Layering, picture adapted from wikimedia commons

Tip layering, suckers and water sprouts

A few plants will root if branches bend over and touch the ground.  Willows and forsythia come to mind, but any shrub with a “weeping” form might be a prospect.   Where a branch tip touches the ground you can mound a little soil over it.  If you can weigh the tip down or tether it in some way it has a better chance of rooting.  Normally wind moves branches around a lot and this prevents rooting.

If a plant puts up suckers, like lilacs do, (that’s small plants that pop up a short distance from the plant), you can simply dig up the suckering pieces, cutting the roots attached to mother plants.  Let suckers grow a year or two to develop a good root system.  Suckers that grow up around a grafted plant will not turn into plants that look like the mother plant and may not be hardy.

If you cut down a shrub or even a tree and it throws a bunch of shoots or “water sprouts” up from the trunk you can mound soil over these shoots and let them develop their own root systems.  Wounding them near their bases with a small cut will make them more likely to develop their own root system and not keep using the old plant roots for sustenance.  Only propagate these water sprouts if the original plant was healthy.  And if the original plant was grafted the plants growing from the sprouts won’t look like the original tree and may not be hardy.

Sometimes living trees will put out water sprouts near the base of the tree.  Do not mound soil around these as it may rot the trunk of the original tree and allow disease and insects inside.

Should you only plant native species in your garden?

Here I go again. I saw a post on line where someone wanted a plant with pretty purple flowers identified, and the poster mentioned that hummingbirds loved the plant.  The plant was identified and then people went on rants about not growing the plant because it was a non-native “invasive”.   I mentioned that it must have value in the environment because the hummers loved it.  Then people began the litany of this non-native disrupting the ecosystem because it took resources away from natives.  I guess they thought if hummers like this plant they wouldn’t go to native plants. Or maybe it was just the occupying of space that concerned them. This is what makes me so angry.

There are a lot of plants not native to North America that bees, birds and other animals are very fond of, and that contribute to their well-being.  There’s never been any proof that a plant introduced into an environment caused the extinction of a native plant.  And hummers, bees and butterflies rarely abandon natives; they just use non-natives as supplemental feeds, or nesting spots, maybe in an area where native plants no longer sustain their populations.  This is a good thing, not a bad thing, because more species are being saved.

It seems ironic to me that the most invasive, environmentally destructive, non-native plants in this country are plants that benefit humans.  All that wheat, soy, rice, oats, cotton, lettuce, cabbage, apples, citrus, those honey bees, in fact most food crops, are not native.  But they feed us, humans, so they get to stay. And those crops have been the cause of more harmful changes to the environment than any non-native ornamental plant in a garden.

So why is it wrong to let plants that feed or house other species stay?  Why do we decide its ok to root out and destroy plants that birds, bees, butterflies, and other animals like because they aren’t native?  If people in North America started eating only native North American species and destroyed all those non-native crops maybe they would have a change of heart.  Believe me, bees, hummingbirds, butterflies, songbirds, and other animals don’t care where a plant comes from if it feeds or shelters them. 

But are native plants easier to grow?

And as far as the idea that native plants are easier to care for, more suited to the environment and so on – well it’s mostly crap, to put it mildly. If you are new to gardening don’t let people tell you to only plant native plants because they will need less maintenance and are more likely to grow for you.

The important thing for any garden situation is to choose plants that suit the conditions, whether they are native species or not.  Those are the plants that are going to be easiest to grow, the ones suited to the soil, weather, light conditions and so on.   Those are the plants you’ll be most pleased with.  If you have a garden that you like, and that suits your idea of a garden that’s the garden that will be a pleasure to care for. 

If you want peonies or poppies or roses and your conditions are suitable for them don’t let people guilt you into planting native plants instead. And when it’s your personal garden space don’t be afraid to choose ornamental qualities of non-natives over “native ” if both plants are equally suited to the conditions.   Consulting with experts is great, learning about what different species of plants need is essential, but don’t let other people dictate to you what plants you should grow. 

Most garden environments and even larger pieces of land have changed over time from their original conditions either because they were modified by human activity or climate change.  So plants that were once native to that area may struggle to grow there.  Many non-native plants, conventional garden plants grown for hundreds of years in gardens, are going to be more suitable for your conditions and easier to care for than native plants.  You are more likely to have success growing them and success in anything generally encourages you to do more of it.  Growing any kind of plants is better than growing no plants at all.

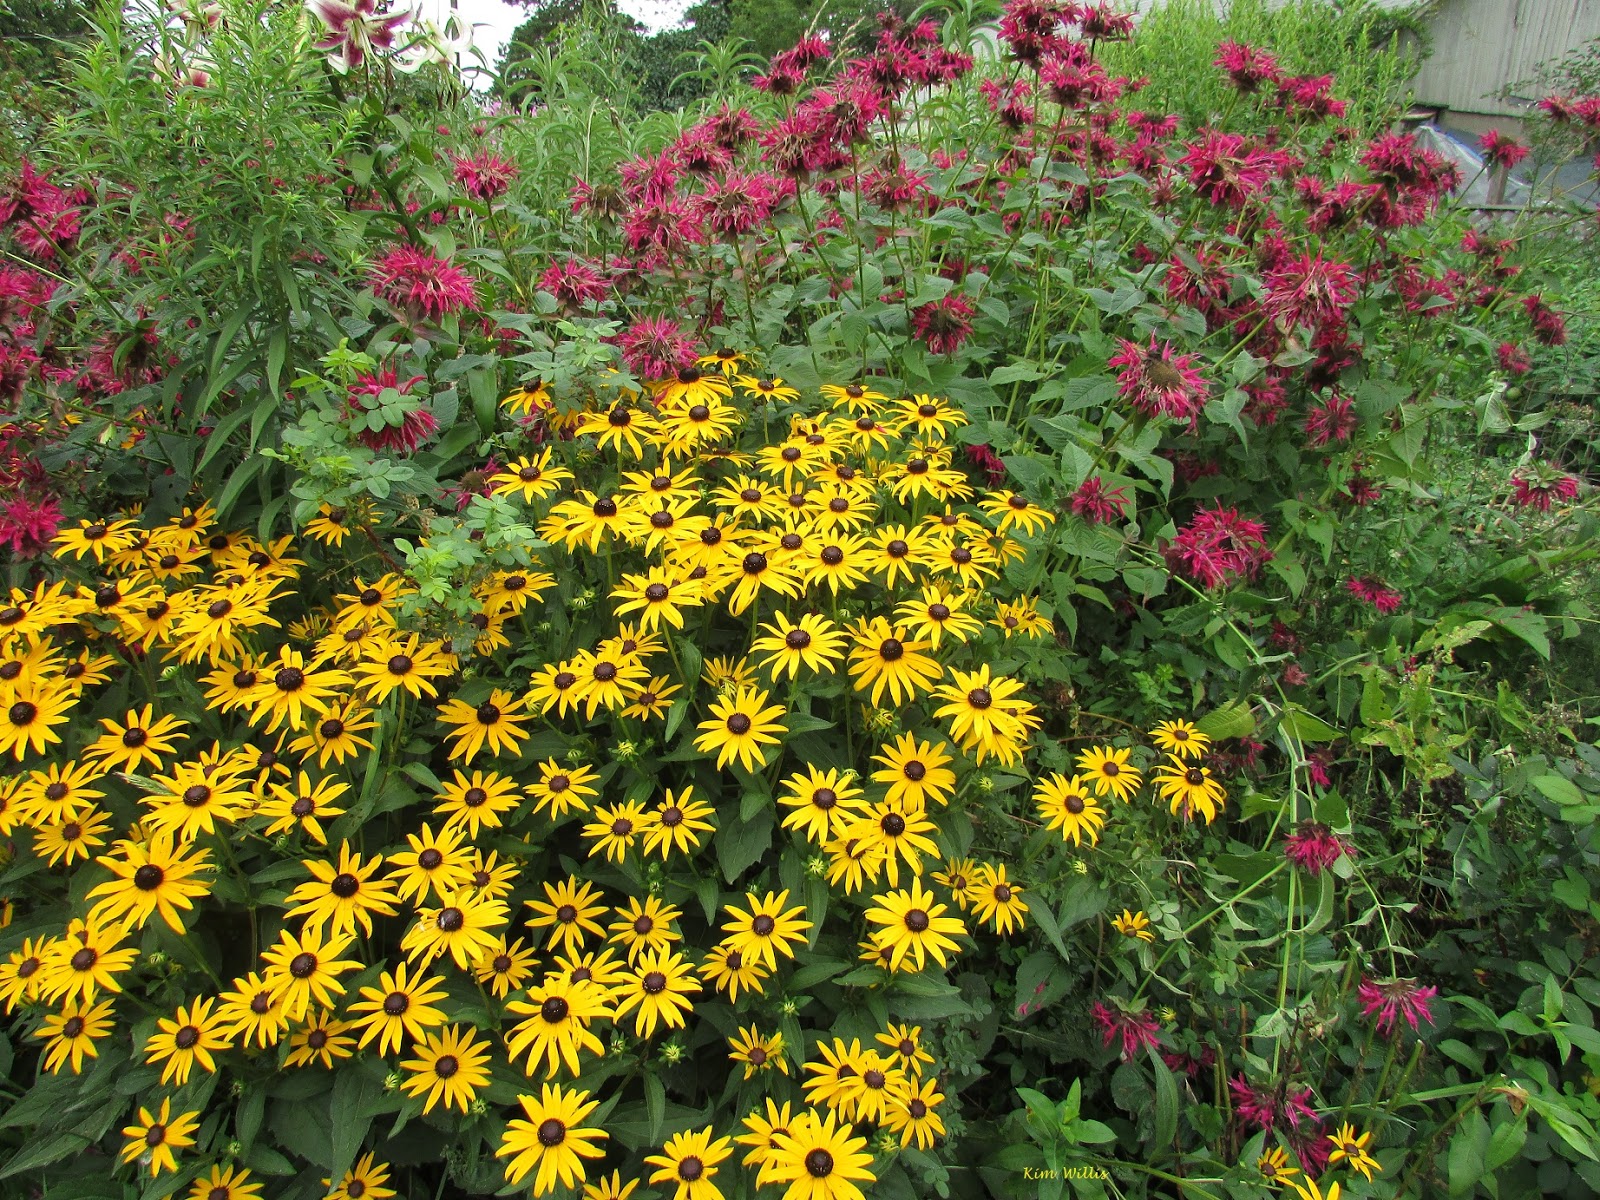
Rudbeckia and monarda, native plants.
Sure there are hardy and adaptable natives that grow almost anywhere and those are great for your garden or landscape.  I recommend you use some of them. I’m thinking coreopsis, rudbeckia, monarda, chelone, echinacea, goldenrod and helenium, all pretty adaptable and easy.  And many other native species may be perfect for your conditions and showy enough for the garden too. But many native plants aren’t going to grow in your conditions and don’t let anyone tell you because you live in the “northeast” that all of the northeastern native plants are the most suitable ones for your garden, because many won’t be. 

There are, of course, some species of animals, butterflies in particular, that need certain plants for reproduction or food.  Monarch butterflies need milkweed plants for their caterpillars to eat for example.  So if you can tuck some of those larval-host species in the garden or allow them to grow somewhere on your property you are encouraging and protecting those species and that’s a good thing. 

Some native plants are hard to get established even in good conditions for them.  You can’t just plop them in the ground and walk away.  They won’t all stay looking nice without pruning and other care.  Some native plants can also become a nightmare in the garden, overrunning everything and becoming almost impossible to control.  And most native plants have a short bloom period and then many don’t look especially attractive after that. 

Native plants propagated responsibly for sale can be more expensive than equally suitable non- native species.  And the fad for native plants is actually leading to the destruction of populations of some species as unscrupulous dealers harvest them from the wild.

It’s not wrong to plant either native species or non-native species- it’s wrong to plant the wrong plant for the conditions and for the expectations you have for a garden.

Celebrating dandelions

Did you know that the dandelion is not a native plant?  They were brought here by early European colonists as an herbal plant and escaped to live happily ever after.  Lawns lit up with gold splashes are so pretty after a long winter how could people hate them?  Its likely more people would tolerate dandelions “naturalized” in the lawn if they didn’t turn into those white fluff balls of seed. 

The bees appreciate dandelions too.  They are an important source of nectar and pollen in early spring, and get bee colonies off to a good start.  Birds like the seeds of dandelions even though they are small.  Some farm animals don’t care for dandelion foliage as it’s rather bitter and the plants are often left to flower in pastures to the delight of the bees. 

Dandelions are interesting plants.  The leaves are grooved and arranged to funnel water to the roots and the root itself is a long sturdy taproot capable of storing water so the plant survives drought well.  The dandelion begins flowering when the day length is slightly below 12 hours, stops flowering when the day gets to its longest point and then begins flowering again in autumn when the day length is about 12 hours again. 

Dandelion flowers are actually masses of small flowers bundled together and these flowers do not need pollination to set seed, although they appreciate and reward bees for helping with pollination.  Dandelion flowers close at night and when rain is coming.  The dandelion seed floats away on a tuff of fluff to start new colonies.  Dandelions are perennial and if you dig down beneath the snow you can find the leaves still green in winter.

Herbal and edible uses of dandelions

All parts of the dandelion are used in herbal remedies or for food.   Young dandelion leaves are used for salads and are grown commercially for that purpose to include in “green mixes.”  The buds of dandelions and even open flowers can be used in salads also.  The young greens are cooked like spinach, although they are best mixed with other greens as they are bitter when cooked.  The flowers of dandelions can be breaded and fried.

Dried dandelion leaves are used as a tea to aid digestion.  Dried dandelion leaves, dried nettles and yellow dock are turned into an herbal beer once popular in Canada.  The leaves are high in calcium, boron, and silicone and modern herbals suggest them to aid in treating osteoporosis.  Dandelion flowers contain high levels of lecithin and choline, two substances modern herbalists use for treating Alzheimer’s and other brain disorders

Dandelion flowers are used to make dandelion wine. (Recipe below).

Dandelion roots are dried and ground and used in a number of medicinal ways.  They are a mild diuretic and laxative and are said to help the liver.  The dried roots are also used as a coffee substitute.  The chopped, boiled and mashed roots are an old remedy for sore breasts and mastitis. 

When you pick a dandelion flower the stem leaks a milky sap.  That sap is an old remedy for warts and other skin conditions.  And that sap can be turned into rubber too.   In Germany a manufacturing facility began large scale production of rubber from dandelions a few years ago.  They hope to have dandelion rubber tires on the commercial market soon.  Besides tires the rubber will be used in many other applications that traditional rubber and latex are used for, such as latex gloves.


As you can see a lawn full of dandelions is like a giant herb and vegetable garden rolled into one!  Of course when you pick dandelion parts for eating and herbal use pick them from areas that have not been sprayed with pesticides.  Why would anyone want to pollute their lawn with weed killers to get rid of this valuable plant?   Don’t hate this valuable and useful plant-think of it kindly and let some live.

Here are some other great things to do with dandelions.

Dandelion jelly

This jelly is sweet and mild in flavor.  It won’t be bright yellow though, unless you add a few drops of food coloring.  For the best jelly the calyx, the green area on the back of the flower needs to be removed.  Do this quickly with kitchen shears or pinch off the green area with your fingers.  The petals will then be loose.  This will make about 2 pints or 4 half pints.

1 qt. flowers, calyx removed
4 ½ cups sugar
1 ¾ oz. powdered pectin
2 tablespoons lemon juice
1 qt. water
Food coloring if desired

Boil the flowers in water for 3 minutes, and then strain off 3 cups of fluid and place in a pot.

Add pectin and the lemon to the fluid you saved.   Bring to a boil.

Add the sugar to the boiling fluid and stir to dissolve.

Boil 3 minutes, stirring constantly until the mixture thickens – or jelly stage.

Pour into hot, clean jars and seal.

Dandelion wine

My grandfather would make wine out of about anything.  This wine recipe is a folksy one; there are more professional recipes for dandelion wine too.   I kind of think it’s more citrus wine because of the fruit you use, but still it’s a good use for all those dandelion flowers.  It’s a fun thing to try and may keep your significant other from trying to poison off all the pretty dandelions.

You’ll need a two gallon or larger crock or glass jar.  Do not use metal or plastic that’s not food grade.  Heavy food grade plastic buckets could be used.  You’ll also need a strainer and some cheese cloth or some clean old nylon stockings.

Pick one gallon of open dandelion flowers, packed.  This is a good family experience.  It’s best to pick them early in the morning when they have just opened.  Of course only collect dandelions from places where you know they haven’t been sprayed with pesticides.

Now sit there and remove all the green parts from the back of the dandelion flowers and save the petals.  My grandfather just used whole flowers, but modern wine makers say that leaving the green parts makes the wine bitter and interferes with fermentation.

Put the flower petals in your two gallon container and pour boiling water over them until they are completely covered, about 1 ½ gallons water. Cover your container with cheesecloth or the nylons and let it sit at room temperature for three days.

Put a strainer over a big pot.  Pour the fluid through the strainer.  Squeeze and mash the flowers against the strainer to extract as much fluid as possible.  Discard the mashed flowers.

Clean your crock or jar with hot water and soap and set aside.  You’ll need it soon.

To your big pot of fluid add a 3 lb. bag of sugar. (7 cups)

Chop 4 lemons and 4 oranges up into small pieces, rind and all, and add them to the pot.

Boil the fluid in the pot for 3 minutes, stirring occasionally, make sure sugar dissolves.

Cool the fluid to lukewarm and add a package of wine or brewers yeast or if you can’t find that, two packages of bread yeast, or about 2 tablespoons of yeast.  Stir gently.

Pour into the cleaned crock or jar and cover the top with cheesecloth or nylons.  Set the crock or jar in a dark area with an ideal temperature of around 70 degrees.  Too cool or too warm conditions don’t allow good fermentation. 

The mixture in the crock should bubble and smell yeasty.  It’s normal for a scum layer to form on the top, leave it alone.  If the mixture doesn’t bubble it isn’t fermenting.  In about three weeks, when the mixture stops bubbling, the wine should be ready to bottle.

Pour the wine through cheesecloth or coffee filters to strain off solids.  Discard solids. You can taste it now but it’s better to let it age a few months.  Pour it into clean bottles or jars and cover with a balloon over the top. This allows some fermentation to occur without breaking the bottle.   After a month or so you can cork the bottle/ cap the jar. Keep them in a dark, cool place.  You’ll get about a gallon of white wine from this.  Folk lore says it should be opened on winter solstice.

Open up the windows, smell the flowers, spring is here.

Kim Willis
 “He who has a garden and a library wants for nothing” ― Cicero

© Kim Willis - no parts of this newsletter may be used without permission.

And So On….
Do you have plants or seeds you would like to swap or share?  Post them here by emailing me. You can also ask me to post garden related events. Kimwillis151@gmail.com

Find Michigan garden events/classes here:

An interesting Plant Id page you can join on Facebook

Here’s a seed/plant sharing group you can join on Facebook

Newsletter/blog information

If you would like to pass along a notice about an educational event or a volunteer opportunity please send me an email before Tuesday of each week and I will print it. Also if you have a comment or opinion you’d like to share, send it to me or you can comment directly on the blog. Please state that you want to have the item published in my weekly note if you email me. You must give your full name and what you say must be polite and not attack any individual. I am very open to ideas and opinions that don’t match mine but I do reserve the right to publish what I want. Contact me at KimWillis151@gmail.com

I write this because I love to share with other gardeners some of the things I come across in my research each week. It keeps me engaged with people and horticulture. It’s a hobby, basically. I hope you enjoy it. If you are on my mailing list and at any time you don’t wish to receive these emails just let me know. If you know anyone who would like to receive a notification by email when a new blog is published have them send their email address to me.  KimWillis151@gmail.com

The information in this newsletter is copyrighted.  Feel free to share the blog link but if you wish to reprint anything you find on this blog site please ask for permission.  This includes photos with my name on them.


Tuesday, April 18, 2017

April 18, 2017, Kim’s Weekly Garden Newsletter


Hi Gardeners

It’s a beautiful spring day here, temps in the low 60’s and sunny.  Last week we had some really warm weather – 82 degrees on Saturday and things are popping into bloom like crazy.  The crocus are just about gone, the daffodils are in full bloom.  Hyacinths, windflowers and corydalis are in bloom.  Bloodroot and some early tulips are just starting to bloom.  My apricot is in bloom and the apple tree buds are showing pink. The dandelions, purple deadnettle and violets are blooming.

My lettuce is coming up.  The rhubarb is just about ready to harvest. I picked a pocket full of chickweed and dandelion greens for my house birds, they love early spring greens.   I spent the weekend planting more seeds in pots and moving sprouted seeds into my little greenhouse.  I potted up the dahlia tubers from last year to get them growing and I noticed my begonia pots are beginning to sprout too.

I bought pansies this week, I love pansies and it’s hard for me to choose which ones I want.  I ended up making myself limit my choices to one flat.  I now have several pots of pansies around for color and I made some pansy planters up for Easter gifts too.  I found one petunia at the greenhouse I had to buy, even though it’s too early to plant it outside.  It’s the petunia ‘Night Skies’ which is deep blue sprinkled with white - like stars on a clear night.  It’s in my greenhouse now.

Many trees are blooming now and there’s lots of pollen in the air. Some trees are leafing out, there’s a thin haze of green and yellow when I look toward my woods.  My husband did our first lawn mowing of the back yard yesterday.  Mosquitoes are out too; see the article below for more mosquito information.  I still haven’t seen the hummingbirds or orioles but I expect them any day.

I am not seeing any bees.  That’s a bit worrisome.  I have seen some active hornets.  Did you know that bees feed on the same flowers for the whole day based on the one  they started on first in the morning?  I think maybe as the fruit trees start to bloom there will be more bees around.  I’ve seen cabbage butterflies out and about and the small brown skippers. 

Corydalis


Taking care of Easter gift plants

Did you get a plant for Easter?  Chances are good it was an Easter lily, the most popular gift plant at Easter but other favorites at this time of year include spring flowering bulbs like hyacinths, hydrangeas, miniature roses,  florist's cyclamen (Cyclamen persicum cultivars), florist's gloxinia (Sinningia speciosa) and florist's cineraria (Senecio x hybridus, formerly Pericallis), and azaleas.

If you are a gardener you probably want to know how to keep these gifts alive beyond the holiday.  The good news is that with the right care some of these plants can last a long time.

The Easter lily

Easter Lilies are the fourth largest potted plant in terms of wholesale value each year. Michigan is the number one producer of potted Easter Lilies in the United States. About 55 Michigan growers produce all the Easter lilies sold here, worth about two million dollars each year.  (The bulbs are produced on the west coast.) And it isn't an easy job to have the lilies in bloom for Easter. Easter comes at different times each year. It's always the first Sunday after the spring equinox, which can be anywhere from March 22 to late April.

A small area on the border of Oregon and California, within sight of the Pacific Ocean, is where virtually all of the Easter lily bulbs that are used for potted flowers are now produced. The bulbs are usually sent to other areas to be potted up and forced into bloom.

It can take three to four years for a bulblet, (baby bulb) to produce flowers. Each fall the Pacific coast growers dig up their fields and sort the bulbs by size. Mature lilies produce new bulblets every summer, which are loosely connected to the "mother" bulb. These new bulbs are removed and replanted as are the bulbs in the field that are not large enough to bloom. The blooming size bulbs are cleaned and packaged for shipment to nurseries where they will be forced to bloom in time for Easter. The bulbs must be kept chilled for at least six weeks or until the grower is ready to start the forcing process.

Lilies are only in bloom for a period of one to two weeks so growers have to be quite knowledgeable about manipulating the bloom time. It's done by regulating the length of day and night and the temperatures the plants are growing in. Growers actually prefer the early Easters, because as the days get longer and the temperatures higher, it's harder to keep the plants from blooming too early. Growers count the number of leaves on a plant and note how they are expanding to get an idea when the plants will bloom. If it looks like the plants are progressing too fast, the temperature and lights have to be adjusted. Once the flower buds are visible, the plant will be in bloom in about 30 days.

Of course Easter isn't the normal time that these lilies should bloom. In my zone 5 garden the Longiflorum lily blooms in late June or early July. If you receive an Easter lily as a gift and want to try to move it to your garden in the spring, here’s what to do. When the blooms open, carefully cut off the stamens, the little dangling things covered in yellow pollen. This prolongs the bloom and keeps the pollen from staining the flower and your clothes. As each flower dies cut it off.
While blooming, the plant should be in bright light but not direct sunlight. Blooms will last longer if the plant is kept at cool temperatures, 60-65 degrees would be nice. Keep the plant watered but don't over water. You may have to remove decorative foil pot covers so it can drain. Keep the plant out of cold drafts and away from heat ducts, which will dry it out. When the plant is done blooming, move it to a sunny window. Do not remove any leaves unless they yellow and die. The leaves are producing food so the plant can produce new buds for next year.

As soon as the danger of frost has passed you can remove the lily from the pot and plant it in the garden. Choose a spot in full sun with good drainage. It is natural for the plant to die back now, but keep it watered and new shoots may come up.

The lily will probably not bloom again this year, but should bloom next summer if it survives winter. The Easter, or Madonna lily as it is sometimes called, is marginally hardy in zone 5, and does well in zones 6 -7. It should be mulched well to survive winter. If you don't have luck saving your gift plants you can buy bulbs that haven't been forced to bloom, and those may do better for you.

Spring flowering bulbs

Pots of hyacinths, tulips and daffodils are also popular gifts at Easter.  When Easter is in late April these plants are often in bloom outside too.  Bulbs forced into bloom in pots may not survive as well as those bulbs purchased and planted in the fall but it’s worth the try for many gardeners.  You will need to be able to plant them outside; they won’t bloom again if kept in a pot inside.

Set the blooming pot of bulbs in a cooler spot inside, in good light but not direct sunlight.  Be careful not to over water, remove any foil pot covers so the pot can drain. As flowers die cut them off.  Move the pots outside as soon as you are through enjoying them.

As soon as the blooms have died or even while they are still blooming the plants should be moved to the garden.  As long as there’s no snow on the ground and you can dig a hole for the bulbs they are good to go.  They will survive light frosts, but any flowers left may wilt if there’s a freeze. 

Find a sunny spot and remove the bulbs from the pot. Unless the leaves are completely yellow and dried up don’t remove them.  You can separate the bulbs, there are generally several in the pot, or leave the root ball intact.  Dig a hole so that bulbs are at the same soil level they were in the pot, don’t bury the leaf stems.  This may not be the depth the bulbs should be planted if you were planting them in the fall but don’t worry.  Plant the bulbs. Don’t fertilize at this time.

Let any leaves on the bulbs yellow and die naturally before removing them.  Spring blooming bulbs like their dormant time to be on the dry side so there is no need to water bulbs after the leaves die.  Fertilize with a general purpose slow release fertilizer next spring when the bulbs start to emerge from the soil.  

Bulbs will not bloom again this year but if you are lucky you’ll get blooms next year in spring.  Some forced bulbs will not recover.  Of course for spring flowering bulbs like these to bloom your area must have a cold winter period, with temperatures below 40 degrees for about 3 months.

Hydrangeas

The hydrangeas sold in pots for Easter may not be hardy varieties for your area and pots are rarely labeled with hardiness information.  These are varieties selected for pot culture and they rarely make large plants in the garden.  However many gardeners will want to try and keep the plants alive. 

Like other gift plants keep them in a cool, bright location inside while they are blooming and don’t over water.  Remove the foil pot covers that limit drainage.  When they have finished blooming cut off the dead flowers and move them to the sunniest window you have, unless you are ready to put them outside.

Most of these hydrangeas can’t be kept as houseplants that will bloom again.  You’ll need to move them to the garden and try your luck there.  Wait until after the last frost in your area to move them outside.  Plant them in a sunny spot at the same soil level they were in the pot.  Fertilize lightly with a slow release fertilizer after planting and water if it’s dry until the plants are well established.   You’ll know the plants are getting established if new growth begins.  The plants will not bloom again this year.

Mulch these hydrangeas heavily the first winter.  If you are lucky they will return the next spring.  They may not bloom the second year either as they adjust to outside conditions.  When they do bloom they may not be the same color the Easter blooms were, depending on the variety and your soil pH.

Azalea

Azaleas

Azaleas sold at Easter are like the hydrangeas, varieties developed for pot culture.  However these plants can be kept inside as houseplants if you like and may bloom again inside the next year.  Generally they won’t have as many flowers the next year.  If you are in zone 7 or higher you can also plant them in the garden.  In lower zones they may or may not be hardy outside.

Like most gift plants remove the foil pot covers from the azaleas and make sure the pot drains well.   Keep in a cool location while blooming.  If you are going to keep the plant inside move it to the sunniest place you have, preferably a south facing window when it’s done blooming.  Trim off dead flowers. 

Inside let azalea pots dry just a little between watering unless in bloom, when they should be kept moist.  Fertilize with a water soluble acidic fertilizer once a month February through October.  You may want to transplant the azalea into a larger pot in the fall if it has grown well over the summer.  If you can arrange it the azalea will do better with an outside vacation during the frost free months.  For this the plant should be in a lightly shaded or semi-shaded place.  Check pots outside frequently and don’t let them dry out too much.  Bring inside before a hard frost.

With enough sunlight and adequate fertilizer the indoor azalea may bloom again the next spring, although it may not be at Easter time.  I have known people to have these azalea plants bloom for them for many years.  Cool winter nights, around 55 degrees, seem to help with re-bloom.  Keep plants moist and humidity high while plants are in bud and bloom.

Those in zone 7 and higher can plant the Easter azalea outside after the last frost. They generally prefer lightly shaded or semi-shaded locations, with humus rich soil.  Fertilize with an acidic fertilizer if your soil isn’t naturally acidic.   Keep the plant well-watered during the first year.  The florist azaleas may not perform as well outside as varieties bred for the garden but some people have good luck with them. 

Miniature roses

Miniature roses are often sold in the spring as blooming plants.  Once again there are many varieties but many of the small roses are quite hardy and can be planted outside.  They can also be kept as houseplants although that isn’t as easy as growing them outside.

While blooming keep them in a bright but cool location inside.  Trim off flowers as they fade.  Remove foil pot covers so the pot drains well and keep plants evenly moist while blooming.  Move them to the sunniest spot you have, preferably a south window when you are through using them as a decoration.

Miniature roses can be successfully kept as houseplants but care can be a bit tricky.  They need supplemental light in most homes during the winter.  They like high humidity and temperatures between 55 at night and about 70 degrees F. in the day.  From August through October they should get a water soluble fertilizer once a month, from February through August use a fertilizer for blooming plants every other week to encourage bloom.

Let soil dry slightly between watering.  Mist when humidity is low.  Rose plants inside are prone to spider mites, aphids and other pests.  Check the plants frequently and treat them as soon as pests are noticed.   Insecticidal soap sprays or a systemic rose care product can be used.

If you have the right place the miniature rose can be planted outside.  Large containers, rock gardens or places where they won’t be lost among larger plants should be considered.  They should be planted in full sun and treated like larger roses.  Prune to shape, fertilize and water regularly.  Depending on the variety you may get flowers most of the summer. 

Mulch the roses heavily for winter in colder zones.  Most of these roses are hardy and many are grown on their own roots.  They will often return for many years. 

I treat my mini roses somewhere between houseplant and outdoor plants.  I keep them in pots and leave them outside until the fall when leaves have dropped and the plant is dormant.  I then bring them inside to an unheated area which stays cool but above freezing.  They stay dormant until the sun starts heating the room up in February, and then begin growth again.  I put them back outside in late April here, when light frosts may still happen but no hard freezes.  They bloom freely and grow well with this treatment.

Cyclamen (florists)

These cyclamen’s are not the hardy ones for the garden and for most people it’s probably better to discard them after they finish their blooming period, which can be a long period if they have the right conditions.  The plants need a dormant period to re-bloom and be healthy and that is hard to get right on these types of cyclamen.

While blooming they need bright light, temperatures between 55-70 degrees F. and to be kept moist.  Shortly after blooming has stopped the leaves will begin to die back.  Stop watering the pot and take it to a dim place, and turn it on its side.  After the leaves have dried up put the whole pot away somewhere until early fall.  It doesn’t need to be cold, just in a dimly lit dry spot. 

Put a reminder on your calendar to take the pot out of storage in early fall – around September.  Repot the tuber in fresh potting soil, water it well and put it in bright light.  When you see leaves emerge begin fertilizing with a flowering plant fertilizer every other week.  If you are successful you’ll get blooms again in spring- around March. 

Gloxina
If you can keep African Violets alive you can probably keep a gift gloxinia alive as a houseplant.  Like the cyclamen however these do need a dormant period.  They are a bit temperamental but plant lovers do manage to keep them going.

While blooming the gloxinia needs bright light and a minimum of 60 degrees F.  Water with warm water and keep it off the leaves.  Keep the soil moist while in bloom. Keep humidity high.  It will bloom for several weeks.

After blooming has finished, reduce watering allowing the plant to dry out a little between watering.  The leaves will begin to yellow and die.  When leaves have died, move the plant to a dry, dim spot, 50 degree temperatures would be ideal.  In early fall, repot the tuber in fresh soil, begin regular watering and fertilize every other week with blooming plant fertilizer. The plant should be in bright light, east windows are ideal. South windows may burn the foliage.  If you are lucky you’ll get blooms in spring.

These plants generally don’t do well outside and summer is their dormancy period.

Cineraria

Cineraria have masses of daisy like flowers and will bloom for a month or more in the right conditions.  Unfortunately these plants can’t be kept for another year as they are annuals.  When the plant starts dying it’s time for the compost heap.

To keep them blooming for the longest period they need to be kept in cool temperatures, 45-60 degrees F is optimal and not likely in many homes.  Therefore bloom period is generally shorter. Keep them in bright light but out of direct sunlight. Keep the soil moist, but make sure it drains well, waterlogged plants quickly die.   Trim off flowers as they fade.  Enjoy the plant while it blooms – which can be 6 weeks- and then let it go.

Mosquito plant myths

I am once again seeing articles being posted that tell you there are plants that you can set on your patio or porch or plant in your garden that will repel mosquitoes.  This is the time of year when mosquitoes are bothersome and it’s tempting to think there’s some simple solution to keeping them away.

But here’s the plain truth. There are no plants that you can just sit on the patio or plant around the house that will effectively repel mosquitoes, despite all those advertising claims.  No objective studies have ever found a plant that will do that. NONE! No plant repels mosquitoes just by sitting near you. 

The citrosa plant (Pelargonium citrosum ‘van Leenii’) sometimes advertised as Mosquito plant, Mosquito Shoo, and other assorted names, is useless as a mosquito repellant.  Thousands of these plants are sold each year, even though they don’t work and don’t even have a pretty flower or form to redeem them. This plant is actually a scented leaved geranium and it does have a very small amount of citronellol (a repellant) in it just as many other plants do. But you would have to crush the leaves and rub them on your skin for it to have even the most fleeting effect.

Common Lemon Balm has 3-4 hundred percent more citronellol than Citrosa, but don’t expect it to repel mosquitoes.  Besides Lemon Balm and Citrosa, these plants are often claimed to be mosquito repellants; lemon grass, lavender, catnip, rosemary, basil, marigolds, geraniums, garlic, pennyroyal and assorted other things, generally anything that has a strong smell.  In fact if you do an on line search for plants that repel mosquitoes you’ll get lists of anywhere from 6- 31 plants.  But not one of these will repel mosquitoes simply by having a plant near you.
Lemon balm

What does work

Some plants do have chemical ingredients that when extracted and applied to the skin do have mosquito repellant properties.  However, homemade concoctions of oils and plant extracts are sometimes more dangerous than commercial products and many are ineffective as well.  A chemical found in mints for example, is effective as an insect repellant but some studies have found kidney damage and genetic damage when it is used.  Many plant extracts will cause severe skin irritation when applied to the skin and since these products may be absorbed into the body great caution should be used when mixing homemade remedies and applying them to the skin.

Plant sources for mosquito repellants are being tested and studied for safety and effectiveness by many researchers.  Most of these studies are able to isolate beneficial compounds from those with side effects, which home producers of herbal repellants aren’t able to do.  They then undergo rigorous testing to determine safety.  For example C10, a chemical found in celery seed has shown promise as a mosquito repellant.  But you can’t use celery seed in a home remedy in any way that’s been proven effective.

Citronellol is found in several plants and has some repellant properties.  The problem with using citronellol as an insect repellent is that it must be used in a very strong concentration and the effect wears off quickly.  Citronellol is only effective if applied to the skin.  That causes another problem, many people are allergic to strong concentrations or their skin becomes irritated. Ctironellol is absorbed through the skin and some studies are linking exposure to the chemical to liver damage and cancer.

Commercially made natural products with oil of lemon eucalyptus (OLE) or para-menthane-diol (PMD) such as Repel are fairly effective and relatively safe.  Bite Blocker, a commercial preparation containing glycerin, lecithin, vanillin, oils of coconut, geranium, and 2% soybean oil can, according to CDC studies, provide protection similar to a low dose of DEET for several hours.

To keep from getting bitten the CDC suggests using these products on your body and clothing; products with DEET including Off!, Cutter, Sawyer, and Ultrathon brands.  Deet is the most studied insecticide in the world and has been used for over 40 years.  It is a synthetic chemical product but if label directions are followed it is extremely safe. 

Some other recommended mosquito repellants are products with Picaridin, also known as KBR 3023, such as Bayrepel, and Icaridin, Cutter Advanced, Skin So Soft Bug Guard Plus. Products with IR3535 such as Skin So Soft Bug Guard Plus, (another formula), Expedition, and SkinSmart are also good. 

Interestingly one research project found that using Victoria’s Secret Bombshell perfume repelled mosquitoes.  The ingredients are secret, so we don’t know what causes the effect.  However you would have to apply it all over your exposed skin and it’s expensive.

Candles and other devices

Even burning the plants in a candle or as incense has little effect.  Most studies find that burning a plain candle is just as effective as burning a citronella one.  Most citronella products you buy at the store are so diluted that they contain almost no active ingredient.  It is a waste of money to buy citronella oil or candles to burn unless you just like the smell.  No other products you burn to make smoke are any more effective.

Other things that do not work to control mosquitoes are ultrasonic devices and light traps.  Some traps using carbon dioxide and pheromones show promise but are expensive and each trap appeals to different species of the hundreds of mosquito species in the US.  They haven’t been very effective on many species of mosquitoes that are most likely to carry diseases.

Because preventing mosquito bites is so important and a matter of public health I would like to see ads and articles claiming there are plants you can sit on your porch or deck or plant in the garden that repel mosquitoes be made illegal unless they can provide scientific, documented proof of the claim.  Be an educated and informed gardener and don’t fall for these mosquito plant myths.  Be a careful and safe gardener and wear repellant to prevent mosquito bites. 

More information, references

Growing the Trout lily in home gardens

The beautiful Trout Lily, Erythronium americanum, is found in dappled sunlight in moist woodlands and throughout the north eastern states in the early spring.  (The USDA plant database does not list them as growing in Michigan, although the photo used here is from a wild stand found not far from my home.  I have seen them in several other locations too.)   Trout lilies are close relatives of the Dogtooth Violet, which is very similar except the Trout Lily has a yellow flower and the Dogtooth Violet flower is white. 

 
Trout lily
The Trout lily is named for its leaves.  Some fanciful person thought the leaves looked like the coloring of a trout.  The blade-shaped leaves are silvery green on top, with mottling of purple and brown.  Leaves may be held pointed upwards or spread out along the ground.  The Trout Lily plant consists of only a few leaves, usually just two, which can persist through much of the summer in the forest undergrowth.  Plants grow to about a foot high in good locations.

Trout Lilies have a single tiny 3/4- 1 inch nodding yellow flower on a leafless stalk rising a few inches above the leaves in early spring.  The flowers are like tiny tiger lily flowers, with the petals-tepals swept backward and the flower facing downward.  The backside of the petals is reddish.  Some flowers are speckled with orange or brown near the center.  The flowers close at night and are pollinated by ants.

Garden culture

Trout lilies make good plants for shaded or woodland gardens.  You can find sources to purchase Trout lilies and they should always be purchased rather than collected from the wild.  Trout lilies arise from a small corm, a bulb-like structure.  New corms grow from seeds or as off shoots from older corms.  It can take 6-7 years for a corm to mature enough to produce a flower shoot when grown from seed, slightly less time to blooming from small corms.  

When you are purchasing Trout lily corms try to buy from companies that list the age of the corm.  Pink and lavender flowered non- native species of Erythronium are often listed for sale more frequently than the native species.  The corms should be planted as soon as you receive them, as they deteriorate rapidly. 

Plant Trout lilies in a shaded location, preferably under the shade of deciduous trees where they will get some sunlight as they emerge in the spring.  They like a rich, organic soil so add compost before planting.  Plant the corms 4-5 inches deep.   Keep them moist, especially in spring.  Leaves may disappear in the heat of the summer, so mark the location so you won’t overplant on top of them.  Mulching with shredded leaves is an excellent soil conditioner for Trout lilies. Trout lilies in a good location will form a slow spreading groundcover.  Large clumps can be gently divided a few weeks after blooming with divisions immediately replanted.

Trout lily seeds can be collected about 6 weeks after the flower has faded.  The pod is oval shaped and light green to tan.  The pod should be starting to split when collected for seed. You must plant the seeds immediately in a moist, humus rich potting mix as they do not store well.  They will not germinate until next spring as they need a period of cold stratification.  The seedlings look almost grass like when they appear and will take several years to bloom.

Trout lilies are listed as both edible and medicinal.  Both leaves and corms are said to be edible although no one should be harvesting them for food, as they are becoming scarce.  Besides the medicinal qualities attributed to the Trout lily are said to be emetic- which means they make you throw up.  So there are two good reasons not to eat them. 

Trout lilies, like many woodland wildflowers, suffer greatly from deer browsing in our deer devastated woodlands.  Obviously deer don’t get sick from eating them.  They are more likely now to be found on wooded roadside ditches where deer don’t stop to graze.  Trout lilies are a protected plant and should not be picked or removed from their natural homes if you do come across them.

If they are left alone Trout lilies are long lived and colonies can be as old as the deciduous trees sheltering them.  The flower show is short-lived however and requires a walk in the woods or garden in the very early spring to enjoy it.  Good companions in the home garden are cyclamen, hellebores, trillium, bloodroot, toad lilies, pulmonaria, violets and violas.

Redneck gardening tips with pop and water bottles

Gardeners may want to raid their redneck savings account (those of you in states with bottle deposits) and use some of those plastic pop and water bottles in the garden.  Here are some tips for using them.

Cover plants to keep them warm with plastic 2 liter bottles.  Cut the bottom off, remove the cap and place over a plant.  The open top helps keep the plant from getting too hot, but in sunny warm weather you may need to remove them until evening so the plants don’t cook.

Use the bottoms you cut off as saucers for potted plants.

You can also fill 2 liter bottles with water and surround a plant with them to aid growth in cool weather.  The water heats up in the sun and heat is released at night.  You can further protect plants from the cold by throwing something over the bottle circle at night.  To keep the plants from falling over on a plant, wind a piece of twine around the bottle tops, binding the group together.  If you dye the water in the bottles red with food color the red light reflected helps tomato plants become stocky and vigorous.

To make trickle waterers for plants melt tiny holes in the bottom of bottles.  Use a small nail or ice pick heated in a flame to quickly melt holes in plastic or you can use a drill.  Holes need to be tiny, about 3-4 to a bottle.  Fill the bottle with water, screw on the top tightly and set near the plant you need to keep watered.

Cut around bottles with scissors or a knife to make round plastic cut worm collars.  Small water bottles are good for this. Make each round piece about 2 inches wide.  Place them over small plants to keep cutworms from cutting the stems off.

Cut a bottle half way around, spread it and insert a ball of twine or string.  Thread one end out the top of the bottle.  Tape the cut shut and you have a twine dispenser.

If you have a large pot that’s too heavy to move when filled with soil use plastic bottles in the bottom of the pot to take up space.  Leaving the tops on makes the bottles less likely to be crushed and keeps soil levels from sagging.

Calico Casserole

Here’s a quick spring meal that uses some of those abundant hard boiled eggs we have around Easter.

Ingredients
8 oz. dry spaghetti, broken into 3 inch pieces
10 oz. package of frozen mixed vegetables
6 tablespoons butter
1 ½ cups bread crumbs
4 tablespoons flour
1 teaspoon salt or to taste
3 cups milk or cream
1 tablespoon mustard
3 cups shredded sharp cheddar cheese
½ cup finely diced ham ( or cooked crumbled bacon)
5 hard-boiled eggs, peeled and sliced
Directions

Place spaghetti in boiling water and cook until soft.  Drain.

Defrost frozen vegetables in microwave or in a little heated water until slightly softened and warm.

Melt butter over low heat.  Remove 2 tablespoons of the butter to a bowl.

Toss the bread crumbs with the butter in the bowl and set aside.

In the pan with the rest of the butter add the flour and salt.  Cook stirring constantly until it bubbles.   Then stir in milk and mustard. 

Cook and stir the milk mixture until it thickens and is bubbling.  Add 2 cups of the cheese and stir until it’s melted.  Turn off heat.

Add the cooked spaghetti to the cheese sauce and stir until well blended.  Spread half of the spaghetti mixture into a 2 quart shallow baking dish.

Arrange egg slices on top of the spaghetti and sprinkle with diced ham.  Cover with the rest of the spaghetti mix.

Sprinkle the remaining cheese on top, then sprinkle on buttered bread crumbs.

Bake at 350 degrees F. for about 30 minutes until bubbly and lightly browned on top.  Serve warm.


It’s spring when you hear the music of mowers and smell the cut grass.

Kim Willis
 “He who has a garden and a library wants for nothing” ― Cicero

© Kim Willis - no parts of this newsletter may be used without permission.

And So On….
Do you have plants or seeds you would like to swap or share?  Post them here by emailing me. You can also ask me to post garden related events. Kimwillis151@gmail.com

Find Michigan garden events/classes here:

An interesting Plant Id page you can join on Facebook

Here’s a seed/plant sharing group you can join on Facebook

Newsletter/blog information

If you would like to pass along a notice about an educational event or a volunteer opportunity please send me an email before Tuesday of each week and I will print it. Also if you have a comment or opinion you’d like to share, send it to me or you can comment directly on the blog. Please state that you want to have the item published in my weekly note if you email me. You must give your full name and what you say must be polite and not attack any individual. I am very open to ideas and opinions that don’t match mine but I do reserve the right to publish what I want. Contact me at KimWillis151@gmail.com

I write this because I love to share with other gardeners some of the things I come across in my research each week. It keeps me engaged with people and horticulture. It’s a hobby, basically. I hope you enjoy it. If you are on my mailing list and at any time you don’t wish to receive these emails just let me know. If you know anyone who would like to receive a notification by email when a new blog is published have them send their email address to me.  KimWillis151@gmail.com

The information in this newsletter is copyrighted.  Feel free to share the blog link but if you wish to reprint anything you find on this blog site please ask for permission.  This includes photos with my name on them.