October 6,
2015, Kim’s Weekly Garden Newsletter © Kim Willis
Hi Gardeners
I generally like fall weather but I certainly don’t
like this gloomy, wet weather we are having.
So far we have escaped a frost here and in the short term it doesn’t
look likely but we are pushing the frost/freeze average occurrence. It will happen soon. The hummingbirds left last week but the turkey
vultures remain. Maybe they know its
prime season for car-deer smash-ups and want to be around for the feast.
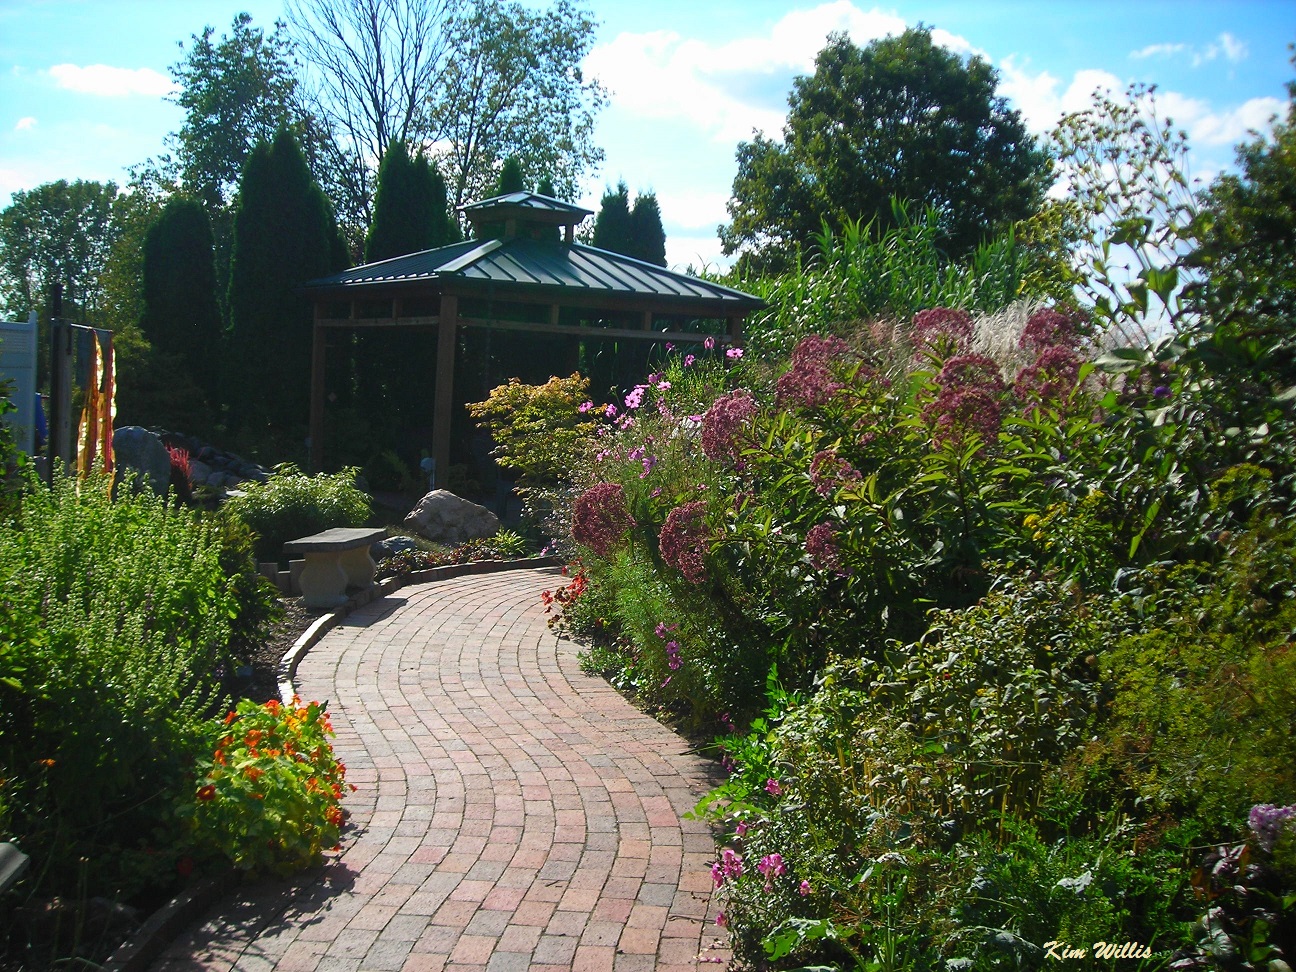 |
| Garden at Suncrest, Lapeer. |
All of my houseplants are now inside, except for my
huge rosemary and a pot of rain lilies, which are marginally hardy. It’s very crowded near the windows now. I brought in a burro’s tail (succulent) that
sat near some small annual nicotiana outside that obviously dropped seed into the
burro tails pot. There’s a nicotiana plant about a foot high in the pot and it
started to bloom, the prettiest deep purple, almost black flowers. I saved some seed from that pot of nicotiana
earlier and I am tempted to start some more plants to see if they would bloom
through the winter. I also have some
small lavender petunias blooming in my Chinese hibiscus pot that came up from
seed.
I still have a few stragglers blooming, some annuals
like zinnias, morning glories, calendula and cleome, the dahlias, Maximillian
sunflowers and Jerusalem artichokes, and the landscape roses. In the vegetable garden I am holding my
breath that some nice sized watermelons ripen before frost. I have some romaine
lettuce getting bigger and still have cabbage and carrots to harvest.
I started a project to thin out two of my older flower
beds but the weather has put that on hold. In one I have the Maximillian sunflowers which
are so cheerful right now but are taking up huge areas of garden and are flopping
on everything else. Comfrey has gotten a
hold in there too, and it’s messy looking this time of year. But in order to do
the “ shake up” I am going to have to be ruthless and cut the Maximilian down
in its prime. Oh, the hard dilemmas of a gardener.
I want to transplant the smaller perennials from another
garden bed into the bed where I’m removing the Maximillian’s and make that bed
home to larger shrubs like viburnums, hydrangeas and peonies, things that are
easy to care for and can be seen from farther away. That bed is now literally choked with phlox
which will have to be dug out. And all
this need to be done while trying to get my ambitious order of fall bulbs
planted.
I am also going to be making apple butter this week and
preparing apples for freezing. I have
recipes for apple butter and applesauce in this issue. Apples are abundant this year. My trees are
loaded. It seems every dirt road around
here has apple trees near it spilling apples on the ground. Anyone who needs apples should just take a
ride in the country. They may not be
perfect apples but can make nice sauce or apple butter.
If we ever get rid of the gray and gloom we are fast
approaching the peak of fall color. Make
sure to get out and do some leaf peeping if we have a nice day.
October almanac
October’s full moon occurs on the 27th just
before Halloween. This full moon is called the Hunters moon, Dying Grass moon or Traveling moon as Native Americans often moved
to winter grounds during this time. The Hunters moon is named such because at
this time of year the moon rises early in the evening and stays bright until
almost dawn, letting hunters easily track animals in the night. It’s now illegal to hunt most game animals
after the sun goes down.
If you like sky gazing you may want to look for the Draconid meteors which will be at
their peak Oct 9th. This
meteor shower isn’t as frequent or showy as others but who knows what you might
see. Look for the meteors in the
northwest sky just after dark. Later in
the month the Orionid meteor shower peaks around October 20-21st. Good viewing times for this meteor shower are
around midnight. Look straight up and to
the southeast.
October’s birthstones are the Tourmaline and Opal. October’s birth flower was the calendula
originally, but now is listed as marigold.
Calendulas were the “marigold” before the African plant we now call
marigold was discovered. So now either calendula or marigolds is considered
correct. The meaning in flower language
is warm, undying and contented love.
October is National popcorn popping month, vegetarian month,
seafood month, cookie month, pizza month, and applejack month. If you are not into food it’s also National
Diabetes month, National Adopt a Shelter Dog month, National Domestic Violence
Awareness month and of course the most used and abused “cause” of all, Breast
Cancer awareness month.
Holidays of note in October include the 10th
–World Egg Day, 12th-Columbus Day (why are we still celebrating this
one?) 14th – National Dessert day,
17th –Sweetest Day,(another stupid one), 21st
National Pumpkin Cheesecake day, 22nd – National Nut Day, 24th
–and then there’s two of the world’s
favorite holidays, 30th Devils night and 31st Halloween.
October Gardening in Michigan
 |
| Ornamental grasses in fall. |
In Michigan we generally have pretty good weather in October
and it’s an ideal time to do some garden chores. While the weathers not too hot hard labor
seems a little less daunting and sometimes the beautiful fall weather just
invites us to work outside. The first
good frost usually comes by the second week of October across most of Lower
Michigan. We usually have a freeze
before the end of October. But there are
still nice days in between the cold weather.
If the weather is dry you will want to remember to keep
watering annuals and plants in containers even if it’s cool as long as they are
blooming. Also newly planted trees and
shrubs, grass seed, and newly planted perennials should also be watered if it’s
dry. If fall turns out to be very dry
you may want to water established perennials and shrubs several times so they
go into winter well hydrated, which helps winter survival. They can use water even after they lose
leaves if the ground isn’t frozen.
Before the garden dissolves into brown mush you may want to
take some good close pictures of your perennial beds and landscape. It’s amazing how much space we think we have
and what we can’t remember when it’s deep in the winter and all those garden
catalogs are tempting us. Photo’s help
us remember where we do need plants or want to change things and where it’s
really too crowded to add more.
In the vegetable garden clean out all plants after they have
been killed by frost. Remove all dropped fruit and left over veggies to the
compost pile to help prevent overwintering disease and insects. Some root
vegetables like carrots and beets can stay in the garden until just before the
ground freezes without harm. Lettuce,
chard and some other greens may survive for harvest through the month. Harvest
any herbs you want to dry before frost.
It’s a good time to add manure or compost to the vegetable
garden. Let the chickens in the garden to fertilize and till it. If you feel you have to rake leaves pile them
on the garden. It’s also a nice time to
build additional garden beds or smother a spot to enlarge the garden. Put away all the stakes and cages. You may want to record what vegetable
varieties you planted this season and how they performed for you.
Harvest all apples, grapes, pears and other things that are
ripe even if you don’t want them and pick up all fruit on the ground under
trees. This does two things, it keeps
animals like deer away from your trees and it helps keep insects and disease
from over wintering. Compost these
fruits or pile them far away from the house.
You may want to scatter old fruit far away from your trees if deer are
around. They may munch your trees as well as the fruit. If the fruit is edible and you don’t want it
give it to someone.

In the flowerbeds add bulbs now for spring color. See the article below for tips. You’ll want
to dig up and store summer bulbs like dahlias, canna’s and glads after frost
has wilted them and well before a freeze is predicted. Collect seeds now if you want to save them.
Pull out and compost annuals killed by frost. For color you can still add pansies or mums
to planters. Ornamental cabbage and kale are cold hardy and can add bright and
unusual color. Or pile pumpkins and
gourds in planters to add color, maybe with dried flowers or seedheads tucked
among them.
Watch the pruning now.
Pruning can stimulate new growth in some trees and shrubs and that isn’t
good close to winter. After a hard freeze though, you can trim oaks if needed
and trees that bleed easily like maples. Winter damage to woody plants starts
at the end of stems and works its way back toward the trunk or base of the plant.
Dead areas can protect living tissue farther down. If the stems are short there’s
no tissue to sacrifice.
Most perennials that die back to the ground are better cut
back and cleaned up in the spring. Dead stalks and foliage catch snow and
protect the crown or base of some plants through winter. Neatniks out there can trim dead growth back
to a few inches above ground for those herbaceous plants if they must but leave
the woody stemmed plants until spring.
Remove seed heads of plants that don’t provide food for
birds or winter interest, especially if the plant seeds itself widely and you
don’t need it coming up everywhere.
October is a little late to add new perennials but if you find a bargain
plant them, water and mulch and hope for the best.
Do not mulch plants, such as strawberries, for winter
protection until the ground has frozen solid.
You want the ground to stay frozen.
If you protect broad leaf evergreens with burlap shields, put the stakes
in before the ground freezes but add the burlap after.
Do not put cones over roses until the ground freezes, which
hopefully won’t be until late next month.
Only trim them enough to fit inside the cones. Hardy landscape roses do not need cones. If you don’t use cones you may want to mound
some soil over the base of less hardy rose plants. Use some soil dumped from containers or bring
soil from another place, don’t scratch it up from around the plant because you
may damage roots. Mound soil up to a
foot high around the base of rose canes.
Weed your flower beds and edge them. It’s one less job to do in the spring. Dump out and clean bird baths, if you have
ceramic or thin plastic baths they need to be turned upside down or put away so
they won’t freeze and break, ditto for clay and ceramic pots. Put the hummingbird feeder away. Fill suet and other bird feeders. Make sure they are in places where you can
see them from the house for winter bird viewing.
If you do it early in October, grass seed can still be
planted. So can new trees and
shrubs. They do need some time to
establish roots before the ground freezes.
Trees and shrubs that are small or have thin bark, old and newly
planted, including fruit trees, should be protected with rings of small wire
mesh around the trunk. This keeps
rabbits and voles from girdling trunks over winter. Mesh openings should be no larger than 1/2
inch and plastic mesh doesn’t work for this use. The mesh should be about 3 feet high.
Don’t rake leaves, run over them with a mulching mower
several times. Leaves return valuable
nutrients to the soil and chopped leaves bring down quickly. Oak leaves are great to pile in flowerbeds whole;
other leaves should be chopped first.
Never burn leaves or send them to the landfill! That’s a major waste of
valuable nutrients and environmentally harmful. If you must rake leaves put them into the
compost pile.
If your lawn is very high- over 3 inches long and you aren’t
cutting it when you mulch those leaves, mow it to about 3 inches high. Long grass tends to matt and get fungal
diseases under the snow. Grass grows
more slowly as the day light shortens but it will grow until a hard freeze.
Little touch ups such as replenishing mulch, making paths,
painting benches or fences can be pleasant fall tasks. Don’t forget to take some notes about what
grew well or didn’t grow this year so you can refer to it in spring. If you planted bulbs, note what kind and
where. Get a soil test done now if you
feel you may need one due to poor plant growth this season.
Next month you may need to turn your gardening efforts to
houseplants but enjoy what’s left of the Michigan garden season.
Crock pot applesauce or apple butter
Turn some of those Michigan apples that are so abundant into
delicious apple sauce. You can make
applesauce from fresh apples or from apple slices you have frozen. On a cold fall day in Michigan start up a
batch of crock pot applesauce or apple butter and fill your home with a
delightful aroma. If you make your own applesauce or apple butter you know what
kind of ingredients and care went into it.
You can adjust the flavor to accommodate allergies or aversions to
particular spices.
Applesauce is great eaten just as it is but it’s also great
to cook a pork roast or pork chops in it.
It can be added to any cake mix for moisture in place of oil. It can be used with some slices of apple to
make pie filling. It’s great for making
apple cake or bread. Applesauce can also
be used to make swallowing pills easier.
Apple butter used to be more common than peanut butter. Nearly
every housewife made apple butter in the fall.
Apple butter is great on toast or an English muffin. It can also be used in cooking, particularly
pork dishes.
 |
| Peeling apples. |
The difference in applesauce and apple butter is that apple
butter is usually cooked until it is very thick and the spices are usually
stronger. Apple butter is usually brown;
you don’t need to worry about keeping the apples from turning brown as you peel
them. Using brown sugar instead of white
sugar, (recommended for apple butter), also makes the apple butter brown.
Applesauce or apple butter can also be made on a pot on the
stove. It takes less time but requires careful
watching and occasional stirring. Using
a crock pot lets you do other things while the sauce cooks and makes a great
product. However do note that batches of
apple butter or apple sauce will probably be smaller than what you can cook in
a large kettle on the stove.
You will need about 3 pounds of apples per quart of sauce
you want to make. The same amount of apples will usually make about a pint of
apple butter. One pound of peeled, sliced or chopped apples yields about 3 cups
of apples. You’ll need to guess-timate how
many cups or pounds of apples your crock pot will hold. A 6 quart crock pot may hold 6 pounds of sliced
apples but it may hold more or slightly less depending on many factors.
You can flavor the homemade apple sauce/ butter in a number
of ways and make it as sweet as you like. You can leave applesauce chunky or
make it smooth. Your finished applesauce or apple butter can be canned in a
water bath canner or frozen to store it.
You will need:
Apples, washed,
peeled and cored, sliced or chunked- 3 pounds per quart of sauce or pint of
butter.
Sugar, white or
brown, about 4 tablespoons per 4 cups (quart) apple pieces or adjust to
taste.
Cinnamon -
optional to your taste
Nutmeg -
optional to your taste
Cloves -
optional (used frequently in apple butter)
For light colored applesauce slice the peeled apples into
color preservative such as a 1/2 cup of lemon juice mixed with a quart of water
or citric acid solution prepared as directed on the package. Let apple pieces
soak a few minutes and drain, before putting them in the crock pot. If the color of the sauce doesn’t faze you,
or you are making apple butter, you can slice the apples directly into the
crock pot. Frozen apples do not need to
be thawed before using.
Place your apples, sugar and spices in the crock pot. Most people will like the taste of about 4
tablespoons of sugar per quart of apple slices.
If the apples are very tart more may be needed. Brown sugar has a slightly different taste
but will make the applesauce browner.
Apple butter can be made with white sugar but the traditional taste is
made from brown sugar.
Applesauce and apple butter can be made without any sugar
but they will be quite tart. Don’t use
artificial sweeteners when cooking the applesauce or apple butter because they
turn bitter under prolonged heat.
Artificial sweeteners can be used when cooking is finished. Simply stir it into lukewarm or cooler apple
sauce or butter. It’s better to freeze
products made with artificial sweetener rather than can them to preserve them.
Some people like the taste of cinnamon and other spices in
their applesauce and apple butter. Add
spices in very small amounts. For a couple quarts of apple pieces a 1/4
teaspoon of cinnamon and less of other spices is suggested to start. Taste the sauce as its cooking and add more
spice if needed. Apple pie or pumpkin
pie spice mix can be used if you like it.
Do not add water. You can fill the
crock pot with apple slices to within an inch or so of the top. They will quickly cook down. Set the crock pot on high and let the apples
cook until they are soft. This can take
3-6 hours on high in the crock pot. While you won’t need to stir often an occasional
stirring will help water evaporate and keep apples from sticking to the crock
pot sides.
When the apples are soft mash them to the consistency that
pleases you for apple sauce and as smooth as possible for apple butter. For really smooth sauce press the cooked
apples through a strainer or whip with electric beaters on low speed or run through
a food processor. Add more spices if
desired and blend them into applesauce or apple butter. Applesauce can then be canned or frozen.
For apple butter the apples should be returned to the crock
pot after mashing and cooked on low heat until the apple butter is thick and
mounds on a teaspoon. This can take
several hours. Water needs to evaporate
off the cooking apples so propping the crockpot lid so that there is a gap that
lets steam escape will speed the process.
You can use a spoon handle to hold the lid open a bit. As the apple butter starts getting very thick
stirring it from time to time will aid steam escaping and keep the apple butter
from scorching or sticking to the crock pot.
Canning applesauce or apple butter
Bring the applesauce/butter to a boil. You may have to put it in a pot on the stove
to do this. Stir continually to keep it from scorching. Ladle boiling hot applesauce/butter into hot,
clean canning jars to within 1/4 inch of the rim. Run a knife blade through each jar to remove
bubbles, wipe the rim and add lids and bands.
Process applesauce/butter in a boiling water canner 15
minutes for pints or smaller jars, 20 minutes for quarts.
Freezing applesauce and apple butter
You can freeze applesauce or apple butter in containers,
either freezer bags or plastic containers. Use containers sized so that you’ll
use up the applesauce or apple butter in a few days after you defrost one. Wait until hot applesauce cools to room
temperature before placing them in the freezer.
Let applesauce or apple butter thaw in the refrigerator
overnight before use. It may separate a
bit as it thaws but stirring should restore the consistency. Keep it in the
refrigerator until it is used up.
Pink applesauce variation
To make pink applesauce make sure the apple pieces are
sliced into a color preservative before cooking. Then you can simply add red food coloring to
your color preference or you can do a more natural coloring job. Add frozen or fresh cherries, cranberries or
raspberries in the proportion of about 1/2 cup of the red item to 3-4 cups of
sliced apples to the crock pot and cook with the apples. This will flavor the applesauce slightly.
Another, different flavored pink applesauce can be made with
red hot candies. For about 6-8 cups of
apple pieces use a 1/2 cup of red hot candies.
Don’t use other spices with these, although you may want to add
sugar. Put the red hot candies in 1/4
cup of water and heat until they dissolve, then pour in the crock pot with
apple pieces.
Tips
for planting fall bulbs
My fall bulbs have been arriving and I have started the
process of planting them. (If you
haven’t ordered yours you should do that today.) My eyes in the catalog are always bigger than
my desire to plant in the fall is, but I work up the energy to get it done by
reminding myself how great they will look in the spring. Here are some fall
bulb and rhizome planting tips.
 |
| If you want tulips in the spring plant them now. |
Always plant lily bulbs and tubers or rhizomes of
things like peonies as quickly after you get them as you can. These do not store well and every day you
wait decreases the chance you’ll have success with them. Lily bulbs found in packages in stores
usually don’t perform as well as those that were dug and shipped directly to
you from a mail order source.
If you are prioritizing your time, next plant the
smaller bulbs, like crocus and snowdrops. They bloom early so they need to get
started early. They also have the
tendency to dry out in storage.
Hyacinths, daffodils, and narcissus should be next, with tulips
last. Tulips actually like cooler
soil. While bulbs can be planted until
the soil freezes they often do not do as well as those planted earlier.
When you are planting bulbs in the fall in a perennial
flower bed that’s full of mature plants it can be a challenge to get the bulbs
tucked under foliage that may still be green and full. But actually it’s a great idea to tuck bulbs down
under those hosta leaves or among the daylilies. Remember that you will need to leave bulb
foliage to dry up before you remove it next spring if you want the bulbs to
return well the following year. So planting
bulbs where later emerging perennial foliage will hide the dying bulb foliage
is a good plan.
I like to plant bulbs among hosta, astible, heuchera,
ferns and daylilies. The bulbs come up
and bloom before these plants get large in the spring. Oriental and other tall
lilies also do well planted with ferns or daylilies as an understory; they
won’t bloom until later in the season but they like their feet in the shade.
Almost all bulbs like well-drained soil. Never plant bulbs where water stands in early
spring. Most bulbs also like to be
planted in sunny locations. However
small bulbs that bloom early can often be planted where the shade of deciduous
trees will be later in summer, as most of their growth will be done before the
trees cast much shade. A few bulbs and rhizomes
do like partly shaded locations, Lily of the valley, trout lilies, trillium,
some true lilies are examples, so do some research and make sure you are giving
the plants the location they need.
Most bulbs should be planted about three times as deep as
their height, but there are exceptions to this rule. Read package directions or look up the plant
requirements if you are uncertain. If
you aren’t good at estimating depth in inches use a trowel that’s marked with
inches or mark a small piece of wood with inch measurements and use that to
guide you.
Don’t mulch too deeply after planting as this may
impede the bulbs emergence in the spring.
A light mulch of 2 inches or less is fine and helps disguise the
planting area from animals. If thick
layers of leaves blow over planted bulbs remove some of the matted leaves in
spring so that bulbs don’t struggle to emerge.
Plant the bulbs with the pointed end of the bulb
up. If you can’t find a pointed end,
look for a round scar on the bulb. This
is where roots were last year and it goes down in the hole. Rhizomes should have budded areas on top if
you look closely.
Try not to remove any papery covering bulbs have, but
don’t worry if some of it falls off. Don’t separate the scales or sections that
lily bulbs have and don’t try to divide daffodils with double or triple
“noses”. Yes, experts propagate bulbs
that way but it isn’t as easy as it seems and your best bet is to plant the
bulbs as they came. A little mold on
bulbs that still feel firm will not harm them.
Mushy or rotted looking bulbs should be discarded.
Don’t use fertilizer or bone meal in the bottom of your
hole. Bone meal should not be used at
all. Old books suggest it and some new
references just copy that but bone meal is now steamed and processed for safety
and little is left in the way of nutrients. It also attracts some animals,
which dig up your bulbs looking for it.
Using a general purpose fertilizer is fine, but mix it with the soil you
are back filling with or sprinkle it on the soil surface, don’t dump it in the
hole. This can burn roots.
Arrange your bulbs in a staggered way, not in straight
lines for a more natural look. Small
groups of the same color or type of bulb look better than single bulbs. Once again package directions will tell you
how far apart to space bulbs. Generally
large bulbs should be about 6 inches apart, small bulbs 2-3 inches. Don’t spread bulbs too thinly though, your
display looks better in the spring if bulbs are fairly close together.
Mark the spots where you planted bulbs with labels so
you know where they are. Some fall
planted bulbs and rhizomes are slow to emerge in the spring and you don’t want
to damage them or plant over them.
 |
| Lilies are also fall planted. |
If you have trouble with animals digging up bulbs you
can lay a piece of wire over the planted area until the ground is frozen. Make sure you remove it early in the spring
if you don’t remove it in the fall. A
piece of wood lattice, with 2 inch holes can be placed on the ground and the
bulbs planted through the holes. This
discourages widespread digging, such as from pets, which really aren’t after
the bulb to eat. By the way don’t let
pets chew on bulbs, some bulbs are very poisonous.
Moles do not eat bulbs, but their tunnels attract other
animals like voles and mice which do eat bulbs and their tunneling can sink
bulbs too deep to emerge. If you have
lots of moles you can plant bulbs in pots, which you sink in the ground to
their rim. Narcissus, daffodil, and allium bulbs are not eaten by animals,
although they can be dug out of the ground and left to die.
When bulbs just begin to emerge in the spring a small
amount of slow release granular fertilizer sprinkled on the soil around them,
especially if you can do it just before a spring rain, will improve their vigor
and size. And if spring is dry make sure
to water your bulbs.
What to do if you
can’t plant bulbs right away
If you cannot plant your bulbs promptly store them in a
cool dark place. The refrigerator
crisper drawer is fine or even the refrigerator in a brown paper bag. Moisten them occasionally in storage but
don’t get them too wet. If they develop
mold put them on newspapers in a dry dark area for a day or two.
If you look outside one morning and snow is on the
ground don’t despair. Plant the bulbs in
a good potting soil mix in containers and keep the containers cool, back in the
refrigerator or on an unheated porch or garage.
The ideal temperature is between 30 and 40 degrees. Water lightly every
couple weeks. After 8-10 weeks of cold
the pots can be brought into a warmer, sunny place and they will probably bloom
for you. Plant the bulbs outside in the
early spring. They may or may not bloom
the next season but at least you had them this spring.
Watch
out for deer crossing the road to eat apples.
Kim Willis
“He who has a garden and
a library wants for nothing” ― Cicero
Events, classes and other offerings
Please let me know if there is any event or class that
you would like to share with other gardeners.
These events are primarily in Michigan but if you are a reader from
outside of Michigan and want to post an event I’ll be glad to do it.
Do you have plants or
seeds you would like to swap or share?
Post them here by emailing me.
Four inch
pots of spider plant (house plant) absolutely free. If you want one contact me, (Kim)
An
interesting Plant Id page you can join on Facebook
Here’s a
seed/plant sharing group you can join on Facebook
https://www.facebook.com/groups/875574275841637/
Here’s a facebook page link for
gardeners in the Lapeer area
Here’s a
link to classes being offered at Campbell’s Greenhouse, 4077 Burnside Road,
North Branch. Now open.
Here’s a
link to classes and events at Nichols Arboretum, Ann Arbor
Here’s a
link to programs being offered at English Gardens, several locations in
Michigan.
Here’s a
link to classes at Telly’s Greenhouse in Troy and Shelby Twsp. MI, and now
combined with Goldner Walsh in Pontiac MI.
Here’s a
link to classes and events at Bordines, Rochester Hills, Grand Blanc, Clarkston
and Brighton locations
Here’s a
link to events at the Leslie Science and Nature Center, 1831 Traver Road Ann
Arbor, Michigan | Phone 734-997-1553 |
http://www.lesliesnc.org/
Here’s a link to events at Hidden Lake Gardens, 6214
Monroe Rd, Tipton, MI
Here’s a
link to all the nature programs being offered at Seven Ponds Nature center in
Dryden, Michigan. http://www.sevenponds.org/education/progs/springprograms/
Here’s a
link to events and classes at Fredrick Meijer Gardens, Grand Rapids Mi
http://www.meijergardens.org/learn/ (888) 957-1580, (616) 957-1580
Newsletter
information
If you would
like to pass along a notice about an educational event or a volunteer
opportunity please send me an email before Tuesday of each week and I will
print it. Also if you have a comment or opinion you’d like to share, send it to
me. Please state that you want to have the item published in my weekly notes.
You must give your full name and what you say must be polite and not attack any
individual. I am very open to ideas and opinions that don’t match mine but I do
reserve the right to publish what I want.
I write this
because I love to share with other gardeners some of the things I come across
in my research each week. It keeps me engaged with local people and
horticulture. It’s a hobby, basically. I hope you enjoy it. If at any time you
don’t wish to receive these emails just let me know. If you know anyone who
would like to receive these emails have them send their email address to
me. KimWillis151@gmail.com
No comments:
Post a Comment