These weekly garden notes are written by Kim Willis,
unless another author is noted, and the opinions expressed in these notes are
her opinions and do not represent any other individual, group or organizations
opinions.
Hi Gardeners
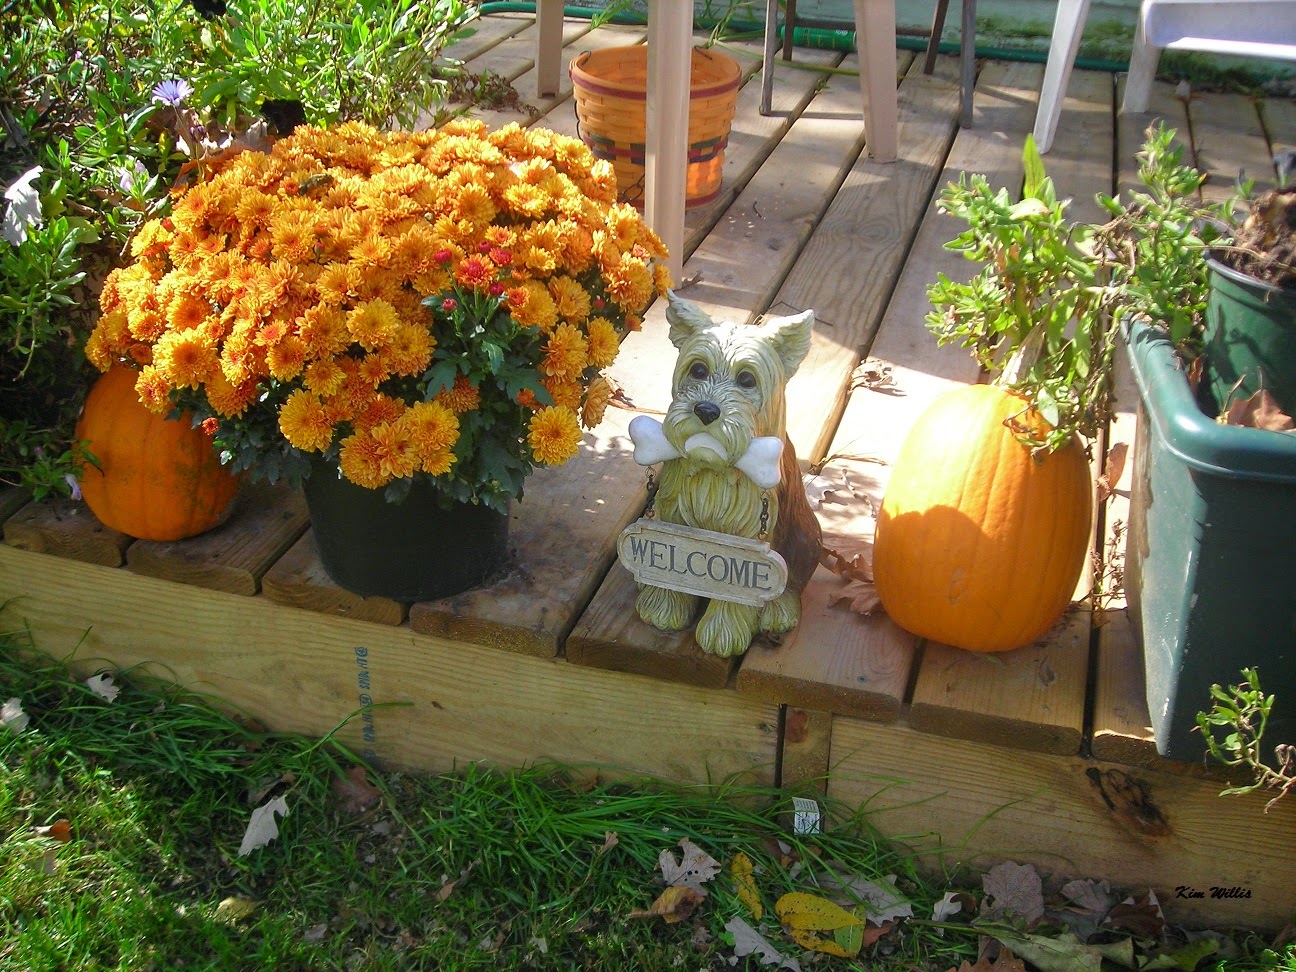 |
| It will be a different scene in a few days. |
Everyone is holding their breath waiting for the “polar
vortex”. I am not afraid. We make weather a lot more scary than we need
to any more. Of course we make
everything more scary now. I am not
looking forward to the cold by any stretch of the imagination. But even though it looks like it will be
quite cold for 10 days or so we could still get Indian Summer after that. Let’s hope anyway. I do feel sorry for those in the UP who got
dumped on though.
This cold spell is running real close to the weather last
year. On Nov. 11 last year it turned
really cold and we woke to snow on the grass.
But on Nov. 17 it was nearly 70 degrees and we had a tornado watch. By the 23rd temps dipped into the
teens overnight and we had an inch or so of snow. We also had snow on Thanksgiving.
The ground will be frozen soon though and if you have any
bulbs sitting around waiting to be planted better get them done between rain
showers. If you have any bulbs to still be dug out of the garden like dahlias,
better do it today. Fill up the bird
feeders before the cold. Get those lawn
chairs put up.
Sugar Harvest
Last year some of the farmlands around us were sold to a
large agribusiness. (The trucks say xxx family farms but the types and number
of machines and employees say big agribusiness.) For the first time in many
years sugar beets were planted on most of the acreage around us, maybe because
of the cold wet spring. This was no real
problem until harvest time rolled around.
 |
| Picking up sugar beets in the field. en.wikimedia.org |
About 2 weeks ago sugar beet harvest began around us. Until past midnight every single day, several times an hour, the huge double tandem gravel trailer type
trucks rumbled down the road, shaking the house, shining their headlights into the
house at night, tearing up the newly surfaced gravel road. After dark the headlights of the harvesting
equipment bounced across the fields like the glowing eyes of giant beasts.
Here’s how sugar beets are harvested, I sat on the deck and
watched the process for a while some days.
First a mowing type machine cuts off the beet tops and leaves them lying
in the field. Then another machine comes through, it digs up the beets and twirls them around in a big hamster wheel
sort of thing to get the soil off, and dumps them on the ground. Then a tractor ( all green John Deeres for
this company) pulls a machine across the beets, sucking them up and spitting
them through a tall pipe into a bright
red wagon ( Merry Christmas) being pulled by another tractor following
alongside the first.
When the dump wagon is full the tractor chugs it down to the
waiting gravel hauler type trucks, the red wagon is lifted by hydraulics
and the beets dumped over the sides of the big truck. When the big trailers are full they take off and another takes it place. On some days the big trucks went into the
edge of the field to wait. They are too heavy to go far into the fields. On
days when we had some rain they waited in the road and this caused traffic to
back up when they blocked the road to dump the red wagons.
 |
| Sugar beet harvest. Credit: Michigan Farm Bureau. |
The big trucks were probably going to Caro, the closest
place I know of where beets are accepted for processing. That’s a 40 minute or so round trip, then
some time for dumping the load, so probably a trip per hour. Usually beets are dumped in huge mountains on
some paved area near a processing facility.
It seemed the trips were pretty well timed so that when one hauler was
filled another was there to take its place.
As I mentioned the trucks went from first light in the
morning to after midnight. Maybe they
had the drivers on shifts but I doubt it.
These drivers were probably exempted by some agricultural clause from
having to rest after so many hours driving the big rigs. Some of the drivers also seemed to think that
being agriculturally involved meant they didn’t have to stop for the stop sign
at the corner and they just blew through it at 35-40 miles an hour. The trucks
must not be required to have the loads covered either. The deer will love the beets along the road. Keep this in mind when you are driving in the
thumb during sugar beet harvest.
This agricultural business harvested about 300 acres of
beets a half mile east of us and about 200 acres across from us. It took all week. In contrast the 200 acres was planted in corn
last year and it took less than a day to harvest it. I am really glad that sugar beets need to be
rotated and we won’t have that intensive harvest next year in those fields.
To justify all that expensive equipment and manpower sugar
beets must be pretty profitable.
Supposedly there is an overabundance of sugar beets this year, too many
to process and some farmers will be paid to leave the beets in the field. Isn’t that grand? The highest average tonnage per acre ever is
29.22, the projected tonnage per acre this year is at least 30 tons per acre.
Sugar beets can’t be harvested when it’s too warm as they
rot in storage and after sitting in piles through the winter some beets that
have frozen are unusable so it’s a race to process the beets. Michigan factories have the capabilities to
process slightly less than 5 million tons of beets.
So how is sugar actually made?
A hundred years ago sugar beet processing was widely spread
across Michigan and sugar beets were grown all over the state. Now most of the sugar beet production and
processing facilities are located in the Thumb-Saginaw Valley area. Besides Michigan sugar beets are grown and
processed in northern Ohio, Montana, North Dakota, Wyoming, Idaho, Nebraska,
Colorado and central California.
In Michigan there are sugar beet processors in Caro, Bay
City, Sebewaing, Croswell and Carrollton. Processing starts at the beginning of
beet harvest – usually beginning in late September and runs through February. It runs 24 hours a day every day of the week
until the supply of beets are gone. About 4 thousand tons of beets are
processed each day at each facility. Here’s
a rough idea of what happens at the Caro facility- (Michigan Sugar Company).
 |
| Sugar beets ready to harvest. Credit: Hugh Venables Geograph.org.uk |
First the beets are dumped into water “flumes”. The beets float and rocks and other debris
are separated out. The rocks collected
from the flumes are sold to landscapers and road construction companies, some
60 tons of rocks are removed daily. Then
the beets go into the beet washers, which scrub off the dirt. Scrubbers have magnets that collect any metal
that may have entered with the beets.
From the scrubbers beets go on conveyors to the slicers,
which slice them into thin slices that look like waffle cut fries, and are
called cossettes. The slices go into
diffusors filled with hot water where they are squeezed and pressed to extract
the sugar from the beet slices. The pulp
that’s left is separated off and a sweet but watery liquid is left behind. The pulp is dried and sold as animal feed.
At this point the raw sugar “juice” still has impurities so
it is pumped into tanks called “olivers” where lime is added and the mix is
carbonated with carbon dioxide. Impurities
bind to the lime and form a mushy cake, which is separated from the remaining
juice. The lime is collected in ponds
outside and – you guessed it- sold in the spring as agricultural lime.
The purified sugar juice goes into pressurized distillers
which evaporate off the water at a low boil, the juice running from one tank to
the next until the mixture gets to a thick syrup stage called massecite and begins
to crystallize. At this point the thick
syrup is carefully monitored by workers with computerized equipment and at just
the right stage it’s sent to centrifugals, which spin the liquid at high speeds, drying and collecting the sugar crystals that form and draining off
molasses, the part that doesn’t crystallize.
Yep- this by-product is sold too.
When the sugar crystals are dried they are pure white. Beet sugar doesn’t produce the brown sugar
used in baking, that comes from cane sugar.
The sugar is packaged and it’s done.
From the beets entering the flues to finished sugar takes about 5 hours.
Each sugar beet produces about 3 teaspoons of finished sugar. There’s 270-290 pounds of sugar produced from
each ton of beets.
Michigan produces
about a billion pounds of sugar each year.
A billion pounds- but despite that we still import sugar into the state
each year. It’s not that Michigan
residents eat more sugar than that but Michigan has several large food
companies that produce cereal and other goods that require a lot of sugar.
Can you make your own sugar from sugar beets?
Yes you can although it isn’t actually easy and your sugar
production won’t be as efficient as a factory.
You could use any beets for sugar but if you use red beets you won’t get
as much sugar and what you make will be pink.
Sugar beet seed can be bought from several seed companies that sell seed
for gardeners. Richters and Bakers Creek sell sugar beet seeds ( and probably
other companies too). The beets are easy
to grow, just like table beets and can weigh several pounds when harvested.
Remember that each beet will produce just a couple of
teaspoons of sugar in the best conditions.
You can get some directions for home sugar production here https://www.richters.com/show.cgi?page=InfoSheets/d1340.html
Growing Chrysanthemums, Novembers flower
 |
| Beautiful mums. Credit: wikimedia commons |
Think about how many holidays where you see mums offered for
sale. At Easter there are white, yellow and pink mums, at Halloween and
Thanksgiving there are gorgeous fall colors, at Christmas perky red and white
mums. Florists would be lost without chrysanthemums;
they are grown by the millions for potted plants or cut flower arrangements.
Because growers have learned to manipulate the light and temperature needs of
mums they are available in bloom all year round.
Potted mums are some of the best plants for removing indoor
air pollution so indulge in them when they are offered for sale. But many people who receive potted mums as
gifts and then plant them out in the garden are disappointed when they don’t do
well. There are hundreds of chrysanthemum varieties though, that will do well in the garden and award you with
wonderful fall color. In this article we
are discussing the hardy mums you plant in the garden.
Gardeners buy chrysanthemums in the fall to pop into beds
where annuals have fizzled or have been killed by frost. They are very affordable and create a vibrant
look in the late fall garden. There is nothing wrong with using mums as
annuals, and not worrying if they will survive the winter. Even if the tag says
hardy mum, many of the mums you buy in full bloom in the fall will not survive
winter and bloom next year.
If you want to give it a try, however, plant the potted mums
directly into the soil as soon as you can. Keep them watered well until the
ground freezes. When the flowers are done trim the stems to about half their
length and mulch the plants heavily. In
the spring remove the mulch when the weather warms very carefully. Don’t remove the dead stems until you see a
flush of new green growth at the stem base.
Then carefully cut off dead stems, don’t yank at the stem. It’s very easy to dislodge the new growth
with the old stems.
Growing hardy Chrysanthemums
The best way to have mums in the garden is to plant hardy
varieties developed for the garden. When you are choosing chrysanthemums for
the garden buy them in the garden center or from a garden catalog, not the
florist shop. And buy them in the
spring, when you are buying other perennials for the garden. Florist mums need more short days to produce
flowers and may not have time to bloom in the north before freezing weather
sets in.
Chrysanthemums are hardy from zone 5 to 9. There are some varieties that survive in zone
4 but have difficulty blooming because the season is short. Zone 4 gardeners should plant mums in a
protected spot.
The leaves on a mum plant vary by variety from a long oval
to leaves with several lobes. The leaves
and stems have a distinctive smell when crushed. Plant size varies from a 1 foot mound to
tall varieties 3 foot tall or more.
Flowers are also extremely variable from tiny pom-pom types to huge
fluffy “football” mums. Some flowers
have quill-like petals and some mums have a single daisy like flower. Chrysanthemum flowers come in every color
except true blue. Mums begin blooming
in late summer and may bloom until a hard freeze.
While mums can be started from seed the most common way mums
are sold is as rooted cuttings. When well cared for even a small rooted cutting
purchased in the spring can produce a nice sized, blooming plant in the
fall. Spring planted mums have a good
survival rate compared to mums that are in full bloom and planted in the garden
in the fall. Those mums are being asked
to produce a new root system while supporting all those blooms.
Chrysanthemums should be planted in full sun. Spring planted
mums should have some slow release fertilizer worked into the soil when
planting and another application of fertilizer in mid-summer. Mums should be
kept well watered, as they have shallow roots, but they will quickly die if the
soil doesn‘t drain well. Be careful when working around mum plants as the
shallow roots are easily damaged.
 |
| Chrysanthemum variety"Dance". Credit en.wikipedia.org |
Most garden mums need to be pinched to produce stocky plants
with more flowers. Pinching simply means
taking your fingers and nipping off the growing ends of branches. You need to
take off only the tip of the branch. Pinch the plants back at least twice
before July 4, but don’t pinch after that or you will remove buds. Some modern mum varieties don’t require much
pinching to stay compact. If you don’t
pinch you will still get flowers but they may be smaller and less numerous and
the plant stems may be more inclined to flop over. Tall, older varieties of
mums may still need staking when they are in bloom, even after pinching.
Chrysanthemums bloom when the nights are longer than the
days and night temperatures are cool. Don’t plant mums where they get a lot of
light at night, such as under security or streetlights or they may not bloom
well.
In the fall dead blooms can be removed for neatness but
leave the dead stems until spring. The
plants survive winter better if the stems are left. When you see new growth in the spring you can
carefully cut down the old stems. Light
mulch in the winter is good, but remove it in the early spring, as too much
moisture around the crown will rot the plant.
Large clumps of mums should be divided every other year or
so. In the early spring dig up the whole
clump of plants and carefully divide into sections before re-planting. Plant mums about 18 inches apart.
Aphids are sometimes a pest of mums. They cause distorted, curling yellowish
leaves. Spray the plants with a good
hard stream of insecticidal soap twice a week until they are gone.
Some mum varieties
There are hundreds of named varieties of chrysanthemums on
the market. Remember to check for
hardiness. Mums also vary in bloom time, to extend garden color gardeners
should look for both early and late bloomers. Check the spread and height of
the variety to see if it fits your garden area too.
If you want tiny button type mums, try ‘Childs Play’ which
is yellow or ‘Pretty Penny’ which is copper.
In the large single flowered types, ‘Clara Curtis’ which is a soft pink,
is an old favorite. If you want a large,
quilled petal mum try ‘Matchsticks’ which is a blend of red and gold or
‘Carousel’ which is lavender. In the
medium sized cushion or bushel basket type mum, try ‘Ruby Mound’ which is
scarlet red or ‘Starlight’ which is white or ‘Curtis Rice’, which is soft
rose. For big, fluffy football type
mums try ‘Stadium Queen’ which is reddish bronze, or ‘Cheerleader’, which is amber
gold.
Every perennial garden should have some Chrysanthemums to
extend color well into fall. Mums fit
into every type of garden from Japanese, to formal to cottage gardens. Plant extra mum plants so that you can cut
big bunches for flower arrangements too.
And once you establish mum plants in your garden they will be there for
many years and are sure to be some of your favorite plants.
Making apple juice
Apples and cider are abundant right now. If you like apple
juice you can make your own juice and can it for the winter. It’s a
good way to spend a gloomy cold afternoon and makes the house smell great.
There are two main ways to make apple juice. The easiest way is to start with cold pressed
apple cider from a cider mill. This
method gives you less control over the juice as you did not select the
apples. It will also be more expensive.
You may be able to find cider made from organic apples but chances are the
apples will be conventionally grown.
Cold pressed commercial cider will probably be pasteurized but you will
still need to heat and can the final product for storage.
To make apple juice from cider simply let your cider sit in
the refrigerator undisturbed for 2 days.
Then carefully pour off the clearer fluid from the top of the jugs,
leaving as much sediment as you can behind.
Strain that clearer juice through a colander lined with cheese cloth or
a coffee filter. Each gallon of cider
will give you about 3 quarts of strained juice.
Put your strained juice into a pan and bring to
boiling. Boil one minute. Then pour hot
juice into sterilized jars to a 1/4 inch from the top, add lids and screw bands
and process in a water bath canner for 5 minutes for pint or quart sized jars.
Making heat processed apple juice
If you want the most control over the apple juice contents
or have an abundance of home raised apples to use this is a good method to make
juice. Cooking the apples a little makes
them yield more juice and you won’t need a mechanical press.
Wash the apples and then chop them in chunks. There is no need to peel or core them. In a large pot combine 1 cup of water for
every 3 cups of chopped apples. Cover
the pot and let the apples simmer for about 25 minutes or until they are
soft. Pour off excess water. You will then need to mash or puree the
apples. You can do that in the pot by
hand or with an electric beater. Or you
can put small amounts at a time in a food processor.
Pour the apple puree through a strainer lined with
cheesecloth or a coffee filter and collect the juice. If you have a lot of puree you can put it in
an old thin pillowcase and suspend that over a collection pot. You can buy what is called a jelly bag for
that purpose but it isn’t very large.
Do not press or squeeze the puree through the strainer. Let it drip slowly for several hours. Take your collected juice and bring it to a
boil, boil 1 minute, pour into sterilized canning jars to a 1/4 inch from the
rim, add lids and process in a water bath canner for 5 minutes for both quarts
and pints.
If you like sweetened apple juice, add sugar to your taste
preferences at the stage where you boil the juice just prior to filling the
jars. A suggestion is a 1/2 cup sugar to
every 3 cups of juice. Do not use artificial sweeteners as they will turn
bitter during heating.
Drying Gourds
Fall is a wonderful time to think ahead and dry some gourds
for winter craft projects. You may have
grown gourds in your garden, but if you didn’t, gourds are often found at farm
markets in the fall. Gourds come in all
sizes and colors. The small, colorful
ones require little more than drying to turn then into decorations, but the
larger plain ones can be painted and cut and turned into several crafty items,
including bird houses.
Pick your decorative gourds before a hard freeze. You can
leave them in the garden until then; it is really better for them to dry in the
vine. Light frosts are fine, they will
continue to dry after them, but freezing may turn them black or mushy.
Let the gourds dry in a sunny location a few hours. Then brush off all surface dirt. Mix a solution
of 1 part household bleach to 3 parts water and use this solution to dip rags
or paper towels in and clean the gourds surface. Then allow to air dry. This
helps prevent mold. You could also use
some of the handy “wet wipes” with bleach to clean the gourds.
Then dry the gourds in a warm, dark place with good air
circulation, until you can hear the seeds rattle inside. The drying process takes from 2-4 months
depending on the gourd and the conditions of the drying area. You cannot hurry gourds by drying them in the
oven or microwave unfortunately.
Don’t worry if you want the gourds for a fall display this
year. They can continue to dry where
they are displayed as long as they are not subjected to freezing or moisture
and aren’t piled too deeply. If you have
gourds layered in a basket for example, you may want to rotate them from time
to time. Gourds that you intend to keep
for a long time can be sprayed with craft sealing finishes, varnish or wax
after they are thoroughly dry.
If you are using larger gourds for crafts wait until they
are completely dry and you can hear those seeds rattling before cutting them or
painting them. A drill with a small bit
is good for starting holes. Gentle use of a saw or drill is required to keep
the gourd from shattering. If you are
making a bird house or something with a large opening, shake the seeds out.
Gourds can be painted with any acrylic craft paint. If they will be outside they should be
covered with a waterproof sealer after the paint dries. Gourds that are to be
left in a natural color should be sprayed with a sealer also. If the bird houses are just decorations use
black paint to fake a hole. If they are
for actual use as bird houses research what size hole the bird species you want
to attract likes in a house and use that size hole.
Painted gourds can also have holes cut in them and small
plastic containers set inside to hold flower arrangements, candy or small
snacks. Make a child’s rattle by
drilling a small hole and inserting small jingle bells or beads, then seal the
hole with a bit of putty and paint over it.
Children enjoy decorating gourds with paint and small glue on
decorations such as macaroni shaped as letters, brightly colored beans and seeds
and feathers.
It’s Veterans Day. Thank
one for his or her service today.
Kim Willis
“He who has a garden and
a library wants for nothing” ― Cicero
More Information
A
day in the life of the permanently grinning Blanding’s Turtle, a Michigan
protected species
A
greater understanding of species’ habitat needs points to the importance of
keeping the shoreline natural as a way to promote healthy populations of fish
and wildlife species and a healthy ecosystem.
Posted
on October 29, 2014 by Bindu Bhakta, Michigan State University Extension
 |
| Blanding's turtle laying eggs. commons.wikimedia.org |
Shoreline areas, on land and into the water, provide
critical habitat for a variety of fish and wildlife species. Developed
shorelines in which natural shoreline vegetation has been removed and replaced
to the water’s edge with turf grass or a seawall, may be unable to fully
support fish and wildlife species due to habitat destruction and declines in
fish and wildlife populations. Such changes can have potential impacts on the
health of a lake ecosystem.
One species that depends on a natural shoreline is the
Blanding’s turtle, a medium-sized turtle with a hard-to-miss long bright yellow
chin and throat, and a very long neck. Its head is relatively flat with a
short, round snout and a notched upper jaw, which give it the appearance of a
permanent grin. It has a dome-shaped carapace (top shell) that is usually
smooth and black with yellowish spots and streaks. The plastron (underside of
shell) is yellow with a dark blotch at the outer corner of each scute, or
scale.
With regard to habitat, Blanding’s turtle prefers areas with
clean, shallow waters with abundant aquatic vegetation and soft muddy bottoms
over firm substrates. It is found in and around ponds, marshes, swamps, and
lake inlets and coves. They are sometimes found in rivers. They occupy
terrestrial habitats during mating and nesting seasons as well as in the fall.
Nesting sites are typically located in uplands adjacent to wetland habitats in
sunny areas with moist but well-drained sandy or loamy soil. When suitable
nesting habitat is not available, the turtle will settle for lawns, gardens,
plowed fields, gravel road, etc.
According to the Michigan Natural Features Inventory (MNFI)
abstract for Blandings’ turtle, the primary threat to Blanding’s turtle is
habitat loss, degradation and alteration. Furthermore, the most critical
conservation need identified for Blanding’s turtle is the protection and
management of suitable wetland and nesting habitat.
What impacts does a developed shoreline have on species that
depend on these areas for some part of their lifecycle? Here are several
examples of how the Blanding’s turtle (Emydoidea blandingii) may be impacted:
Seawalls and even rock rip rap can disrupt/break the natural
transition between the water and land. Blanding’s turtle and other species of
turtles, frogs and other animals need to travel between water and land to feed,
rest, and nest. Such a vertical or semi-vertical barrier can block or obstruct
access to necessary habitats for feeding and reproduction by making it difficult if not impossible for
them to move between land and water.
Many species of fish and wildlife are unable to thrive along
sandy swimming beaches or on mowed lawns. Rather, they prefer areas in the
water that contain native aquatic plants, bottom materials and natural debris,
and trees and shrubs which provide shoreline cover. At night, Blanding’s turtle
are also found in or under aquatic vegetation. In addition, when shallow water
habitats start to dry up in the summer and fall, some will migrate to another
body of water while others enter a state of dormancy or inactivity during hot
or dry weather on land by burrowing under roots, mud or plant debris.
Removal of “unsightly” fallen trees and shrubs (also called
course woody habitat). The Blanding’s turtle has specific requirement for
downed woody debris as part of their habitat needed to both sun themselves.
When shoreline shrubs and fallen trees are removed from the water’s edge,
important turtle habitat is eliminated.
For more ideas on how you can help Blanding’s turtle, visit the Michigan
Natural Shoreline Partnership web site for specific ideas on restoring natural
shorelines to encourage Blanding’s turtles to frequent shoreline areas.
MNFI’s Rare Species Explorer is a database containing
information on Michigan’s 723 rare plants and animals. MFNI also has a large
list of species and community abstracts. To find out more about data, programs,
services, and educational resources available, visit the MNFI website.
“Amphibians and
Reptiles of the Great Lakes Region” by James H. Harding is a comprehensive
resource on Amphibians and reptiles in Michigan and is available from the
University of Michigan Press. Also visit
the Michigan Department of Environmental Quality’s Michigan Turtles web site
for additional information.
For more information on supporting fish and wildlife species
on your inland lake shoreline, consult these additional resources:
Michigan State University Extension Bulletin E-3145, Natural
Shoreline Landscapes on Michigan’s Inland Lakes: Guidebook for Property Owners
available from Shop MSU
Landscaping for Water Quality Booklet
The Water’s Edge
This article was published by Michigan State University
Extension.
Events, classes and other offerings
Please let me know if there is any event or class that
you would like to share with other gardeners.
These events are primarily in Michigan but if you are a reader from
outside of Michigan and want to post an event I’ll be glad to do it.
Master Gardeners if you belong to an association that
approves your hours please check with that association before assuming a class
or work day will count as credit.
Do you have plants or seeds you would like to swap or
share? Post them here by emailing me.
I have several free roosters, bantam and full sized if anyone
is interested. Young, healthy. 3 month old muscovy mostly black ducklings
for sale $5. Kimwillis151@gmail.com
MSU offered a variety of on line
seminars for those who were interested in beginning farming topics of various
types. Some of those are now available
free to watch at the address below.
Gardeners may be interested in topics like organic pest control. Get the list of topics and links here.
New- Michigan Great Lakes
Expo December 9-11, 2014- Devos Place Conference Center/ Amway Grand Plaza
Hotel, Grand Rapids, Michigan
This annual
conference is for fruit and vegetable growers and the greenhouse industry but it
is open to anyone who wishes to attend and there are numerous educational
classes, several bus tours, lots of educational booths and more than 400
vendors. Many home gardeners enjoy
attending as well as those contemplating or operating a farm market, greenhouse
or nursery business.
Pre-registering for
the event by Nov. 20 will save you about $20 per person. It’s $75 for the 3 day admission with several
discounts also being available for spouses, employees, members of certain
groups etc. It will be $95 if you pay at
the door. Children under 18 are
free. There is also a one day admission
for Thursday, Dec 11 of $40. Admission
includes all educational sessions and exhibits but does not include bus tours
and the various luncheons and dinners.
You can get the
brochure describing the educational events and tours plus more information and
register on line at this link: http://www.glexpo.com/images/2014/GL_Expo_Brochure.pdf
You can also call 734-677-0503
for more information.
Holiday Indoor or Outdoor Greens
Arrangement Workshop,
Sat, November 15, At Telly's: 10am Troy, and
1pm, Pontiac
Create
indoor table decor, a hand-crafted gift, or an outdoor arrangement. Bring
clippers. $5, plus cost of materials Register: 248-689-8735.
Skeleton
Trees, Sunday, November 30, 2:00 pm, Seven Ponds Nature Center 3854 Crawford Rd,
Dryden, Phone:(810) 796-3200
Now that most of the trees are bare let’s see if we can
figure out which tree is which during this nature walk. $3
admission for non-members.
Grow
it! Cook it! Eat it! Workshop, Nov. 12. MSU
Extension Ingham County Lansing Office and MSU Extension – Livingston County
Learn how to grow, store and prepare a variety of fresh
vegetables by attending one or all of these mid-Michigan workshops.
Posted
on August 12, 2014 by Diane Brown, Michigan State University Extension
Home vegetable gardening is once again popular. In
addition to vegetables you grow yourself, a bounty of beautiful produce awaits
at farmer’s markets and from community supported agriculture (CSAs). But do you
know the best varieties to select for your home garden? Do you know how to tell
when a vegetable is ready to harvest, or what to look for at the market? How to
store them? How to cook them? Get answers to these questions and more during a
series of three Grow it! Cook it! Eat it! workshops from Michigan State
University Extension designed to help you make the most of fresh garden
vegetables. Cost: $20 for one session/$50 for all three.
Nov. 12, 2014, 6-8 p.m. Pumpkins and Their Kin – winter
squash and pumpkins Location: MSU Extension Ingham County Lansing Office, 5303
S. Cedar St., Lansing, MI 48911
Register online for these exciting workshops, and save
$10 over individual workshop pricing when you register early for all three
events. Contact the Ingham County MSU Extension office at 517-676-7207 for more
information.
Newsletter
information
If you would
like to pass along a notice about an educational event or a volunteer
opportunity please send me an email before Tuesday of each week and I will
print it. Also if you have a comment or opinion you’d like to share, send it to
me. Please state that you want to have the item published in my weekly notes.
You must give your full name and what you say must be polite and not attack any
individual. I am very open to ideas and opinions that don’t match mine but I do
reserve the right to publish what I want.
Once again the
opinions in this newsletter are mine and I do not represent any organization or
business. I do not make any income from this newsletter. I write this because I
love to share with other gardeners some of the things I come across in my research
each week. It keeps me engaged with local people and horticulture. It’s a
hobby, basically. I hope you enjoy it. If at any time you don’t wish to receive
these emails just let me know. If you know anyone who would like to receive
these emails have them send their email address to me. KimWillis151@gmail.com
No comments:
Post a Comment