Hello garden friends
 |
| Bristly Locust |
I’m sitting
here on a rainy Monday morning writing about gardening because I can’t be
outside doing it. We had a 3 day stretch
where it didn’t rain and was sunny, then yesterday we had misty rain off and on,
but I still got a little gardening done along with a visit from my son and
great grandson, who brought me some more flowers.
I am down to
about a half flat of plants that need planting, mostly wax begonias. I like wax begonias, the foliage is colorful and
they have pretty flowers too. They
survive in most conditions, from shade to sun. I even bring some inside for
winter, where they continue to bloom. I
put a large pot of them back outside in my shade garden this spring.
The star of
the garden right now is the peonies, which are now in full bloom. Of course, with the rain they are all
drooping over. The ninebark, bristly
locust and viburnums are in bloom.
Columbine is in bloom too, and the Siberian iris. Kim’s Knee High lilac, which is not knee high,
is also in bloom.
My favorite
rose, the Harrisons Yellow rose is blooming.
It’s an heirloom, my rose came from a cutting of my grandmothers
rose. This rose starts very easily from
cuttings and the runners it puts out. I call it the graduation rose because
every one of my siblings and me, plus my mother, had graduation pictures taken
in front of it in my grandmother’s yard.
Aren’t “pass
down plants” wonderful? Besides the rose
I have a snake plant (sansevieria), that was my great grandmothers, the actual
plant, not a start from it. It’s huge
and easily 60 years old, maybe older. I
come from a long line of plant lovers.
The farmers
around here were scrambling to get fields planted this week during the dry
spell. This was the last week in this area
they could plant and expect to get a crop.
The field conditions still weren’t good, but they got out there and
planted. The hum of those big machines
can be annoying as is the smell of the anhydrous ammonia they were using to
fertilize with. But I am glad they got
the crops in. Now the deer will have
something to eat besides my garden.
My sweet corn
is up and growing, the potato plants are doing well and there are little
tomatoes on the plants. I have good sized green strawberries. The spinach I planted, however, is going to
seed at only a few inches high. It must
be the weather conditions.
If you are
having problems getting your garden in the ground this year because of weather
I sympathize. But don’t give up. You may
have to switch to faster maturing vegetables in some cases. But even if we get
to the end of June there’s still hope. Hopefully the wet pattern is easing up
and some wet areas will soon be drying out.
 |
| Wax begonias |
Become a Master Grower
Many of you
know about the Master Gardener program.
It’s garden classes for home gardeners that are offered by many states
through their county Extension offices.
Since those offices receive some federal funding most Extension programs
have banned their Master Gardener volunteers from helping people with problems
growing marihuana even in states where weed is legal. They won’t help farmers produce legal medical
or recreational marihuana although some will now help hemp farmers.
But the marihuana
industry is way ahead of the stodgy Extension rules. They have created their own courses, many at
college level, for those who either want to grow their own pot or who want to
get good jobs in the marijuana industry.
And if you like working with plants and want a good paying job in a multi-billion-dollar
industry you might want to skip the Master Gardener classes, which prohibit
using your certificate for profit or business and get a Master Grower
certificate or degree instead.
There is some
controversy among the industry as to what courses must be taken to get a Master
Grower certificate, just as there are differences in the Master Gardener
programs among different states. But for
good jobs in the marihuana industry more and more employers require some kind
of specialized training. Of course for a
good job that is also legal you need to be in a state with legalized marihuana.
Some classes
can be taken online, but many are now conducted on brick and morter campuses
and require 300 or more hours of coursework.
They are serious, professional classes meant to prepare people for well
paid jobs.
Here are some
careers you could pursue with Master Grower certification or degrees in
horticulture with an empathize on marihuana.
Master Grower
Cannabis Gardener- worker in grow farms
Cannabis Trimmer- specialty position
Cannabis Compliance Officer- deals with zoning and other legal issues
Cultivation Consultant
Cannabis Garden Designer
Cannabis Educator
Cannabis Gardener- worker in grow farms
Cannabis Trimmer- specialty position
Cannabis Compliance Officer- deals with zoning and other legal issues
Cultivation Consultant
Cannabis Garden Designer
Cannabis Educator
Cultivation
Operations Manager
Dispensary Manager
Marketing Manager
Sales Manager
Processing Manager- making extracts and edibles
HR Manager
Nursing Assistant for dispensaries
Dispensary Manager
Marketing Manager
Sales Manager
Processing Manager- making extracts and edibles
HR Manager
Nursing Assistant for dispensaries
Cannabis
medical research, research assistant
These jobs
pay very well and usually come with good benefit packages. You’ll now find these jobs being advertised on
mainstream employment sites.
So, if a good
career with plants interests you, I have included a couple good links
below. I am not endorsing any school nor
am I getting paid in any manner to promote them.
The Cleveland School of Cannabis
State
Certificate Programs are approved by the Ohio Board of Career Colleges and
Schools and have been recognized as practical learning that is designed to lead
to employment. Their courses cover basic horticultural knowledge,
specialized breeding and growing of cannabis, legal and business aspects,
medical growing and research, manufacture of marihuana products, and much more.
Cannabis
Training University
Oaksterdam
University
You can get a
Bachelors degree in medicinal plant chemistry at Northern Michigan University
Pruning spring blooming shrubs
Many of the
spring flowering shrubs are easy to grow and even thrive on neglect. But knowing when and how to prune them and
some basic maintenance requirements can make the difference between a pretty
flower show and an unruly shrub with few or no flowers.
Some
flowering shrubs may not need much pruning at all. In an open lawn area with
lots of room many shrubs should just be left alone to develop their natural
shape. But in smaller yards some shrubs simply get too large for their location
if they are never pruned and need to be kept within a reasonable size.
Spring and
early summer flowering shrubs include abelia, azalea, daphne, dogwood, elderberry
(Sambucus), forsythia, flowering quince, kerria, lilacs, mock orange, ninebark,
pierus, rhododendrons, snowball bush, (viburnum), spirea, weigela, and witch hazel.
Most of these
shrubs begin the process of producing new flower buds shortly after the current
year’s blooms fade. This is called blooming on old wood, as the branch needs a season
of growth and then a dormant period to produce flowers. If you wait too long after a shrub blooms to
prune it, you’ll cut most of next year’s flowers off. Begin your pruning within a month after bloom has
ended.
Hydrangeas
are a special case. Many don’t need any
pruning except to remove dead branches. Some bloom on old wood, these bloom in
spring and should be pruned after flowering in spring, if needed. If they don’t need branches pruned to keep
them in their assigned space leave them alone.
Some
hydrangeas bloom on new wood, these usually bloom later in summer. Hydrangea paniculata, which have
white, cone shaped flowers, and ‘Annabelle’ types, (Hydrangea
arborescens), should be pruned back to the ground in late winter, while
dormant, because they bloom on new wood.
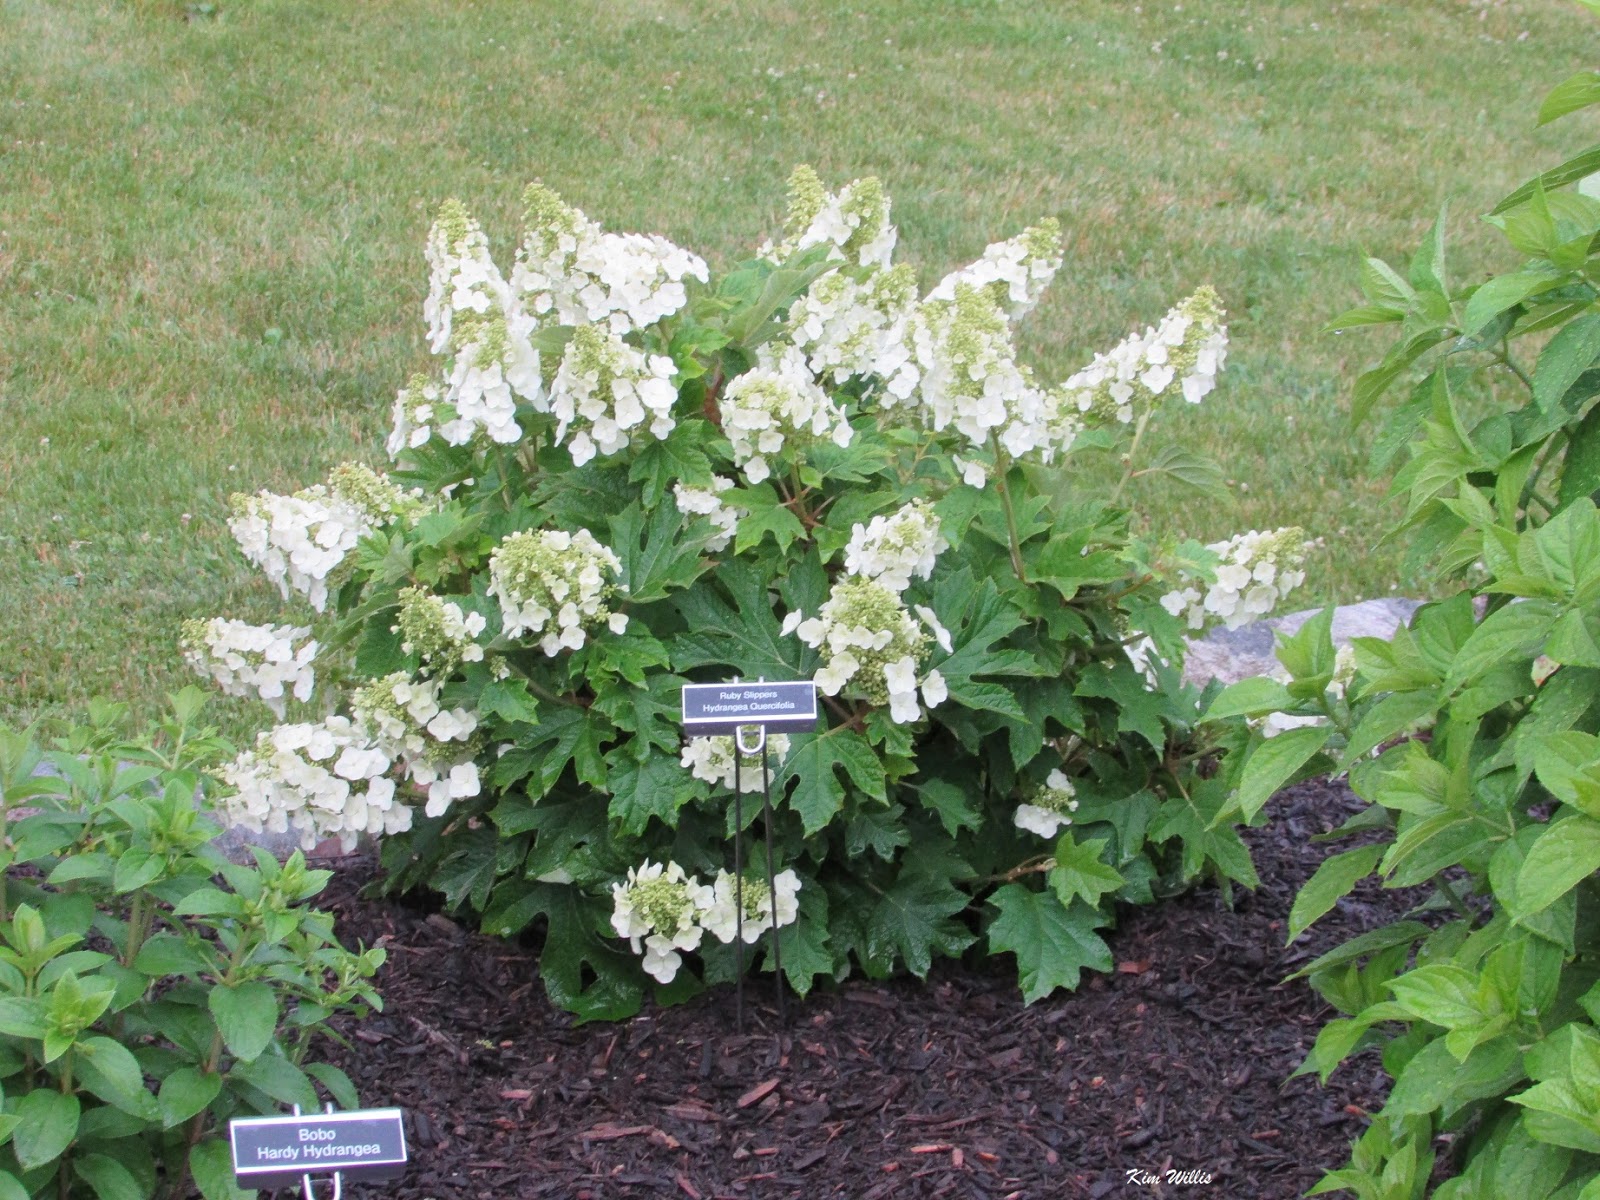 |
| Hydrangea paniculata 'Ruby Slippers' |
Some hydrangeas
bloom on both new and old wood. I have
some of these and I don’t prune them until they leaf out and then I just remove
any dead branches or branch tips. That’s
probably the best way to handle these types. Make sure when you buy a hydrangea
you find out which type you have.
Shrubs that
are primarily grown for their foliage may also bloom in spring. That includes
barberry, cotoneaster, privet and some dogwoods and willows. If you don’t want flowers these can be pruned
at any time.
Of course,
pruning and maintenance will never do much for a shrub that is in the wrong
location or that is not winter hardy in your area. If you have flowering shrubs
and they seldom bloom well in the spring, they may be getting the flower buds
killed over winter. Many rhododendrons
and azalea varieties fall into this category.
The plants can be called winter hardy, but since the buds are killed by
cold, they will never bloom well for you.
When you buy shrubs research them carefully to see whether they are likely
to bloom in your planting zone.
Most shrubs
need a sunny location to bloom well.
Over time a shrub that was once in the sun may become shaded by growing
trees or new buildings. There is not
much you can do about this other than to move the plant or somehow remove the
cause of the shade.
Rhododendrons,
azaleas and other broad-leaved evergreens that keep their leaves through winter
benefit from being watered on mild winter days.
Pour lukewarm water near their base.
These plants lose a lot of water from their leaves in winter and can’t
replace it when the soil is frozen. This
often results in bud loss.
The pruning process
To do a good
job pruning you need sharp, clean pruning shears and possibly a pruning saw. A pass-through type pruner, one that cuts
like a pair of scissors, is best for live wood.
The anvil type pruner- they have one sharp blade and a flat surface on
the other side, is best for removing dead wood.
If you can buy only one pruner buy the pass through.
I like a
folding pruning saw for larger branches and these are large enough for most
shrub pruning. Electric saws and chain
saws are seldom needed for shrub pruning unless you have seriously overgrown
messes that must be taken right to the ground.
Hedge shears probably aren’t needed either, although some people do turn
forsythia into a hedge.
Before you
start take a good look at your shrub and learn what a leaf node is. A node is a
joint on a stem where you see a leaf or bud.
That’s the only place new growth can occur. Plants vary in how far apart these nodes are
on a stem. Nodes do remain on parts of
branches that will no longer produce foliage.
Make every
pruning cut just above a node that currently has leaves for the best appearance
and health of the plant. If you make
your cut too far above a node you will have unsightly little dead stubs on the
end of branches for a long time. If you cut back to nodes that don’t have new
leaves, you’ll probably never have growth again there, just a dead area. Leave
some green! If you cut on a slant just
above a node the stems will quickly be hidden by new growth.
Start pruning
by removing any dead branches, broken branches or branches that seriously offend,
such as those sticking into paths or blocking windows. Then step back and evaluate the shape of the
shrub. In most cases flowering shrubs
look best when allowed to have a natural form and are not trimmed into hedges
or balls. If the shrub has a naturally
arching form, such as spirea, try to maintain that shape.
It’s best not
to remove more than a third of the shrub when pruning. Prune back the height to about a foot below
your desired height, shrubs will continue to grow over summer. Cut back the
width if needed.
Some shrubs
like forsythia and lilac with many individual stems coming from the ground
benefit from removing some of those stems, called thinning. This opens the center of the shrub to
sunlight. Chose the oldest largest
looking stems and use your saw to cut them right to the ground. Try to space thinning cuts so that there are
no big holes in the shrub, but each stem has some room around it.
Until you get
a lot of experience prune slowly and consider each cut carefully. You will make
mistakes at first but thankfully most plants recover from them quite well. Improper
pruning rarely causes the death of a shrub.
While pruning
cut off any seed pods or dead flower clusters.
Unless you want to try and grow some new shrubs from seed these seeds
detract from the shrubs looks and divert energy into seed production that could
go into new flower buds.
Lilacs
require some additional pruning care. This
pruning is best done in winter when the plants are dormant and not after bloom.
In order to keep lilac borer under control some older, woody barked stems need
to be removed each year. Remove about a
third of the oldest woody stems each year. Space the stems you leave so that
they don’t touch. Keep lilac suckers
which come up around the plant pruned out except for one or two. You can prune for height and width right
after bloom.
If a shrub is
seriously overgrown there are some shrubs that will regenerate quickly if cut
right back to the ground. Lilacs, willows and spirea are the best candidates
for this treatment. Some other shrubs
will also regenerate on occasion but cutting them to the ground is best reserved
for worst case scenarios. Do not do this with azaleas and
rhododendrons. Lilacs may take an extra year or two before
they bloom again when this is done. But
you can get them off to a new start in this way and keep them under control as
they grow.
Shrubs that
flower all season or in mid to late summer and fall are best pruned when
dormant. For the small amount of care that they take flowering shrubs are great
investments for your landscape.
Talking roses
June’s flower
is the rose and in many areas of the country roses begin to bloom in June, so
what better month to talk about caring for them? Some gardeners won’t grow roses because they
expect they will take too much work and there are some roses that do require a
little pampering. But many modern roses
are hardy and have disease resistance built into them. If you have sunny areas in your garden one of
the modern landscape roses can be the ideal solution for long lasting bloom and
easy care.
Here are some
rose care articles that may help you with any rose problem you are having.
Black spot on roses
One of the
most common diseases of roses is black spot. Black spot is a disease caused by
the fungus, Diplocarpon rosa. It
is extremely common in older varieties of tea roses but when conditions are
right even roses marked as resistant to black spot can develop a mild case of
the disease. Warm humid conditions,
especially when there are heavy dews, or the foliage stays wet overnight, are
the prime times for black spot to develop.
Black spot
causes black spots on the upper surfaces of rose leaves, surrounded by a yellow
area. If the fungus is heavy the leaves
may look almost totally yellow, sprinkled with black spots. Rose flower petals may show streaking, red
spots or distorted areas. Infected
leaves soon drop off the plant.
 |
| Rose blackspot Flickr image |
While black
spot usually doesn’t kill a plant outright, the plant struggles to put out new
foliage and this weakens the plant and reduces blooming. Infected plants may not survive the winter as
well as those with mild or no infection.
And half bare, yellow leaved plants just aren’t very attractive.
Black spot
overwinters on rose leaves on the soil or on the rose canes. Rain and wind move the spores to new foliage
on the roses in the spring. When
conditions are right, (warmth and humidity), usually about June, the fungus
germinates and infects the rose.
How to control Black Spot
If you have
had problems with black spot in the past or your area experiences lots of
humid, hot weather you’ll want to plant roses with resistance to black spot.
Some modern shrub roses have pretty good resistance to black spot and rarely
require treatment. Even some tea roses
have recently been bred that have some resistance. Older roses with resistance are the gallicas,
rugosa’s and albas. If you don’t like
chemical spraying choose resistant varieties and hope for the best.
Resistant
varieties are not immune to black spot.
In heavily infested areas and ideal conditions even resistant roses may
get black spot. Some resistant varieties perform better in some geographical
areas than others. If one variety of
rose always seems to get infected in your garden, try another rose or at least
another location in the garden.
Other ways to
control black spot are to remove all rose leaves from under the plant in the
fall or early spring before the plant leaf’s out. During growing season pick off any yellowed
or spotted leaves and remove those that fall on the ground as soon as you see
them. Don’t crowd the roses, they need good air circulation and roses against
buildings or with hedges behind them may have more problems with black spot.
Water your
roses at the base, trying not to wet the foliage and do so early in the day so
the foliage dries before evening. Keep
roses healthy by planting them in full sun and regularly fertilizing them as
roses are heavy feeders. You’ll also
want to control rose insects such as rose chafers and Japanese beetles as these
weaken the plant and make them more susceptible to damage from black spot.
There are
many chemical controls for black spot and other fungal diseases of roses. If
you are going to use fungicides begin spraying in June or as soon as you see
even one infected leaf. If you want nice
looking tea roses you will probably want to start a spray schedule soon after
the plants leaf out. Follow label directions and keep up the schedule for best
results. The sprays don’t help already
infected leaves, but they do help new foliage stay healthy to make food for the
plant.
Several years
ago, The Consumers’ Association Magazine put eight fungicides to the test
between April and October to combat black spot on roses. The products they found did the best job were
Bayer Garden Systhane Fungus Fighter Concentrate, Scotts Fungus Clear Ultra,
and Bayer Garden Multirose 2 Ready-to-use.
The test was
conducted on a variety of modern rose called ‘Silver Jubilee’ which has some
resistance to black spot. Black spot was
noticed in June on the roses and treatment according to label directions was
begun. Some roses were left untreated as
a control. The researchers found that
any chemical product was better than no treatment. There are organic treatments on the market
but many of these do little or nothing to control fungal disease.
Beware of so
called “home remedies” for black spot on roses.
Soap solutions do not work on fungal disease. Alcohol, peroxide, baking soda, milk and other
odd substances may actually harm roses. Don’t succumb to folklore and ruin your
roses.
With the many
disease resistant varieties of roses on the market and a little tolerance for
less than perfect foliage almost everyone can grow roses, even without chemical
sprays. Don’t let the fear of black spot
or other rose diseases keep you from enjoying them in your garden.
Rose rosette
Rose rosette
disease is a fairly new rose disease that is fatal to roses. It’s been associated with ‘Knock out’ roses
but other roses do get it. It causes odd
distortions of rose foliage. To read
more about it go to this article.
Rose chafer beetles
Rose chafer
beetles are tan, sometimes with a greenish cast, with reddish orange legs and
short antennae. They are about a ½ inch
long when mature and are strong fliers. In June they emerge from the soil where
they have been pupating and begin feeding on everything in sight. Plants are sometimes covered with the
beetles. If you live on sandy soil your
garden may be particularly hard hit. The name rose chafer is misleading. While they are very attracted to rose
flowers, they’ll eat the leaves and flowers on many kinds of plants.
To read more
about this pest please go to this article;
 |
| Rose Chafer MSUE image |
Identifying plants
I spent some
time this past week identifying two plants that popped up in my cutting
/pollinator garden. It’s pretty weedy
this year, I left things alone hoping most of the plants from last year would
reseed themselves. These two plants
popped up a few feet apart and grew quickly to about 4 and 5 feet high. I was interested in seeing how they flowered
and hoping that would help me ID them.
They put out
umbels of tiny pinkish, mildly scented, 5 petalled flowers at the top of the
plant and from leaf axils. The plant had
pinnately odd compound leaves with toothed leaflets arranged opposite each
other on a hollow, round grooved stalk.
The petioles of the leaf formed a c shape, like a celery stem.
I knew I had
seen the plant before, but the name escaped me, and I couldn’t remember how I
knew it. I begin searching in weed
identification manuals first. When
nothing popped out at me, I started looking in other identification manuals I
have and found it in the herbals. The
plant is valerian, an esteemed herb for hundreds of years. It’s still a much sold, sedative/ sleep aid
in many countries.

 |
| Valerian (Valeriana officinalis) |
A gardener
who likes to identify plants needs several plant identification books. Yes, you can look online, and there are a few
good online sites that give both pictures and identification details on the
plant. You can even submit pictures
online and ask someone else to identify the plant on some sites or send them to
someone you think is an expert. But it’s
so much more satisfying to look up the plant yourself. And once you go through the work to look up
the plant you usually remember it.
Here’s how to
get started identifying a plant. First
examine the plant carefully. Don’t just
look at flowers, look at leaves, stems, any seeds and sometimes roots. (If the plant isn’t in your yard or there is
only one specimen and you might want to keep it, don’t pull or dig the plant to
see the roots.) Notice how tall and wide the plant is and where it is
growing. Is it in sun or shade, a wet or
dry area? Always try to examine more
than one specimen of the same plant.
Here are some
things to look for. Is the plant a tree
or shrub with a woody stem or are stems soft and green? Does the plant have an upright form,
sprawling form, bushy form, or is it a vine? Do all the leaves seem to come
from near the ground, without a pronounced stem? (Think hosta or daylily.)
Are the
leaves of the plant simple or compound?
If compound do they end in one leaflet or two? How many leaflets are
there? What color are the leaves, top
and bottom? Are they hairy or do they
have spines or prickles? Are the margins of the leaves smooth or do they have
lobes, teeth or serrated edges? What
shape are the leaves? Do the leaf veins branch out or all run one direction? How
long and wide are the average leaves?
How do they attach to the stem – opposite each other or do they
alternate sides along the stem? Is there a scent to the foliage?
How long and
thick are the stems? Do the stems have hairs, spines, ridges or grooves? What color are the stems? Do the stems have bark? If you can see the roots are they like
tubers, is there a tap root or are the roots fibrous and spread out? What color are the roots?
If there are
flowers what color are they? Do all the same type of plants have the same color
flowers? Are the flowers in groups or
single? How many petals do they have?
What shape are the flowers? Use
comparisons such as daisy like, pea-like, bell like, tubular and so on if you
aren’t familiar with flower biology. How
large are the flowers? If they are in a
wand or column shape do they open first at the top or bottom? Can you see male
and female flower parts or just one sex? What color is the pollen if you see
any? Is there a scent to the flowers?
If there are
seed pods what shape and color are they? What shape, size and color are the
seeds?
Never taste
plants for identification. Until you
identify a plant and know it’s safe keep it out of your mouth. Some plants can seriously harm you with just
a taste.
Try to jot
down some notes to help you identify the plant whether or not you take a photo
or specimen, as to where it was growing, growing conditions, size of plants and
the number of plants and of course answering the questions above.
Don’t pull or
cut specimens to take home to identify unless the plant is on your property or
you have permission. A single leaf, flower, or seed pod may not be sufficient
for identification in some cases. If you
are taking a specimen try to take the entire plant, or at least a small branch,
along with any other parts like flowers you can gather. If you are going to take them to someone to
ID make sure you keep the specimen as fresh as possible until then.
 |
| Sticktight, aka beggerticks, Bidens frondosa |
If you can
take a picture of the plant do so. Pictures are a great aid to memory. But blurry pictures or pictures taken from a
distance often don’t help much in identifying the plant. When taking pictures try to get a close up of
foliage, how leaves attach to the stem, stems, flowers and or seeds. Make sure it’s clear what foliage is attached
to what flower or seed pod that is in the picture. Sometimes people take a picture of a flower
peeking out of a jungle of all different types of foliage and it’s not clear
what goes with what.
Most cameras
allow you to check the photos on the device to see if they are blurry. Check and take better pictures if needed.
So now that
you have a specimen or picture and notes where do you start? There are thousands of plant species and you
need to narrow your search down in some way.
First consider whether the plant may be native to your area, an
introduced weed or a cultivated plant. If you have a hunch or think the plant
resembles another plant that you do know, start there.
If you found
the plant on a walk in what seems to be a wild area start by looking in identification
books for native plants in your region.
Narrow it further down by deciding whether it’s a woody plant, (a tree or
shrub), or not. Identification
books/sites usually separate these types of plants. If it was growing in water or a marshy area
you can further narrow the search, most ID books/sites separate wetland or
aquatic plants. After those traits
narrow the search, various ID books/sites have different ways to further narrow
the search. Some may use flower color,
bloom time or plant families to group plants for ID.
Knowing
characteristics of a plant family can really help narrow down a plant ID search. For example, plants in the mint
family (Lamiaceae) usually have square stems and aromatic leaves. If your
mystery plant has these, you could narrow your search considerably. I can’t go
into plant family characteristics here but here’s a tip. If you are using a search engine online type
in – daisy family or mint family – or orchid family and so on if you think the
mystery plant looks like one, and you will get the Latin family name, which can
help narrow your search.
If the plant
you are trying to ID is in your garden then it could be a weed or a cultivated
plant. Using a weed ID book may be the
place to start. They are usually divided
by grassy weeds and broad-leaved weeds.
If you think the plant is a cultivated plant, there are books and sites
that describe common garden plants.
Garden catalogs may also help, especially if you have a flower as part
of your specimen or photo. You may also
try herbal books, like I did to identify my mystery plant.

A note about
cultivated plants. These plants may be
changed from the original wild form of the plant by selective breeding. They may have different colored flowers or
flowers that are double or unusually shaped. Foliage may be different colored
or shaped than the original species.
If neither a
native plant ID book/site or cultivated garden plant ID book/site help, try
using an invasive plant list for your area.
Most of these include pictures and detailed descriptions of plants.
Use a picture
of a plant only to get you started in the right direction. Pictures can be deceiving unless they are
close up and detailed, including foliage and the plant form and some way to
determine size. Once you locate a
picture of something that resembles your mystery plant then you look up a
detailed description of that plant and compare it to the unknown plant.
It’s very
important to match up all plant parts before you say you have made an ID. There are several plants with yellow daisy
like flowers for example. You need to
match up the leaf, stem and growing habits as well as flower color and
shape. If a plant has narrow, opposite
attached leaves on a multi-stemmed bushy plant, it isn’t the same plant as one
that has a single stem with broad leaves that are arranged alternately on the
stem, even if the flowers look similar.
There is no
doubt that it is going to take some time and effort to ID a plant. Think of it
as a learning game, because each time you identify a plant it will get easier
to identify other plants in the future.
And even experts need help sometimes from other experts, some rare
plants may be hard to identify.
 |
| Star of Bethlehem (Ornithogalum umbellatum) |
Taking the
easy way out
For some of
you though, the task of identification will seem too daunting and you will
choose the easy route- asking someone else.
This happens on garden websites all the time. However not all the answers you will get will
be the right ones. Probably the best
site for a good ID is this one; https://www.facebook.com/groups/156706504394635/
On this site
it’s strictly ID and the post is closed after the correct answer, instead of
allowing a million guesses. The Latin name is usually given as well as common
ones.
On other
sites you could get a dozen answers to your mystery plant’s ID. Choose the answer with the most likes or
posted the most times. Then do a lookup
on a good ID site and compare the results there with your specimen.
Some county
Extension offices will have someone on hand to do plant ID or a lab where you
can send specimens. Ask them what their
procedure is and whether they need a specimen or if you can send a picture for
ID. Some public gardens and larger
retail garden centers will ID plants.
Call and ask first before sending photos or bringing in specimens.
If you are
posting a picture for others to ID make sure it’s a good clear one and try to
include as many details as you can. Shots from different angles and of
different plant parts are good. The
picture must be a close up , not shot from 100 yards away.
There are
some things that are almost impossible to identify from a picture. A very young seedling with only the first set
of seed leaves, cotyledons- is hard to ID.
Sometimes a single plant leaf can get you an ID, sometimes it can’t. Plant
roots and seeds can also be hard to identify.
It’s almost
impossible to post a picture of a daylily (or other garden plant) leaves and ask
someone to identify the name (cultivar or variety) of the plant. Even posting a picture of a flower- a red tea
rose for example- may not get you the correct variety name. Sometimes the foliage or flower is so unique
a cultivar name can be given but most times it cannot.
What about
those plant ID apps? You take a picture
and the app ID's the plant. Most of these
apps aren’t very accurate. If you use
them make sure to cross check with another identification source.
Here are some
ID books I use A Modern Herbal,
(2 volumes), M. Grieve, Weeds of the Northeast, Uva, Neal and
DiTomaso, Dirr’s Hardy Trees and Shrubs, Dirr, Armitages
Garden Perennials, Armitages Manuel of Annuals, Biennials, and Half Hardy
Perennials. I also have a set of
old Golden Books- the field guides to trees, wildflowers, water plants, ands so
on. Every gardener should have some good
plant ID books on hand.
I’ll
certainly remember valerian now. Even
though I thought I had seen the plant before, I hadn’t paid enough attention or
had enough contact with the plant to remember it. Now that I spent time identifying it, I’ll (hopefully)
remember it.
“On this June day the buds in my garden
are almost as enchanting as the open flowers. Things in bud bring, in the heat
of a June noontide, the recollection of the loveliest days of the year, those
days of May when all is suggested, nothing yet fulfilled.”
-Francis King
Kim Willis
All parts of this blog are copyrighted and may not be used without
permission.
And So On….
Find Michigan garden events/classes
here:
(This
is the Lapeer County Gardeners facebook page but all gardeners anywhere are
welcome)
Newsletter/blog information
I write this because I
love to share with other gardeners some of the things I come across in my
research each week (or things I want to talk about). It keeps me engaged with
people and horticulture. It’s a hobby, basically. I hope you enjoy it. If you
are on my mailing list and at any time you don’t wish to receive these emails
just let me know. If you or anyone you know who would like to receive a
notification by email when a new blog is published have them send their email address to
me. KimWillis151@gmail.com


