Tuesday, September 12, 2017

September 12, 2017, Kim’s Weekly Garden Newsletter

“-here and there a yellow leaf shows itself like the first gray hair amidst the locks of a beauty who has seen one season too many."
-   Oliver Wendell Holmes


Fall is here, even if the calendar doesn’t say so yet.  At least here in Michigan it is, the leaves are beginning to turn and everything looks a bit old and jaded.  The light is softer and weaker, the mornings shrouded in fog.  We’ve had some really cold nights here 38 degrees one night, but I won’t let my husband turn on the heat just yet.  I still want the windows open too so I can hear the crickets and smell the wood smoke in the air.  I want to squeeze every bit of summer out of the season.  So I just get out my warmest nightgowns and sweaters.


My hardy hibiscus are finally blooming, that’s it, there’s no more first blooms left unless you count the cup and saucer ( Cobaea scandens) vine that’s growing on the rails of the ramp.  I started it from seed and planted it in front of the ramp where a “spot light” of sun peeks through the mostly shaded area.  It’s grown like crazy and now has lots of buds but it looks like it will be a race between it blooming and frost.


Harvest is wrapping up.  Our apples are beginning to ripen; my husband picked the red delicious today.  This week I begin to tear up the vegetable garden, removing all that’s left but maybe the tomatoes and peppers. We are supposed to have a warming trend for a week or so and some more tomatoes and peppers may ripen.


I’ve got the chicken coop cleaned out and ready for winter.  Pullet eggs are beginning to be laid from the new batch of hens I’m raising.  The chickens are going to bed by 7 pm now, another sign the summer is leaving.


I worked this weekend to get the windows cleaned and new hangers up for plant grow lights.  I’m going to begin bringing in the houseplants that summered outside, a few at a time because it’s a major job.  I hate to bring them inside because they do so well outside, but I don’t like to be in a rush to do it, as when a frost is coming that night.

The remnants of hurricane Irma may brush us tomorrow.  We need some rain.  I really feel sorry for those of you who may have lost whole landscapes to Irma’s destruction.  All the stately old trees, the beautiful flower beds, destroyed by wind and flooding.  It hurts to think about it.  But plants grow back.  Some people lost their homes and even their loved ones. Those wounds are much harder to heal.  I’m hoping for sunny mild days and calm conditions and lots of help for those of you in Florida and other places Irma visited, so you can begin to re-grow your lives as well as your gardens.


Frost- why it happens and what to do


For most of us the first frost is rapidly approaching.  I narrowly escaped losing my indoor plants to frost on Saturday night.  I was waiting before bringing them in because the weather is supposed to warm again.  But Saturday night the temps lowered to 38 and the dew point to 36- and that’s getting close.  Luckily I can see no damage to my plants, even the tropical ones, from the cold.


Frost can occur when the air temperature is above freezing if the dew point is at 32 degrees or less.  The dew point is a measure of when moisture will condense out of the air and form dew or frost on objects that are as cool or cooler than the air. Drier air has a lower dew point. Things above ground, cars, roofs, your plants will be slightly colder than the air temperature and when the dew point is 32 and the air temperature 35 degrees or so the dew becomes frost. The surface of the objects with frost on them was 32 degrees even if the air was not.  Moist soil helps dew or frost occur, as moisture is drawn out of the ground. Plants also transpire or give off moisture.


A freeze occurs when the air temperature is 32 degree or less, regardless of the dew point.  Frost also occurs with a freeze if the dew point is 32 or below.  But you can get a freeze without having frost.


Wind, even a light breeze, can prevent frost from forming because it mixes warmer air from higher in the atmosphere into the colder air laying close to ground level.  When it’s cloudy and the temperatures are above freezing frost generally does not occur because the heat from the ground does not radiate off into the sky.  Clouds act like a blanket.


The best time to get frost is when the dew point is 32 degrees or lower, the air temperature in the 30’s, winds are calm and sky clear. Day temperatures will probably not have been above the 60’s.  Gardeners who are worried about bringing in or protecting plants should watch the weather predictions carefully on those fall days when they know it’s going down to 40 degrees or lower at night and clear calm conditions are predicted.  The National Weather Service will issue a freeze or frost warning but that sometimes doesn’t happen until the evening when the frost is predicted.


You should also know when the average first frost for your area will be.  I have provided a map from the USDA but you should also ask gardening neighbors or your local county Extension office for more exact information.  My average first frost is around October 1 so I like to have tender plants inside before then.  The weather in September is my guide though. 


There are also micro climates in every area which could be colder or warmer than the general area.  Your home area could experience frost before your neighbors.  Generally low areas and very exposed areas will be more susceptible to frost.  Areas next to house foundations or on higher ground are less likely to get frost early.


Frost and your garden

Many perennials hardy to your area will not be affected by the first light frosts.  But tender perennials and most annuals will be harmed by even light frost.  Some annuals will not be affected until a hard frost or freeze, this is when temperatures dip into the 20’s.  Frost damage generally causes blackened, wilted foliage.  It can show up in just a few hours after frost exposure.  After a light frost only the top leaves of plants may be affected and some plants will recover from the damage and bloom a while longer.

Frost damage


Move most houseplants and tender tropicals inside before the first frost, when temperatures start falling into the low 40’s at night.  There are some plants that are considered half-hardy perennials, like the horticultural geranium (pelargonium).  They will survive light frosts, the leaves may redden a bit, and keep blooming until a hard freeze.  You’ll want to bring them in before then if you want to save them.  Other perennials you may over winter inside because they aren’t quite hardy in your area don’t mind being out a bit longer and shrug off light frost.  In my case this is rosemary. I leave it outside until the ground is frozen the first time.


In the vegetable garden tomatoes, peppers, eggplant, beans, melons and cucumbers will be killed by frost.  Cabbage, lettuce, kale, carrots, beets, will be fine through light frosts but should be harvested before a hard freeze.  You can throw an old sheet or some floating row cover over your tender plants if you want to prolong the harvest just a little longer.  This may be helpful if first frost is predicted earlier than normal.  If it’s late in the season it’s probably best to harvest what you can and let the plants die.


You can leave bulbs you store inside over winter, like dahlias, canna’s and gladiolus, outside until frost has killed the foliage but dig them before the soil freezes.  Tender bulbs in pots can be left until the foliage dies but bring the pots inside before they freeze solid. Things like pumpkins, gourds, and popcorn can be harvested after a frost, but pumpkins and gourds shouldn’t be allowed to freeze.


If you want to prolong the bloom of annuals or tender perennials like marigolds, petunias, impatiens, cosmos, and so on, you can cover them when the first frost is predicted.  Use a light weight cloth or spun row cover material, not plastic.  (I use old sheets.) You must remove the covering early in the morning before the sun heats things up very much.  This is best done when there’s an early frost and many more warm days are ahead, or you got caught off guard and don’t have time to move plants inside.  You can’t protect plants forever this way and it won’t protect them if the temps fall into the mid 20’s or below.


There are some annuals and tender perennials grown as annuals that will survive quite a bit of cold.  This includes violas and pansies, some salvias, diascia, wax begonias, and calendula.  Let them bloom until they die.  I have had the occasional petunia bloom until Thanksgiving here also.


Plants you can save for next year


I also have to mention here that some tender ( non- hardy) perennials people think of as annuals can make good houseplants if brought inside or at least will survive until you put them out again the following year.  This includes polka pot plant, Setcreasea pallida 'Purple Heart', “spikes” (various dracaena species), sweet potato vines, the small flowered fuchsias, the geraniums (pelargonium), many of the various ivies used as pot “spillers”, coleus, fibrous rooted and cane begonias, rex begonias, Joseph’s coat (Alternathera ficoidea), lantana, aloes and agaves, Cuphea (cigar plant), eucalyptus, Chinese (tropical)hibiscus, abutilon, bougainvillea, mandevilla, gardenia and lofos.


Don’t bring numerous plants of the same species inside unless you have tons of room.  You can start cuttings from the ones you save in the spring.  You could also take cuttings of many of these in the fall and keep them inside as small plants.


If you live in zone 6 or below you may want to bring any rosemary plants you have inside once freezing conditions arrive but keep them in a cool room.  Lemon verbena and lemon grass can also be wintered inside.  While tomatoes and peppers are tender perennials unless you have a greenhouse or a special grow area with intense artificial light don’t try to bring them inside.


True annuals such as zinnias, marigolds, cosmos and so on might bloom inside for a few weeks but they will soon die. Cold hardy perennials like hosta, echinacea, phlox and so on need a cold dormant period and won’t do well when brought inside.  Save your indoor space for perennial plants that can handle inside conditions.


So here’s the timeline-houseplants and tropicals before the first frost, when nights are getting into the 40’s, right before the first frost or after a light frost bring in tender perennials you’ll be saving, then bring in those almost hardy in your zone perennials before a hard freeze along with pots of bulbs gone dormant and dig up tender bulbs in the ground for storage.  Six months or so inside and we’ll be moving it all back outside.


Collecting and storing seeds


As the gardener strolls through the garden in late summer and fall he or she may notice a lot of seed pods hanging on various garden plants, maybe on some plants you never dreamed you could start from seeds. Wilderness hikers and people touring public gardens may also notice various seeds that they would like to collect.  Use some sense in these instances, many parks prohibit removing any plant material, and you should ask permission from someone in charge of a public garden before collecting seeds.  Gardeners want to help plant babies grow.  But collecting the seeds won’t help you grow new plants if you don’t know when to collect the seeds and how to store them.


Before you begin collecting seeds from common garden plants remember that many plants we grow in gardens today are hybrids.  The seeds you collect from hybrid plants will produce plants that probably will not look like the parent plant.  They may be excellent producers or have beautiful flowers or they may not be the best looking or producing plants.  Even if you planted several varieties of purebred “open pollinated” plants in the garden they may have cross pollinated and the seeds won’t produce plants like the parent you collected them from. It’s a gamble. 


Many times when seed from hybrid plants is collected and grown the next generation tends to revert to the wild or most common form of the plant.  Morning glories and phlox are two species that come to mind.  This reversion tends to get greater with each generation of seeds collected and grown.  You may have planted Heavenly Blue morning glories this year and collected their seeds.  Even if you only had Heavenly Blue morning glories in your garden the seeds will produce some plants that have blue flowers but also some with other colors, most often the purple of the wild morning glory.  When you collect seeds the second year the third years plants will have even fewer blue flowers. 


This doesn’t mean you won’t want to try collecting and growing seeds from hybrid varieties.  Sometimes you may get some truly interesting or beautiful plants from those collected seeds. 


Make sure they are ready

In most cases you want to collect the seed when the seed pod or fruit surrounding the seeds is fully ripe.  Since we eat some fruits before they are fully ripe, like cucumbers, you must know what a ripe fruit looks like for that plant and wait to harvest the seeds. A ripe cucumber is all yellow.  Corn should turn dry and hard on the stalk before saving seeds.  Melons should be mushy ripe and the seeds black or dark brown for watermelon before harvest.  Peppers must be fully ripe- and they can be many colors when ripe- and soft.  Tomatoes must be ripe to the rotting point.  Most flower seed pods or seed heads turn brown and dry when the seeds are ready to harvest. The opening of pods means the seeds are ripe.
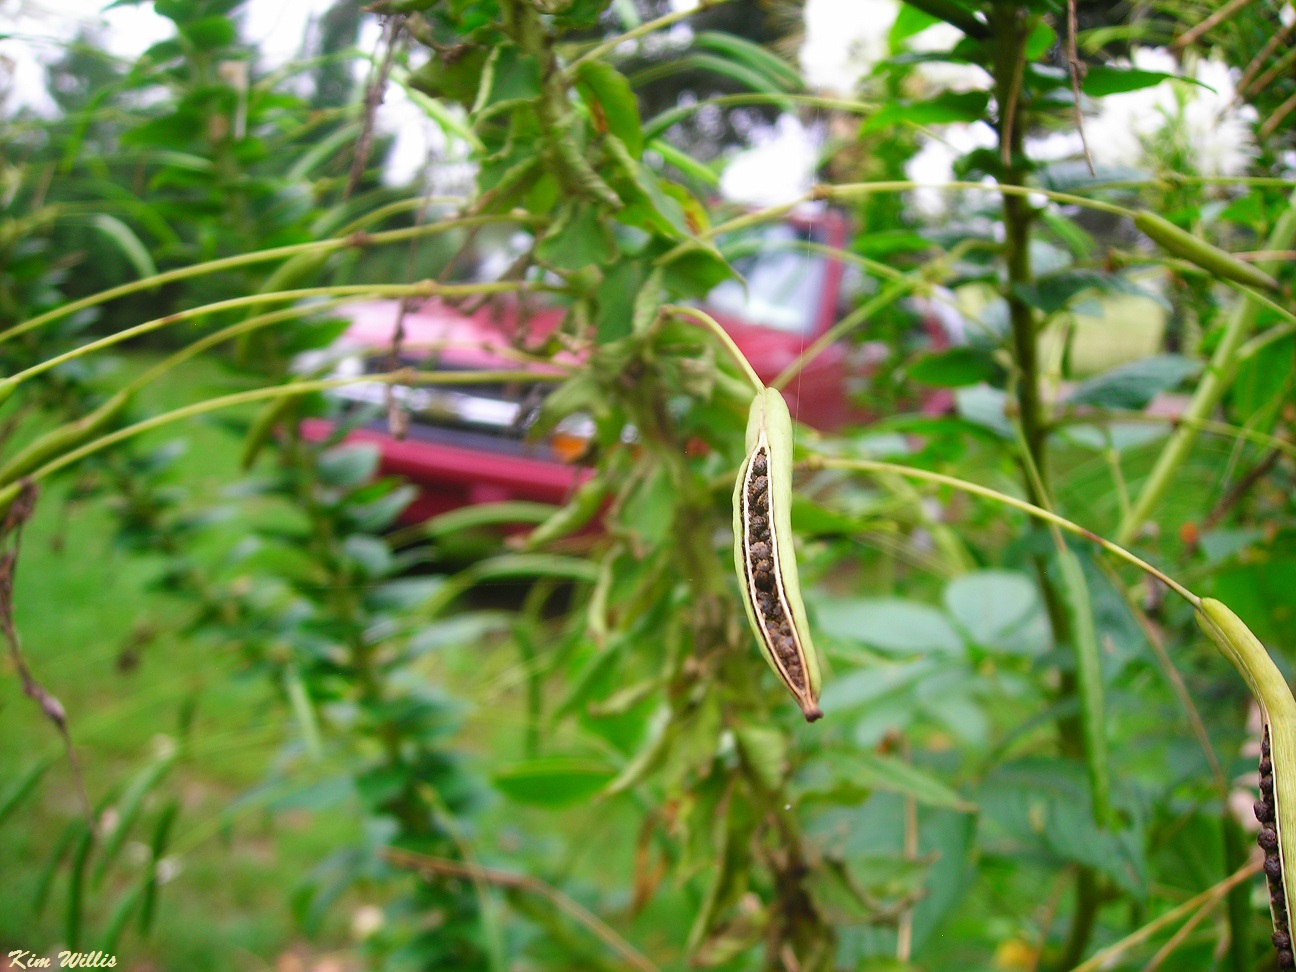
Cleome seed pod splitting


Collect seeds on a warm, sunny dry day if at all possible.  It’s best to collect most types of seed before a heavy frost or freeze but collection after that can still work for many seeds.  The trick in collecting seed pods and seedheads to get the seeds is to not let them split or otherwise disperse the seeds before you collect them, but have them still be mature.  Keep a close eye on ripening pods and seedheads.  On a warm day a closed pod in the morning may have shot off the seeds or dropped them on the ground by evening. If seed pods and seedheads are almost dry and nearly ready to harvest you can cut them and put them in paper bags in a warm dry place to finish drying.  Separate the varieties and species because they may drop the seeds.  Label your bags! Or you can surround seed heads or pods with paper bags and tie them right on the living plant.

  
Sometimes gardeners have a hard time distinguishing the actual seeds from the seed pods, or remnants of flowers and fruit.  Put the ripe seed heads or pods in paper bags, close and shake them.  You may see loose seeds in the bottom.  In most cases a ripe pod or seed head will split or otherwise open or drop its seeds, but in some cases even ripe pods must be opened. If you can’t decide if it’s a pod or an individual seed try opening one. Some flowers like Echinacea, rudbeckia, zinnia and others with daisy like flowers will have a bit of dried petal attached to the seed. Even when dry some of these flower heads must be pulled apart to separate the seeds.


Sometimes fruit needs to rot


In some cases for seeds to be properly stored and then sprout, the fruit must first rot or ferment.  While you can cut open a very ripe tomato and extract the seeds for storage, it’s better to let the tomato turn to a rotting, fermenting mush before separating out the seeds, drying them and saving them.  Germination rates will be higher.  Rotting fruit keeps seeds moist for a while.  And chemicals caused by the decomposition process may be necessary in some cases to soften the seed coat.


Many seeds are prepared for germination in nature by passing through some animal’s digestion system.  You can ferment or rot fruits in a nicer way though.  Simply place a ripe fruit in an open container and let it sit for a while.  You can cut the fruit in pieces if you want. Tomatoes, eggplant, grapes, berries, summer squash and cucumbers benefit from letting fruit rot and ferment before saving the seed.  Label the container if you have several varieties of something like tomatoes to ferment.  You’ll want to put the containers somewhere where you don’t smell them and the flies they attract won’t bother you.  Make sure animals can’t eat them. 


Let the fruit rot until it’s a watery, smelly unrecognizable mass.  Then put the contents in a fine wire mesh strainer and gently rinse with clean water until clean seeds are left in the strainer.  Spread the seeds on a piece of screen and let them dry in a warm, dark place until they look and feel thoroughly dry before storing.   If you spread the seeds on newspaper or paper towels they often stick to the paper as they dry and can be hard to remove.

Ligularia seeds

Storing seeds

When you do have the seeds separated from pods and fruit let them dry for a few more days in a warm dark location.  Almost all garden seeds need to be thoroughly dry before storing them so they don’t mold or rot.  Clean out pieces of stem, pod and other debris before storing.  It’s best to place seeds in paper packages, even a twist of tissue or fold of newspaper, before placing them in sealed glass or plastic containers. (A tip- cut junk mail up into small rectangles, fold them in half and tape the sides shut.  Fill with seeds and tape the top shut. ) Paper absorbs moisture.  You can add a bit of powdered milk wrapped in tissue to each container to absorb moisture too.  Once again- label containers and packets, there’s nothing worse than forgetting what kinds of seeds you carefully saved.  And I tell you that from experience.


After your seeds are packaged store the seeds of most common garden plants in the refrigerator crisper drawer or another cool, dry dark spot.  Most plants grown in temperate climates, both annuals and perennials, need a period of cold dormancy before they germinate.  Even if they don’t they will store better in a cool location.  Some tropical plant seeds may do better in warmer storage and some seeds may actually need freezing temperatures to properly prepare them for germination.  A few types of seed need to be stored moist.  If you are saving some unusual seeds you may want to research how to store them.


There are some seeds that should be planted soon after you collect them.  If they are cold hardy you can plant them outside. Otherwise plant them in pots inside.  The sooner they are planted the better germination will be. These plants include:
Anthurium, Asparagus species, Clivia, perennial Delphinium, Geranium (Pelargonium), Gerbera, Ginkgo, Impatiens, Kochia, Oriental lilies, Philodendron, Magnolia, onions, Passiflora, Potentilla, Salvia splendens, Tanecetum coccinium (or Pyrethrum).


Hosta and most types of lily seed other than Oriental have better germination if sowed as soon as collected but can be stored until late winter and started inside.  They should be kept in cold storage- refrigerator- until planted.


So have fun- get out there and gather those seeds.  You can trade with other gardeners for things you don’t have.


Peace Lily


Do you want a houseplant that will bloom without a sunny window?  Or a tropical looking plant for the shady porch or patio?  Why not try a Peace lily?  Spathiphyllum species are not true lilies and have been used as houseplants for hundreds of years. (A common name is spath lily). Peace lilies are great indoor air cleaners, removing harmful particulates from indoor air.   And best of all peace lilies are fairly easy to grow and are a great plant for beginning indoor gardeners.  They also make great patio container plants in the summer in shady areas.


There are some 40 species of peace lilies, they are native to South America, and southern Asia, and many are in cultivation.  They range in size from about a foot tall to over 6 feet tall at maturity.  Two small varieties are ‘Sonia’ and ‘Little Angel’.  ‘Domino’ and ‘White Stripe’ have leaves variegated with white.  One of the largest varieties of peace lily is ‘Sensation’ which often gets 6 feet tall and has huge leaves.  Most plants gardeners will find in stores will be simply marked “peace lily”.  They have green leaves, white flowers and get 3-4 feet tall.

Gardeners will want to start with a peace lily plant.  You’ll see seeds advertised, but peace lilies are hard to start from seed, slow growing and take years to bloom from seed.  Plants are propagated by division for quick growth and bloom.

The large, glossy green leaves of Peace lilies appear to rise right from the soil, there is no noticeable main stem.  This nice, glossy foliage is one of the best attributes of the peace lily, whether it’s one sitting on your desk or filling a shady spot on the deck.  There are a few varieties with white variegation in the foliage.

In spring and into summer peace lilies that are happy and healthy will have numerous white blooms similar to a calla lily bloom.  There is a rod shaped, white bumpy true flower surrounded by a big white bract, which most people see as a flower.  Large plants will bloom for 2 months or more, with several flowers blooming at a time.  When the flowers turn greenish, with browning edges cut the flowering stalk off.  The flowers are interesting but the plants foliage is pretty all year around. 

What Peace lilies need

Peace lilies like bright, indirect light.  They can be several feet from a west or south window, by a north or east window or even do well in brightly lit rooms without windows. If many leaves are turning yellow or looking browned on the edges or the leaves look bleached out the light level is too high.  Don’t let leaves touch cold windows.  When moved outside peace lilies must be kept in a shaded area, direct sun will quickly kill them.  My peace lily sits outside in the summer under a cedar tree, with sunlight only filtering through late in the day.  It absolutely loves it there and blooms all summer.

Peace lilies want temperatures about the same range as humans like, 65-85 degrees, with no cold drafts.  They will not survive temperatures that go below 45 degrees so wait before bringing them outside in the spring until it has warmed up and bring them back in before temperatures drop too much in the fall.  When they are outside keep Peace lilies protected from the wind. Of course they will gladly stay inside all year round if they are not situated over an air conditioning vent. 

Peace lilies have one special requirement, moisture- they need a fairly high humidity level and even soil moisture.  Keeping them in groups of other plants, giving them a shower once in a while, or using a humidifier in the home will help keep them glossy and happy.  Plants like growing by aquariums or water features also.  They are excellent plants for brightly lit bathrooms and laundry rooms.

Water the Peace lily as soon as the pot gets just a little dry, but before it wilts. When you do water, soak the pot well and let it drain from the bottom.  Wilted plants will generally recover when watered but don’t allow this to happen too often as it stresses the plant.  Using rain water, untreated well water or distilled water is better than chemically treated city water for all plants.

Use fertilizer sparingly on Peace lilies; start fertilizing in late winter using a flowering houseplant fertilizer mixed according to directions at every other watering.  Stop fertilizing in mid-summer.  Some growers claim Peace lilies are sensitive to artificial fertilizers and use only natural fertilizers like fish emulsion.  But others say it doesn’t make much difference what type of  fertilizer you use.  I use a commercial fertilizer that I use on all my houseplants and my peace lily thrives on it.

Peace lilies don’t require a lot of pruning or shaping.  Trim off any dead leaves or flowers.  Re-pot the plant only when it is so root bound that it needs very frequent watering or is splitting the pot.  They don’t mind crowded roots and bloom better when a little pot bound.  Use any light weight potting medium when you re-pot.  Aphids are occasional problems for indoor peace lilies.  You can treat them with an insecticidal soap spray or houseplant insecticide.

Peace lilies are mildly toxic to pets, keep pets from eating them (and the kids too).  They contain oxalate crystals which will cause a burning sensation in the mouth so pets rarely consume enough to be harmed.  If they did continue eating them they would begin vomiting long before they ate a toxic amount.

With a name like peace lily everyone needs one of these beauties in their home.  Maybe we should place them all over the senate and congress floors too.

Tailgate Apple cake

Let me make this clear- I don’t do tailgate parties. But this apple cake would be excellent for one or for a potluck or just a great dessert.  I make this a couple of times in the fall when apples are plentiful.  It’s a good way to use apples that aren’t perfect too.

Ingredients
 
6 cups of peeled and sliced apples
4 tablespoons of butter
1 cup of brown sugar, packed
1 spice cake mix
3 large eggs
1/3  cup oil or melted butter
½ cup water
1 jar of caramel ice cream topping

Directions

Melt the butter in a large skillet, add the brown sugar and apple slices, cover pan and cook on low heat until the apple slices are tender, about 5 minutes.  Stir the cooking apples frequently.

Spray the bottom and sides of a 9 x 13 cake pan with cooking spray.  Instead of spraying a pan it could be lined with non-stick foil for an easy clean up.

When the apples are tender, pour skillet contents in the cake pan and spread them evenly over the bottom of the cake pan.

Mix together the cake mix, eggs, oil and water.  Pour the mix over the apples in the pan.  Bake the cake at 350 degrees until a knife inserted in the middle comes out clean- 30-40 minutes.   

Let the cake cool about 5 minutes then poke holes evenly across the surface with the handle of a wooden spoon, skewer or similar item.   Pour the caramel ice cream topping over the cake evenly, it will be absorbed by the cake.

This cake is great served warm with cool whip or ice cream.  It also freezes well.

Soak up that sun; let your body store the goodness for winter
Kim Willis
 “He who has a garden and a library wants for nothing” ― Cicero

© Kim Willis - no parts of this newsletter may be used without permission.

And So On….
Do you have plants or seeds you would like to swap or share?  Post them here by emailing me. You can also ask me to post garden related events. Kimwillis151@gmail.com


Find Michigan garden events/classes here:
(This is the Lapeer County Gardeners facebook page)
An interesting Plant Id page you can join on Facebook

Here’s a seed/plant sharing group you can join on Facebook

Newsletter/blog information

If you would like to pass along a notice about an educational event or a volunteer opportunity please send me an email before Tuesday of each week and I will print it. Also if you have a comment or opinion you’d like to share, send it to me or you can comment directly on the blog. Please state that you want to have the item published in my weekly note if you email me. You must give your full name and what you say must be polite and not attack any individual. I am very open to ideas and opinions that don’t match mine but I do reserve the right to publish what I want. Contact me at KimWillis151@gmail.com

I write this because I love to share with other gardeners some of the things I come across in my research each week. It keeps me engaged with people and horticulture. It’s a hobby, basically. I hope you enjoy it. If you are on my mailing list and at any time you don’t wish to receive these emails just let me know. If you know anyone who would like to receive a notification by email when a new blog is published have them send their email address to me.  KimWillis151@gmail.com


Tuesday, September 5, 2017

September 5, 2017, Kim’s Weekly Garden Newsletter


"The breezes taste
Cosmos
Of apple peel.
The air is full
Of smells to feel-
Ripe fruit, old footballs,
Burning brush,
New books, erasers,
Chalk, and such.
The bee, his hive,
Well-honeyed hum,
And Mother cuts
Chrysanthemums.
Like plates washed clean
With suds, the days
Are polished with
A morning haze."

-   John Updike, September

Hi Gardeners

Have you ever walked by your garden and saw something you didn’t know was there?  This has been my year for that.  I think of myself as an observant person when it comes to nature and gardens but I guess I’m getting old.  Today when I walked by the akebia, chocolate vines, covering the fence on the east side of the vegetable gardens, I noticed the fat sausage like fruits clustered in the vine.  This is exciting- it’s the first time I have had fruits from the plants.

I have been picking blackberries close to the vine for the last month and never noticed the fruits.  The fruit looks like light green bananas right now so it isn’t ripe yet and I sure hope it gets a chance to ripen before frost.  I planted the plants, 2 varieties ‘Silver Bells’ and Violet’  five years ago and they have bloomed every year but never had fruit.  There’s not a lot of fruit but hey, I feel quite thrilled I have any.  I have an article about the plant below.

Well it’s September, how did that happen?  The garden is looking very mature.  The annuals are still going strong, sweet autumn clematis is in bloom, and the clematis by my barn door has a new flush of blooms.  The toad lilies are blooming, the little white asters are peaking out here and there around the garden. 

I have big buds on my hardy hibiscus but they haven’t bloomed yet for some reason.  Also left to bloom are the spider lilies, they are peeking up out of the ground now.  I have them potted because they aren’t hardy here.  At least I can bring them inside if they don’t bloom before frost.

I ordered bulbs this week.  You can’t have enough tulips.  I also ordered a couple new bulbs I haven’t had before, I try new things each year.  I ordered Fritillaria camschatcensis (Black Lily),  Fritillaria persica, and some Camassia quamash.  What have you ordered?

Colder weather is on the way here.  I have been getting prepared to move the houseplants back inside.  At least I am not racing to save them from a hurricane.  You folks on the east coast and in Puerto Rico take care and remember plants can be replaced.  Maybe you’ll get lucky and Irma will fizzle out but it’s not looking good so take care.
 
Fruit of the chocolate vine
September almanac

The Harvest moon occurs this month on September 6th. It’s called the harvest moon because farmers often used the light of this month’s full moon to complete their harvest.  It’s early this year and I doubt few harvests will be complete. Moon perigee is the 13th and apogee is the 27th.

The autumn equinox, the start of fall is September 22nd.  We’ll be down to 12 hours of daylight then, give or take 8 minutes, depending on where you are.  On this day the sun sets exactly due west and rises due east of your home.  Go outside and position a marker or note it on a landmark if you are into marking astronomical events.  Then you will always know the true directions around your home.

The birth flower for September is the aster or in some places, the morning glory.  Asters are said to symbolize powerful love and morning glories just affection so choose the flower you give this month accordingly.  The September birthstone is sapphire.

September is Hispanic Heritage Month, National Chicken month, Honey month, Classical Music month, National Preparedness month, and International Square Dancing month.

Besides Labor Day (4th) holidays in September include Grandparents day the 10th (who honors us grandparents anyway?) Patriots day on the 11th, the 13th is National Peanut day, the 14th is Pet Memorial day, the 19th is National POW-MIA day, 21st is International Peace Day, the 26th is Native American Day and the 28th is both Good Neighbor Day and Ask a Stupid Question day. 


Growing Chocolate Vines- Akebia quinata

Do you need a hardy vine for a sunny or partly shaded spot that’s unusual?  Do you want something pretty that covers an eyesore or arbor quickly? Try a Chocolate vine or as it’s sometimes called, Raisin vine or Five Leaf Akebia.  Chocolate vines grow quickly, have sweet smelling flowers and produce an edible, decorative fruit.  They are hardy in planting zones 4-8.  The plant is native to Japan and other parts of Asia.  There are several species in cultivation.  Named varieties include “Silver Bells”, “Violet” and “Purple Bouquet”.

Why this vine is called Chocolate vine is unknown.  The vine has leaves consisting of 5 rounded leaflets. There is a variety with white variegated leaves but it is hard to find. The vines can keep their leaves all winter in warmer zones but usually shed them in the fall in colder zones.  In hard winters the vine can die back to the ground but will quickly recover in spring.  The vines can grow 40 feet in a year and quickly cover a trellis, fence or out building.  They will grow in sun or partial shade.

Akebia, Chocolate vine flower
Some southeastern states are labeling the Chocolate vine as invasive, but in colder zones it is no more invasive than wisteria or trumpet vine.  If you are a gardener who has either of those vines you can guess that Chocolate vine is a vigorous grower and it is when it’s in a good spot. It can spread by runners and will cover a lot of ground if unchecked but in northeastern states it rarely spreads to the wild.  Vigorous pruning and keeping runners mowed or chopped down will contain the plant.  In northern zones plants rarely propagate naturally by seed.

Chocolate vine flowers and fruit

Chocolate vine has tiny flowers in mid-spring to early summer in dangling clusters.  The sepals of the flowers look like petals and can be white, pink, yellow and shades of purple. Older plants in full sun are loaded with flowers in spring and quite attractive. Depending on the weather and species chocolate vines can flower before leaves emerge or when the leaves are still small. They have a sweet scent but its more lilies of the valley or lilac smelling than chocolate.  The smell isn’t overpowering but will pleasantly scent a garden or yard.

If the flowers of Chocolate vine get pollinized they turn into fat, sausage shaped blue or purple seed pods about 5 inches long which are attractive on the vine.  These ripen in late summer-early fall. The pods are filled with a creamy white roll of thick jelly-like material studded with tiny round black seeds.  The jelly is edible, but once again it doesn’t taste like chocolate. It’s the texture of marshmallow or custard and is sweet but bland.  In Japan jelly is made from the pulp.  The pods are sometimes filled with rice and meat and deep fried.

Pollination of the Chocolate vine can be a problem. Some gardeners get tons of fruit pods, others none.  Bees don’t seem too interested in the plants. It may be that beetles or some other insect pollinate the chocolate vine in Japan. In the north the flowers may occur before many pollinators are out or be frost damaged. It may also be that some plants are just more fruitful than others.

While each Chocolate vine flower has both male and female parts they don’t self-fertilize and at least two plants are needed to get fruit. Many growers recommend two different varieties or species for best pollination and offer two species in pairs to buyers. However other growers feel that two plants, whether the same species or not will be enough for pollination.  If you aren’t getting fruit pods it’s suggested that you can pollinate flowers with a paintbrush, moving pollen from one plants flowers to another plant’s flowers. 

Planting Chocolate vine

Chocolate vine will grow in most places but prefers a light or sandy loam soil. Best flowering and fruiting occurs in full sun but Chocolate vine will grow in partial or even full shade in some cases.  Indirect bright light such as on the north side of buildings is fine.  Chocolate vine doesn’t need fertilization unless your soil is very poor.  It prefers moist but well drained soil but can withstand dry periods.

Plant your Chocolate vine next to a sturdy support as it can overwhelm and topple flimsy supports.  The different vines needed for pollination can be at least 20 feet apart perhaps more.  Some people have used Chocolate vines as a sprawling ground cover for preventing erosion with great success.
 
Prune Chocolate vine after it flowers if you want flowers and fruit pods.  You can prune it hard to keep it in bounds or shape it.  If it gets too large and ungainly you can prune it right back to the ground and it will recover quickly.  Watch that Chocolate vine doesn’t climb into trees as it can quickly smother them. 

Chocolate vine has few pests or diseases and deer and rabbits seem to leave them alone.
Akebia fruit

Propagating Chocolate vine

Chocolate vines are easily propagated from soft new growth cuttings about 6 inches long, generally taken in late spring- early summer.  The seeds can be saved from ripe pods but they must be planted immediately as they don’t store well.  Plant them in a fine potting medium inside, in a warm area.  They will need to grow overwinter in a warm bright area.  This is probably why Chocolate vine does not spread well by seed in northern areas as the seedlings would be killed by cold.

Medicinal uses of Chocolate vine

Akebia is used in Chinese/Japanese herbal medicines as a diuretic and to increase the milk flow in nursing mothers.  For this purpose stems are chopped in fine pieces, dried and powdered then used in teas and decoctions.

Sources for Chocolate Vine

Bulbs that bloom in fall

Gardeners are aware that they need to plant spring blooming bulbs in the fall but they may not know that there are some bulbs to plant in the fall that will actually bloom in the fall.  These bulbs often bloom when other garden plants have faded and provide a needed burst of color to the garden.  Most of these bulbs are easy to grow and once established will multiply and provide you with reliable show each autumn.   Gardeners from zones 3 through 9 will be able to grow at least some of these bulbs.

Tiny cyclamen flower

There are four main types of fall blooming bulbs that are hardy in zones 5-6, the Cyclamens, the Colchicums, the Fall Crocus, and Sternbergia.  Nurseries that sell other fall planted bulbs that bloom in spring will usually sell some of the fall bloomers, although some unusual species may be hard to find.

Cyclamen family

The Sowbread Cyclamen, C. hederifolium, sometimes sold as (C. neopolitanum) and the rarer Cyclamen cilicium are two members of the Cyclamen family that bloom in the fall.  Other species of Cyclamen bloom in early spring or are grown in pots for the florist trade.  Sowbread Cyclamen is much prettier than its name and is hardy to zone 5.  It has pretty triangular shaped dark green foliage with silver spots and streaks that may appear before or after the plant blooms.  The foliage often persists well into winter.  In zone 5 C. hederiflolium usually blooms in September.  The flowers are tiny pink “shooting star” versions of the familiar florist cyclamen.  They will be put up in succession and last a long while in cool weather.

Sowbread Cyclamen corms (bulbs) are large- good bulbs will be 4-5 inches across.  The bulbs are round with a slightly flattened top. They can be offered for sale in the spring or fall.  Bulbs planted in the fall probably won’t bloom until the following fall.  C. hederifolium doesn’t reproduce by splitting off new corms, rather the bulb itself gets bigger each year, eventually forming a large clump of foliage and flowers.

Cyclamen cilicium has heart shaped foliage of green mottled with a lighter color.  The undersides of the leaves are purplish red.  The tiny flowers are variable shades of deep pink to lighter pink with a red blotch at the center.  If you can get close enough the tiny flowers smell like honey.  C. cilicium is only hardy to Zone 6.  Both Cyclamen species prefer light to partial shade and rich organic soil.  They like to be dry in the summer.

Colchicum Family

Colchicum
There are numerous species of Colchicum that can be grown in the garden including C. autumnale. C. bornmuelleri, C.Byzantium, C speciosum, C.cilicicum.  There are also numerous hybrids and species variations.  Most are hardy from zones 5-9 but some are hardy to as far north as zone 3.  Some species have narrow crocus type foliage and others have broader, more strap shaped foliage.  Depending on species the foliage may appear in spring and summer or after the plants bloom in the fall.

Colchicums have flowers similar to crocus but much larger.  However there are double flowered varieties that look like either small peony flowers or water lilies.  The flowers appear from the bare ground on long stems ( about 6 inches high).  They range in color from white through shades of pink, carmine, mauve and lilac.   Some species such as C.bornmuelleri and C.speciosum are fragrant.   Flowers may be produced in succession and last well into freezing weather.  Large groups make a fine show of fall color.

The bulbs of colchicums are large also and should be planted as soon as you receive them.  They will often bloom even before you plant them, if you delay, and this isn’t good for the plants.  Colchicums will thrive in sun or semi-shade and like good, organic soil.  They spread in good conditions by making daughter bulbs and also though self- seeding.  Ants like the seed coating and carry them into tunnels, effectively planting them.  Colchicums are poisonous so are seldom eaten by wild animals.  Make sure pets and children don’t eat the bulbs or other parts of the plant.

Crocus family

There are several species of crocus that bloom in the fall instead of the spring.  They include the saffron crocus, C. sativus,  from which the very expensive spice is made and other species such as C. speciosus, C. kotschyanus, C.laevigatus fontenayi, C. medius, C. ochroleucus.  These have foliage and flowers much like the familiar spring flowering crocus.  Most bloom in October in zone 5 and are hardy from at least zone 5-9 but check the zone hardiness when you purchase autumn blooming crocus.

Most autumn blooming crocuses have flowers that are shades of blue or purple or white.  Plant the small bulbs as soon as you receive them and some will bloom the same year.  Others will need a whole year to bloom so mark the spot.  If they aren’t eaten by mice and squirrels which like them, crocus will multiply through new bulbs and through seed.   You will get better blooming if large clumps are dug every 4 years, separated and replanted. Crocus will grow in full sun to partial shade and like sandy soil.

Sternbergia Lutea

There is only one member of this family that is fall blooming.  Sternbergia flowers have 6 petals and look much like golden yellow crocus. In fact they are often sold as yellow fall crocus.   They help to add yellow to the fall blooming bulb palette.  The foliage of Sternbergia is broader than the narrow grass-like foliage of crocus.  Sternbergia are only reliably hardy to zone 6.  They prefer to be planted in full sun in a spot that will be dry in the summer.

Where to plant fall blooming bulbs

Since fall blooming bulbs have flowers close to the ground they need to be planted where mature perennials and annuals won’t block your view of the flowers.  Rock gardens are good spots for them as is the very edge of a path.   Low growing groundcovers like small sedums or thymes may allow the flowers to peek through.  Since many won’t have foliage part of the year, even when they are blooming, you should mark the location that these bulbs are in so you won’t dig them up when planting other things.

If the fall blooming bulbs are planted under deciduous trees, watch that leaves don’t cover the flowers as they fall.  After the flowers are finished however, it’s fine to rake a layer of leaves over them for winter protection.  Fall blooming bulbs are a gardener’s special treat, something pretty and blooming when everything else is dying.   Try some in your garden soon.


Rose of Sharon - Hibiscus syriacus

If you need color in the landscape in late summer and early fall Rose of Sharon may be the plant you are seeking.  Sometimes called Althea or Rose Mallow these plants have been in gardens for centuries.  Your grandmother may have had one in her yard but even if you consider yourself a cutting edge gardener there is a Rose of Sharon perfect for your garden.


Because Rose of Sharon is in the Hibiscus family and the flowers are typical of that family there is some confusion when using common names for the plant. It should not be called hardy hibiscus. The Rose of Sharon or althea is a deciduous woody plant, forming a bush or small tree.  Hardy hibiscus are herbaceous plants, they die back to the ground each year.  Tropical hibiscus of various species are also bushes or trees but they are not hardy in the United States except in zones 8 and higher and are generally kept as potted plants.

Rose of Sharon, Hibiscus syriacus, is native to India and Asia but not to Syria.  It has been planted around the world in temperate regions and sometimes naturalizes.  The natural shape of the shrub is vase like with many long straight stems rising to a height of about 12 feet.  Nurseries and gardeners often prune and train them into a more tree like shape, with a central trunk. 

Rose of Sharon makes an excellent tall screen or hedge when planted closely.  They are also planted as landscape accents or garden focal points.  They are easily pruned to keep them within the boundaries of your garden.

The bark on trunks and stems of Rose of Sharon is pale gray and smooth.  The leaves are about 3 inches long with 3 distinct lobes and a coarse toothed margin. They are arranged alternately on the stems.  Leaves are green, sometimes tinged with purple or maroon.  The flowers are the fall show- the Rose of Sharon leaves fade to dull yellow brown in the fall.

The flowers of Rose of Sharon are produced profusely from late July to hard frost, depending on the variety and planting zone.  In the single flowered varieties there are 5 petals forming a circular flower up to 4 inches across.  There is a prominent protruding pistil in the center typical of hibiscus flowers.  However many cultivated varieties are now double flowered, looking more like the rose they are named for or like small peonies.

The flowers of Rose of Sharon come in a wide range of colors from white, through shades of blue, mauve, pink and purple.  There are bi-color varieties.  There are no true red or yellow flowered varieties.  Flowers remain open at night.  They are attractive to hummingbirds, moths and butterflies.

Flowers turn into brown, 5 chambered seed capsules. Older varieties re-seed freely and some gardeners consider them invasive. Newer varieties, including many double flowered Rose of Sharon are sterile and don’t make seeds.

Growing Rose of Sharon

Rose of Sharon can be grown from seed quite easily, although it may take 2 or more years for them to flower.  Some varieties are not available from seeds as they are sterile and are reproduced through cuttings.  I recommend gardeners start with plants, which are sold bare root or potted.  You will then know what color and type of flowers to expect.

For hedges plant Rose of Sharon about 6 feet apart.  Otherwise plant Rose of Sharon as you would any shrub.  They will grow in most soil situations, except poorly drained areas. Don’t add amendments to the hole when planting; plant them in the native soil. They prefer full sun, especially in the north, but can take partial shade in the south.

Rose of Sharon visited by a Japanese beetle

Rose of Sharon blooms on new wood, so prune them for shaping only in winter or early spring while still dormant if you want blooms.  Some gardeners prune each branch back to 3 buds to make the flowers larger.  If your plant is trained to a tree shape you may want to trim back any branches that grow too long horizontally and remove branches appearing at the trunk base.

A light application of slow release fertilizer in spring as plants begin new growth is helpful for good growth and flowering.  Keep plants well-watered as they get established, after that they are pretty drought tolerant.  Flowers will be larger in dry years if they are given supplemental watering.

Japanese beetles are fond of Rose of Sharon and can severely damage foliage in some years.  Whiteflies and aphids are sometimes problems also and plants should be treated with pesticides if pest numbers get high.  Rose of Sharon are occasionally hit with fungal diseases such as rust or leaf spot diseases but they rarely kill the plant.

If you have a small garden you may want to try a new Rose of Sharon sold by Proven Winners called Purple Pillar®.  While this plant gets tall- up to 16 feet- it’s very narrow and columnar, only about 2-3 feet wide.   It is covered with lilac purple flowers in late summer.

Edible and herbal uses

Rose of Sharon flowers and leaves are edible.  Leaves are cooked as a green when young or added to salad.  Flowers are added to salads and both flowers and leaves are made into tea. 

In Korean and Asian medicine there are many uses for Rose of Sharon.  Leaves are diuretic, expectorant and used for stomach problems. A decoction of the flowers is diuretic, used as an eye wash, and as a treatment for itching and other skin diseases.   

Decoctions of Rose of Sharon root bark are mucilaginous and are used for diarrhea, stomach cramps, menstrual problems, as a vermifuge, and externally to treat skin disorders.

I can find no serious toxicity or side effects listed for Rose of Sharon but as with most herbal medicines use carefully until you see how it affects you. 


Dicamba drift - Watch out for damage to your plants

This year there have been more than 1000 complaints in several states of “volatilization drift damage” on crops and ornamental plants when dicamba, a potent weed killer, is sprayed on some farm crops, notably soybeans, up to a mile or more away.  Dicamba is an older herbicide but was released this year in several new formulas to partner with a new soybean variety that was genetically engineered to be resistant to it, much like round-up ready soybeans.

The new weed killers are called XtendiMax, FeXapan, and Engenia.  As a gardener you won’t be using these pesticides as they are registered for certified applicator use on certain crops.   But you may be seeing the damage that they can do on your trees, shrubs and home garden plants, especially if you live in rural areas.

Last year the new soybean varieties that are dicamba resistant were being sold to farmers but the new pesticides to accompany them had not been approved by the EPA yet.  So farmers used old formulations of dicamba on the crops and almost immediately complaints began about spray drift and volatilization of dicamba affecting crops and ornamental plants nearby.

Volatilization of dicamba occurs when plants are sprayed with the weed killer and it evaporates in the sun and becomes a misty cloud in the air.  This cloud is easily moved by a light breeze and can carry the pesticide at least a mile away, I saw reports that it was suspected to have moved 5 miles in one case.  When it eventually settles on plants in another area it can cause widespread damage.

Dicamba damage in plants begins with twisted, flattened, distorted new growth, yellowing of foliage and strap like, puckered leaves.  It can cause serious stunting and plant death.  If food crops are affected by volatilization drift of dicamba they are considered inedible/toxic.  (And yet soybeans sprayed by it are considered to be safe for edible uses, go figure.) 

You can’t see or smell a dicamba “mist” as it’s drifting down on your plants. Damage can take a few days to a few weeks to show up, depending on how much dicamba the plant received and the species of plant.   All types of broad leaved plants can be affected.  Grapes, elderberries and peaches are known to be highly sensitive to dicamba.  Farmers who opt not to plant dicamba ready soybeans are having problems with volatilization drift on their crop.  But any broadleaved plant can be injured, including large trees.

And what about the damage to things other than plants? That dicamba mist can’t be good for the lungs of people and animals.  It does reduce flowering of plants, and that’s hard on pollinators.  Dicamba is listed as relatively non-toxic to bees, however all the studies were done on older formulas of the pesticides and the new formulas have other chemicals added.  Here’s a link to a pesticide fact sheet.

The new dicamba pesticides released this year were supposed to help with the volatilization problem, but it seems that they haven’t.  Across the mid-western states complaints from both farmers and homeowners about damage to their plants from volatilization drift of dicamba are being taken by state agencies.  Some states have put bans on the new products.

Extension researchers and others are scrambling to figure out why the problem is so widespread and serious. They have found that even when applicators followed the rules for dicamba application exactly, some cases of  volatilization drift occurred.  Monsanto, the developer of both the dicamba resistant soybeans and some of the pesticides says they are seriously studying the problem and are offering free spray nozzles designed for the pesticide and free training for applicators.  But they aren’t pulling the products off the market.

What to do if you suspect your plants gave been damaged by volatilization drift

If you are a gardener who lives within a few miles of agricultural crop land, particularly where soybeans or cotton are being grown, your garden and landscape might be affected by volatilization drift of dicamba.  Volatilization is different from regular spray drift caused by droplets of liquid pesticide “overshooting” their mark.  In regular drift the damage is close to the field being sprayed and generally stopped by hedges or windbreak trees.

In volatilization drift of dicamba the damage may occur some distance from a farm field. The mist can travel for miles.  Hedges and windbreaks don’t always stop the drift.  Dicamba is persistent and volatilization may occur days after the field is sprayed. This can make it difficult to trace the dicamba damage to a particular place.  And other pesticides and even some diseases and environmental problems can cause similar symptoms.  

First aid for plants damaged by drift isn’t very helpful.  Washing off dicamba gets it into the ground where root uptake may be worse than the contact damage.  You may try removing damaged areas of the plant (don’t compost) and keeping the plant watered and fertilized in hope it outgrows the damage.  Dicamba damage doesn’t occur on monocots- grass like plants like your lawn grass, ornamental grasses, corn, wheat and so on.

If you suspect dicamba drift damage take lots of good, close pictures.  Document the date you first noted symptoms and what plants are affected.  Note where on your property the damage is, and on what side of plants the damage occurs.  You may want to contact neighbors to see if they notice damage- and to see if they have used any weed killers recently.  There are some older lawn weed killers that use a weaker dicamba formula.  Contact your local county Extension office and/ or your state department of agriculture and ask where you can send samples of plants to be tested and how to collect and send the samples.  Tell them you suspect dicamba drift.

In many states you will have to pay for the testing.  If it’s confirmed that dicamba caused the problem and you can trace the application of dicamba to a particular farm you may be able to collect damages.  Some farmers have liability insurance and most certified pesticide applicators that are hired to spray crops will have liability insurance.  You may be able to submit a claim and collect damages.  However you may have to hire a lawyer to be reimbursed for damages.

You may have to be a sleuth to find out who owns a soybean field, the most likely place a volatilization drift came from.  Try using plat maps, usually sold or available to look at, somewhere in your county government, to find the owner of the land.  Your county Extension crop “educator” or a state agricultural inspector may be able to help you locate who owns a field.  Then you’ll have to ask what type of soy they planted and what they sprayed on the field. 

Why do we need another GMO variety of soy?

So why are we having this problem?  Some weeds have become resistant to, glyphosate, (Round Up).  Farmers that are interested in improving their yield want to easily manage weeds by spraying weed killers that don’t affect the crop.  They will embrace the new technology or be pressured into accepting it.  It was estimated that 60% of the soybean crop planted this year was already dicamba resistant varieties.  And if they pay for GMO dicamba ready seeds they are going to use the dicamba products on them.

Personally I think we need to re-evaluate if we want to control weeds by GMO means.  I am not against genetic modification of plants to improve yield, increase nutrition, improve disease resistance and so on.  I am not too worried about consuming GMO plant products.  However it’s been shown that weeds quickly develop resistance to a weed killer.  More and more product has to be applied and then we head on to another product, which always seems more toxic than the last.  Dicamba is more toxic in the environment than glyphosate and much more persistent.  What will we move on to after dicamba?

Here are links to some additional reading on the dicamba problem.


Bacon and Tomato jam

This is a novelty jam that you can make to use up tomatoes.  It’s good on toast.  You need some sugar in this to thicken it but you can reduce the sugar slightly. It is a sweet product, almost like ketchup to my taste.  You can adjust the spices, but don’t reduce the vinegar. You could use bacon bits from the grocery as a shortcut but it will taste better if you cook up the bacon at home. It makes about 2 cups. 

This recipe makes a slightly chunky jam.  If you want a smooth product, more like jelly, leave the bacon out, push the cooked ingredients through a sieve and then add the bacon-of course that will be chunky but you can finely crumble it.

The jam will store in the refrigerator for several days.  You can also freeze it in small portions for up to 2 months.

Note: to easily peel tomatoes dip them in scalding water for a minute or two and then into ice water.  The peel will easily pull off.  It takes about 8 good sized tomatoes to make 4 cups chopped.

Ingredients

½ pound of bacon, (maple bacon is great), fried crisp, drained and crumbled.
4 cups of very ripe, cored, peeled and finely chopped tomatoes
1 medium onion, finely diced
1 cup of sugar
2½ tablespoons vinegar
1½ teaspoons salt
¼ teaspoon black pepper
¼ teaspoon garlic juice (optional)

Put all the ingredients except the bacon in a pan and cook on low heat, stirring occasionally. 

When the jam begins to thicken add the cooked bacon and continue to cook and stir more frequently as the jam thickens.
Cook the jam until it’s thick and glossy.  This jam will take at least an hour of cooking.

Remove the jam from the heat and let cool, then refrigerate or freeze.


"For man, autumn is a time of harvest, of gathering together.  For nature, it is a time of sowing, of scattering abroad."
-  Edwin Way Teale

Kim Willis
 “He who has a garden and a library wants for nothing” ― Cicero

© Kim Willis - no parts of this newsletter may be used without permission.

And So On….
Do you have plants or seeds you would like to swap or share?  Post them here by emailing me. You can also ask me to post garden related events. Kimwillis151@gmail.com


Find Michigan garden events/classes here:
(This is the Lapeer County Gardeners facebook page)
An interesting Plant Id page you can join on Facebook

Here’s a seed/plant sharing group you can join on Facebook

Newsletter/blog information

If you would like to pass along a notice about an educational event or a volunteer opportunity please send me an email before Tuesday of each week and I will print it. Also if you have a comment or opinion you’d like to share, send it to me or you can comment directly on the blog. Please state that you want to have the item published in my weekly note if you email me. You must give your full name and what you say must be polite and not attack any individual. I am very open to ideas and opinions that don’t match mine but I do reserve the right to publish what I want. Contact me at KimWillis151@gmail.com

I write this because I love to share with other gardeners some of the things I come across in my research each week. It keeps me engaged with people and horticulture. It’s a hobby, basically. I hope you enjoy it. If you are on my mailing list and at any time you don’t wish to receive these emails just let me know. If you know anyone who would like to receive a notification by email when a new blog is published have them send their email address to me.  KimWillis151@gmail.com