Tuesday, July 11, 2017

July 11, 2017, Kim’s Weekly Garden Newsletter


Hi Gardeners
Daylilies in my garden

I hope everyone had a wonderful holiday and had some time to get out and actually enjoy your garden – like sit and admire the flowers type of enjoyment. Everyone needs that. 

It’s warm and muggy here today; we had some rain yesterday and are supposed to get more tonight.  Luckily we haven’t had the heavy storms I know some of you have had. We have just the right amount of heat, humidity and rain although I could do without the humidity.  The gardens are progressing well and even the grass is still green and growing.

We have been harvesting Early Girl tomatoes and will have cucumbers in a few days.  The other varieties of tomatoes have set lots of fruit.  There are lots of little peppers, dill and potatoes are blooming, corn is beginning to tassel.  A bumper crop of blackberries is taking shape and it looks like lots of grapes too.

Lily blooming season has arrived, true lilies and daylilies.  The deer have eaten the buds off some of the day lilies and even some of my true lilies but there are still a lot of them blooming.  Asiatic lilies, some OT hybrids, and longiflorums and one trumpet variety are blooming.  Still to bloom are the tiger lilies and Orientals. 

Also blooming in my gardens now are Rocket ligularia, astilbe, hosta, lavender, coneflowers and helenium.  The annuals are blooming well, zinnias, dahlias, marigolds, bachelors buttons, cosmos, 4 o’clock, calendula, and of course the tuberous begonias, geraniums, petunias, snapdragons, impatiens and various salvias.  The Jewelweed, which is trying to conquer the world, is also blooming.

I bought a dahlia assortment this spring to plant in my new cutting garden.  So far two varieties are blooming and I am quite pleased with those.  They aren’t too large flowered but that’s ok.  There are buds on many of the others and it will be fun to see what I get.

The trend to smaller plants

What I don’t like is all the plants being made shorter or smaller.  I know there are lots of smaller gardens and containers are all the rage but I like the traditional size of some plants and those varieties are getting harder to find.  I didn’t check the label for size on some cosmos I bought; I wanted the tall ones for a particular spot and instead got short squat ones, with smaller flowers.  Luckily I found some cosmos coming up from seed from last year’s plants and was able to transplant them, although they aren’t the color I wanted.

I like the tall marigolds with large flowers.  Now most large flowered marigolds are on little short stems which makes them look top heavy if you ask me. Try finding tall salvias or snapdragons now. Even perennials are being “compacted”.   You have to watch the labels on things like Echinacea, coreopsis, rudbeckia, baptisia, and monarda if you don’t want dwarf versions.

And the trend is really apparent with woody ornamentals.  The buddleia I can find on the market now get lost behind my beebalm and daylilies. Most flowering shrubs are now downsized.  That’s fine for those with tiny gardens but for those who don’t want them to get lost in a larger landscape it’s not.  I like large, lush plants not teensy tiny things in most locations.

Making plants more compact to make them sturdier and less likely to flop is one thing.  But making tiny versions so you can stuff them in a container is another.  There are lots of naturally tiny plants.  And let’s not stock the stores with dwarf stuff in exclusion of all else.  Leave the gardeners who like traditional sized plants some choices.

Are you on my email notification list and not getting the notification?

For many years I have maintained a mailing list of people who are interested in when I post a new blog/newsletter.   It gets sent with a link to the blog right after I publish it.  Recently some people have told me they aren’t getting the notification.  If you are reading this I guess you got to the blog from a link I posted on a garden Facebook page or just by checking the site.  But if you want the email notification first check your spam or junk mail box.  Your security system may have sent it there.  You’ll need to set it so that the emails from me are accepted.  If the notice isn’t in your junk/spam box let me know, I’ll see what I can do.

Send me a note using the email address you want the notification sent to at kimwillis151@gmail.com
If you aren’t on the list and want to be also send a note to that address.  For some reason the subscribe feature on the blog won’t work. I’ve looked into it and got the answer that the blog address is too long but it seems I can’t change the address now without creating a new blog. 

Those of you in the Lapeer, Michigan area

I have been asked to mention that the Lapeer Master Gardeners are having a garden tour, starting at the Garden at Suncrest, 1455 Suncrest Drive, Lapeer on July 22nd .  The tour will cover five additional gardens you can visit between 10 a.m. and 4 p.m.  Tickets are $10 in advance and $12 the day of the tour and are available at MSU Extension (in the Lapeer County Health Dept. Building), Burke’s Flowers in downtown Lapeer and Campbell’s Greenhouses in North Branch Township in advance or at the Garden at Suncrest on the day of the tour.

They are also hosting a contest for the best fairy/gnome miniature garden on that day which is free to enter and for which you can win a nice prize.  For more information you can contact Marlene at 810-664-8317,  gardenfairy50@aol.com  Entry form is available at www.lc-mga.org.
It looks like snow in July from falling catalpa flowers.


July almanac

This month’s full moon is called the buck moon or hay moon, depending on whether you are a farmer or hunter I guess.  It’s called buck moon because the buck deer’s antlers begin to show this month.  The full moon in July this year was the 9th.  Hay has already been cut a couple times around here as it normally has been – so I don’t get that name.   I did see hay being cut and baled this weekend though.  Wheat harvest is this month – it will begin soon if it hasn’t already and I think we should call it wheat moon. 

The moon perigee is on the 21st  .   Apogee was the 6th.   This month’s flower is the sunflower- very appropriate and the birthstone is the ruby.

It’s National Blueberry, Eggplant, Lettuce, Mango, Melon, Nectarine and Garlic month as well as National Hotdog and Vanilla Ice Cream month.  Why isn’t it National Cherry month?  And for those secret bare naked gardeners out there the second week of July is nude recreation week.  Have fun.

There are the Delta Aquarids meteor showers on July 27-30th.  Best viewing will be after midnight to about 3 am.  Look to the south.  These meteors continue into early August.

Instructions to Gardeners for Summer

On a summer morning when the light is still soft and the dew glitters on your flowers, go outside with your camera to capture some summer memories. Pick a bouquet to bring inside while the flowers are fresh and perky. Perhaps a handful of blackberries or a juicy peach can serve as breakfast.

In the heat of the noon sun watch the bees busy with the anise hyssop and comfrey then find a cool spot to sip your tea, add a sprig of lemon balm for flavor.  Mid- summer days are meant to be slow and languid.  All too soon these days will pass; take time to savor a few.


In the shade of a tree, spend the afternoon reading a book you have longed to read for some time.  Take time to look up into the tree and wonder at the marvel of it.  Think of the thousands of gallons of water it is pumping from the ground up to the very top leaf.  Each leaf is a little green factory, laboring and sweating in the summer sun to produce food for the community of tree.  Its labor cools you beneath it as it releases its sweat upon the air.

Later in the day the pungent, clean scent of lavender and the strong, sweet smell of lilies drift on the heavy summer air. Make sure you dry a few sprigs of lavender to tuck among your stored sheets and other linens to keep the smell of summer lingering long into winter.

Pluck some golden and orange calendula or nasturtium flowers, some tender greens and slip some sun warmed tomatoes from the stalk.  Search until you find a tiny cucumber hidden in the vines.  Go to the house and make a salad that welcomes the tongue.  Chill it while you cook a bit of chicken with fresh rosemary and lemon thyme sprinkled on it. Get some water boiling and go back to the garden for a few ears of plump, sweet corn.  Then slip the ears into their bath for a few minutes, remove and drench with butter.  Add a dish of vanilla ice cream layered with blackberries and dinner is done. 

Just before the light is gone in the evening take a walk in your garden.  If you have had the foresight to plant some woodland nicotiana, with its stately towers of fragrant white trumpets, you can watch the antics of the hawk moth. Like a burly hummingbird instead of a hawk, it hovers among the blossoms sipping nectar. If you have no moths to watch perhaps the swallows will entertain you as they dip and swoop over your head collecting mosquitoes.

The late night air is filled with the songs of crickets and the shrill of cicadas. A nighthawk adds its distinctive grating call as it swoops in the dark sky hunting moths. The glow of lightning bugs mimics the flashes of heat lightning on the horizon. Take time to sit on a porch after dark on a sultry night and enjoy the concert.

I ask you to spend one summer day, or most of it in the garden, without your cell phone.  It’s nude recreation week  so clothing is optional.  Life is short and each year’s garden is unique and will never come again. Enjoy your life and garden while you can.


Problems of squash and other vine crops

It’s the time of year when people are looking forward to their harvest of cucumbers, squash and other vine crops.  It’s also the time when problems begin happening with those plants and I’m getting lots of questions about these crops. 

Here are some answers to common problems with vine crops.

Why are my squash/cucumber plants blooming and not making fruit? 

Why aren’t the flowers on my squash/melons/ cucumbers making any fruits? Every year new gardeners ask this question when it seems like their vining crops are blooming and blooming but they aren’t getting any “fruits”.  Most vining plants like squash, pumpkins, melons and cucumbers need a long growing season and warmth to do their best.  They also need full sun.  But if they are flowering here is where the confusion begins.  The plants have lots of flowers but the gardener isn’t finding any fruits.  Don’t worry its normal. 

All of these vining plants produce two types of flowers, male and female.  They look similar except that the female flowers have a baby “bump” at the stem end.  This looks like a tiny quash, pumpkin and so on.  Male flowers do not have the baby bump.

Male flowers usually begin blooming first on a plant.  They will bloom and die, because they can’t produce a fruit.  But if conditions are right female flowers will soon start appearing along with the male and if there are pollinators around, the baby bumps will begin growing.  The withered blossom often hangs on the developing fruit for a short time.  Most of the vining crops grow their fruit at a fast rate.  Some like cucumbers and summer squash will be ready to eat in just a couple weeks, as these crops need to be picked when they are still small for the best eating.
Female flower on a gourd.  Pumpkin will have tiny green pumpkins,
cukes will have tiny cukes and so on

So when you see both types of flowers on a vining plant you should expect to see the fruit begin developing soon. (By the way you can take those male flowers, dip them in batter and fry them for something to eat before the fruits develop.)   Some melons, squash, gourds and pumpkins can take a long time to begin blooming – they need long seasons to make fruit.  So check the maturity dates on these types of plants when you buy them or seeds for them and in Zones 5 and 6 stick to those that say 120 days or less to maturity.

Why don’t my squash/melons/ cukes look like I think they should?

The fruit of vining crops may not look like what you expect when they first begin developing but don’t panic.  Cantaloupe develops the netting on their skins later in development.  Many squash, melons, gourds and pumpkins have a different color from when they are mature- melons and gourds may develop spots later for example.  Pumpkins start out green like many squash and then they develop color later.  Cucumbers should be green when picked unless you are growing one of the rare white or lemon varieties.  They will change color to orange, yellow or brown when mature but those mature fruits don’t make the best eating.

It’s not unusual for plants you thought were one type of squash or melon to turn out to be something else.  Plants that look similar like pumpkin and squash sometimes get mislabeled in nurseries.  Also pumpkin, squash, and gourds can hybridize and the saved seeds may produce something unusual.  Different melons may also hybridize. You may get one of these seeds in a seed packet.  

Even when you are growing them close together in a garden the fruit vining crops produce this season should be as expected, the variety of pumpkins or Hubbard squash or cantaloupe you planted, unless you got that odd seed in a seed packet.  Because they are crossing in the garden this year does not make the fruit different.  If a poodle mates with a beagle neither parent changes, but the puppies will certainly be a surprising mix.  It’s the same with vining crops. If you save the seeds from your crop for next year the resulting plants grown from that seed could surprise you.
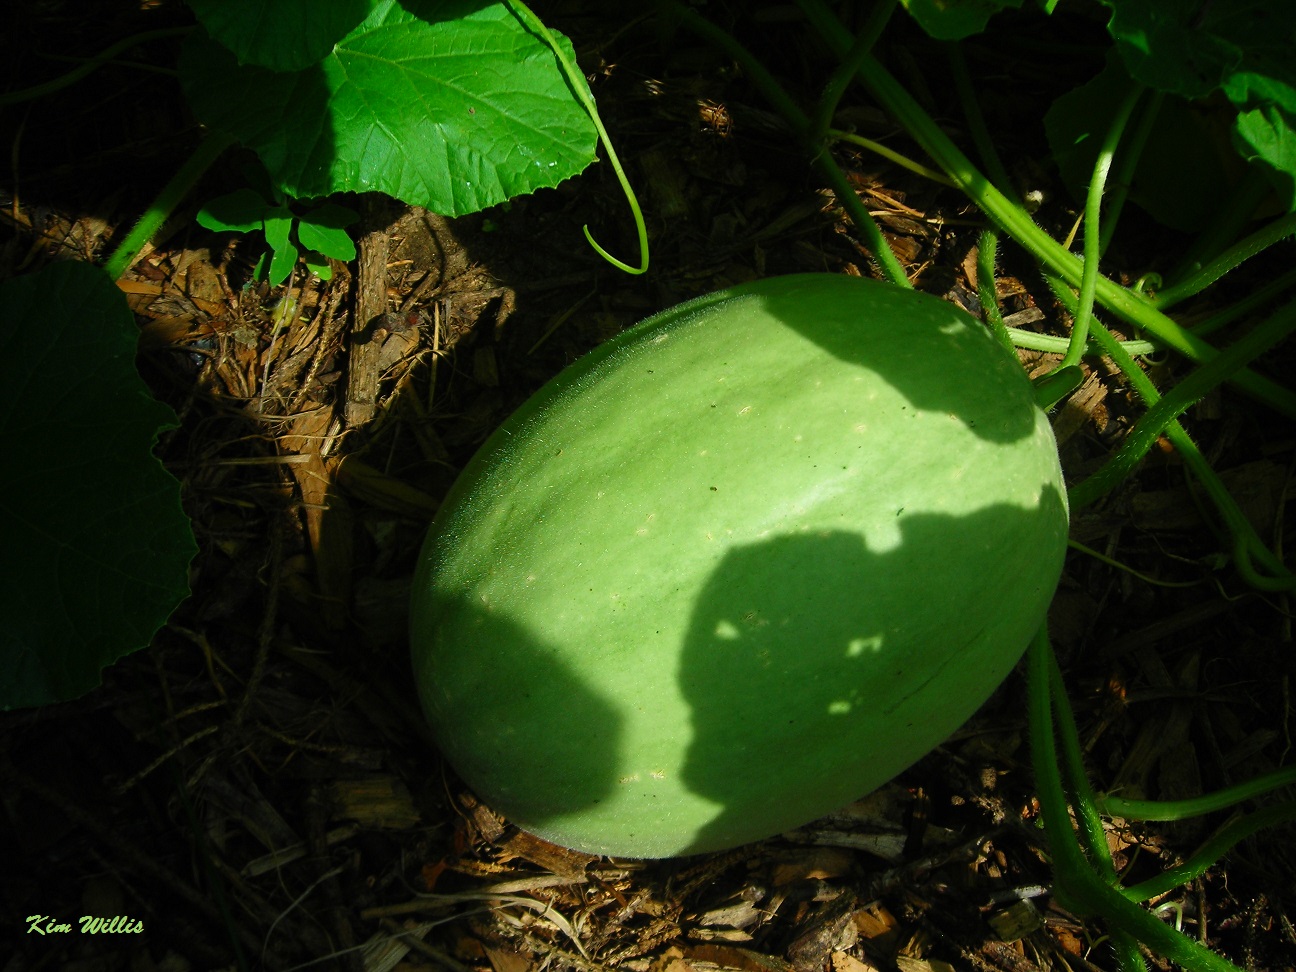
This is a baby muskmelon.  It will develop netting later

Squash Vine Borers

Watch out for squash vine borers as the moths are flying now.  A squash vine borer moth looks a lot like a wasp. It has an orange lower body with black spots.  The moths lay eggs on vine crops which hatch into larvae that bore into the vine’s stems and cause them to wilt. Squash vine borers also attack pumpkins and to some extent melon vines.  If your vine crops are wilting look at the vines near the base of the plant for a hole with some “sawdust” possibly under it.
Squash borer moth.
Flickr xinem
The larvae of squash borer
wikimedia commons

Pesticides do little to control this moth.  One suggested home control is to paint a bucket or bowl yellow including the interior and fill it with water to a few inches below the rim.  The moths are attracted to yellow and many will drown in the bucket.  Kill any of the moths you see on the plants, they look like wasps but cannot sting you.

Once the larvae are in the vines they may or may not kill the vine.  You can take a piece of wire and probe into the hole in vine and try to puncture the larvae inside.   Find several places where the vine is touching the ground out beyond the hole and heap some good garden soil over the vine.  Some vines will then put out new roots there and the vine will recover.

Downy mildew

Downy mildew is a serious disease of cucumbers and melons, and also damages squash and pumpkins.  It is different from powdery mildew, which is a common problem but less destructive. 

Symptoms of downy mildew are light green turning to yellow spots on the top of leaves and the bottom of the leaves will have black, water soaked looking areas, then a purple-brown dusty or dirty appearance to the bottom of leaves when spores appear.  Cucumber plants quickly seem to dry up and die. Downy mildew is carried to crops by the wind and usually begins in hot, wet or humid weather.  Once in your garden it will spread rapidly. 
Downy Mildew on cucumber - Cornell University

Cucumber plants rapidly die from the disease.  Melons have greatly reduced production.  Squash and pumpkins survive but grow more slowly and are less productive.  The best thing to do is to prevent Downy Mildew by applying protective fungicides.  Look for home garden fungicides that have chlorothalonil or mancozeb in the ingredients and apply as directed.  If caught early fungicides may help crops that are lightly infected. Heavily infected crops won’t be helped.

There are no organic products that are effective for downy mildew.  Baking soda, milk, Epsom salts, dish soap and so on are useless.  If you can’t bring yourself to use a conventional fungicide then pull the plants once they are infected and bury them away from the garden or put them in plastic bags for the landfill.  Don’t mess around with home remedies, allowing the disease to continue spreading.  Don’t compost infected plants at home.  Don’t plant in the same spot next year and make sure all plant residue is removed from the garden in the fall.  Next year look for varieties that are resistant to downy mildew.

Powdery Mildew

One of the most common diseases to affect vining crops like cucumbers, pumpkins, melons and squash is powdery mildew.  It is caused by several different fungi species.  The leaves and stems of your crops will first get yellow spots and then get a white dusty appearance, then begin to yellow and eventually leaves turn brown and papery and fall off.  It doesn’t kill plants in most cases but greatly weakens them.  Older plants and older leaves will get the fungal infection first.  New leaves will continue to form in most cases.

Crowded plants and plants growing in less than full sun are more susceptible.  Temperatures between 68-80 degrees and high humidity favor infection.  This disease is generally blown into the garden or carried in on plants or equipment.  It can also overwinter in soil or debris and emerge when conditions are right.

If it occurs late in the season when most fruit has formed it won’t be as harmful.  Earlier in the season it can lead to sun burnt fruit, smaller fruit and fruit that doesn’t taste as good as unaffected fruit and fruits like pumpkins may not store as well.

Fungal infections can’t be cured, only prevented.  Give your vining crops lots of space, and keep weeds out so there is good air flow around plants.   Plant powdery mildew resistant varieties.   You can use preventative fungal sprays beginning when the crops begin to vine and continuing every 7-10 days or as the label directs.  If you start spraying when you first notice any symptoms you may limit the spread of the disease and help plants continue to grow.

Conventional fungicides include Daconil, Bravo, Echo, Fungonil and Nova and you’ll want to look for one of these ingredients; chlorothalonil, azoxystrobin, trifloxystrobin, myclobutanil in garden shop brands.  Always follow label directions and make sure the product is for edible crops. Note: pesticide recommendations can change from state to state and year to year.

Organic fungicides include copper products, neem oil, Potassium bicarbonate (not sodium bicarbonate or baking soda) and products with sulfur.  As with conventional pesticides follow the label directions and use products labeled for food crops.

Home remedies like dish soap, baking soda, milk, Epsom salt, compost tea and so on won’t work and in some cases make the problem worse.  Be sure to rotate where you plant vine crops each year to try and avoid overwintering fungi.

When you spray a fungicide on vine crops use a forceful stream to try and get under the larger leaves and the undersides of leaves so all parts are covered. After rain events fungicides need to be re-applied.

If you have a long growing season try planting your vine crops later in the season or in shorter growing season areas use fast maturing varieties, planted later in the season.  This seems to help a little.  Also if your crops are struggling with powdery mildew a little slow release fertilizer near the plant base may help them keep growing.

Bachelors Buttons

Bachelors Buttons
I remember my grandmothers Bachelors Buttons.  She had a huge patch of them that came back every year but sometimes she would order seed of a new color to add to the mix.  I remember her getting excited when a maroon color Bachelors Button came on the market and she took me to the garden to point them out when they began blooming.  My grandmother frequently made bouquets from her garden to give people and cornflowers (Bachelors Buttons) were often in them.  I was also allowed to pick the cornflowers whenever I wanted a bouquet.

The Bachelors button or cornflower (Centaurea cyanus), is an old fashioned cottage garden flower every gardener should grow even if you don’t make bouquets.  The lovely blue shades of the flowers that are common and the silvery foliage blend well with other cottage garden type flowers like zinnias, marigolds, nasturtiums, cosmos, and calendula.

Bachelors Buttons are native to Europe.   There they grow as weeds in corn (where all grain is called corn) fields which give them their other common name, cornflower.  They have naturalized in many parts of the world.  But the cornflower has also been popular with gardeners for hundreds of years.

Bachelor’s Buttons are hardy in zones 2- 11, so almost every gardener can grow them.  They are an annual flower, but they reseed freely and once you have them you may not need to replant them every year.  I don’t find them invasive though, they rarely come up far from where they were first planted.

Bachelors Buttons have narrow leaves of silver green and plants grow about 3 feet high, although some dwarf varieties exist.  Plants grow quickly and will bloom in about 10 weeks from seed.  Each plant is narrow and Bachelors Buttons look best when planted in dense groups rather than in rows.

Bloom time for Bachelor’s Buttons is from early summer to frost although really dry hot weather may halt blooming. The flowers are about 1 ½ inch across and consist of tubular 5 petaled florets arranged in a circle. There are a few narrow petals in the center, by the stamens. Common colors are all shades of blue, a good true blue rarely found in garden flowers, and they also come in pink, white, and maroon shades.

Bachelors Buttons have tiny seeds but the seeds are loved by birds, such as goldfinches.  The flowers are visited by both bees and butterflies.  They are a great plant to add to pollinator and wildlife gardens.  Cornflowers are said to be deer resistant, although one must assume any plant will be eaten by deer if they take a notion to do so.

How to grow Bachelor’s Buttons

You’ll probably have to start your Bachelors Buttons from seed.  I find most nurseries don’t carry the plants.  Many seed packets of cornflowers will be mixed colors, although you can order pure color varieties.  The seed germinates easily.  You can start seeds inside about 6 weeks before your last expected frost or simply plant the seeds where you want them to grow.  Bachelors Buttons can be fall sown, you plant the seeds in fall where you want them to grow and they will germinate in the spring.

Bachelors Buttons should be planted in full sun.  They are very tolerant of many types of soil.  They are fairly drought resistant but blooming will suffer if it gets too dry.  A light fertilization when planted may promote more blooms but generally isn’t necessary.  Plants grown in rich soil tend to be more floppy.  If cornflowers are thickly planted in patches they seem to hold each other up better than those planted thinly or in rows.   I plant my seedlings I start inside 2 inches apart in the garden.

Like many annuals cornflowers will bloom longer if they are deadheaded, (keeping dead flowers cut off).  I do this quickly from time to time with scissors.  You don’t have to do this, and make sure to stop deadheading later in the season so some plants will set seed, unless you don’t want them to reseed.   You may want to save some seed to start inside next year.  Keep it in a dry, but  cold place, like a refrigerator produce drawer or unheated garage until you are ready to sow it.

Uses of Bachelors Buttons

Bachelors Buttons are excellent cut flowers and are grown for the florist trade.  They are often used in men’s boutonnière; a flower stuck in a buttonhole, hence the name Bachelors Button.

The flowers of Bachelors Buttons are edible and can be used in salads for color. Since the flowers are held together by a cluster of tough sepals I would pull the petals off and sprinkle them in salads. But whole flowers could be used for decoration on cakes. Blue cornflowers were often crushed and used to color sugar a pretty pale blue for sprinkling on confectionaries.

The dried petals of cornflowers are often used in teas, Twinings Lady Grey tea owes some of its flavor to cornflowers.  The teas are said to help digestion.  An infusion of flower petals was often used as a soothing eye wash. Flower extracts were also used in hair products. ( Hey is that where old ladies originally got blue hair?)  A dye or ink can be made from flower petals when mixed with alum, although dyes are said to be not very permanent.

Infusions of Bachelor Buttons plant parts are said to be antipruritic, antitussive, astringent, weakly diuretic, emmenagogue, and very mildly purgative.  They are used as a mouthwash for bleeding gums and mouth infections.  The seeds of Bachelors Buttons can be used as a mild laxative.

Whether you want it for bouquets, tea or its attractiveness to wildlife Bachelor’s Buttons makes a good addition to the garden.  Even if your garden has a more formal look you may be able to find a spot to tuck in some cornflowers.


Cherry Pie Filling and some ways to use it

Here in Michigan it’s cherry season and since Michigan is a top producer of cherries in the US, it’s probably cherry season for you too.  Here’s how to make some cherry pie filling or topping and how to use that filling for some yummy summer desserts.  The filling recipe is from my canning book, Knacks Canning, Pickling and Preserving and it makes about 6 quarts of filling.  What you don’t use up you can freeze or can.


You’ll need a colander or strainer and a large pot or two plus containers or jars to can or freeze the extra filling.  Clear Jel is found in the canning section of stores.  If you don’t use red food color your cherry filling will be a yellow-red but will taste just fine.  To make it a pretty red use a few drops of food color.

Ingredients
6 quarts of pie/tart cherries
7 cups of sugar
1 ¾ cup Clear Jel
9 ½ cups water
2 teaspoons cherry or almond extract
½ cup lemon juice
Red food coloring (optional)

Wash, remove the stems and pit the cherries. You can buy inexpensive cherry pitters if you don’t like using your finger nails.  A nut pick, crochet hook, or tip of a potato peeler can be used for pitting cherries.  A plastic straw can be used to poke the pit right through the cherry.

Fill your large pot with water and bring it to a boil.  Fill your colander with cherries and lower it into the boiling water.  Leave the colander 1 minute in the boiling water, then lift, drain cherries, put them in a bowl and repeat this until all the cherries gave been dipped in the water.  Keep them warm.

Next put your sugar, Clear Jel, water and extract in a sauce pan and cook and stir until the mixture is thick and bubbly.  Keep stirring so it doesn’t scorch.  Add the lemon juice and cook for 1 more minute.  If you want to add red food coloring to make the sauce prettier, blend it in now.

Pour the hot syrup over the cherries and fold them into the syrup.  They mix with the syrup better if they are kept warm.  You can use the filling immediately, can the filling or let it cool to room temperature and freeze it.

To can the filling pour it into clean hot quart jars to ½ inch from the rim.  Stir to remove bubbles, wipe the rims and add your lids.  Process in a water bath canner 35 minutes from 0-3000 feet altitude, 40 minutes 3001-6000 feet altitude, over 6,000 feet 45 minutes.

Uses for cherry filling

Pie
You can use a pre-baked crust or tart shells or make your favorite pie crust recipe.  Just pour in the filling.
Cherry chocolate cake
Instead of frosting pour cherry filling over your favorite chocolate cake after baking.  It’s delicious!
Cherry cobbler
Pour about a quart – 8 cups – of cherry filling in a 9 inch cake pan.  Mix a ½ package – about 2 cups of yellow or cherry cake mix with 1 egg, ½ cup melted butter and a half cup water until well blended.  Spread over the cherry filling in the pan.  Bake at 350 until the cake is browned on top and a toothpick inserted just into the cake portion comes out clean, about 30 minutes.
Cherry Cheese cake topping
If you have a favorite cheesecake recipe you can just use the cherry filling on top.  Or take a graham cracker pie crust and fill it with prepared cheesecake filling (sold by the cream cheese in supermarkets) and use the cherry filling on top.
Cherry pudding dessert
Fill a deep graham cracker crust about half full of vanilla (or chocolate) pudding.  Then fill the remainder with cherry filling.
Cherry Barb-b-cue sauce
Blend some cherry filling in your blender until smooth.  Some people also like to blend in a little red pepper.  I suggest ½  teaspoon red pepper to 3 cups of filling, taste it and see if you like the flavor or want more heat.  Use the cherry filling to baste meat; it goes really well with poultry.
Cherry dip
For a sweet dip simply blend your cherry filling with softened cream cheese.  Blend the cherry filling smooth first, or until it’s just slightly chunky.  Use 1 part filling to 2 parts cream cheese or whatever portions suit your taste. A bit of vanilla or cinnamon can be added.  Serve with chocolate graham crackers or cookies, chunks of cheese or fruit and vegetables. For a spicier dip blend in some red pepper with the cherry filling and cream cheese. 

 Or how about some sweet cherry wine?

Kim Willis
 “He who has a garden and a library wants for nothing” ― Cicero

© Kim Willis - no parts of this newsletter may be used without permission.

And So On….
Do you have plants or seeds you would like to swap or share?  Post them here by emailing me. You can also ask me to post garden related events. Kimwillis151@gmail.com


Find Michigan garden events/classes here:
(This is the Lapeer County Gardeners facebook page)
An interesting Plant Id page you can join on Facebook

Here’s a seed/plant sharing group you can join on Facebook

Newsletter/blog information

If you would like to pass along a notice about an educational event or a volunteer opportunity please send me an email before Tuesday of each week and I will print it. Also if you have a comment or opinion you’d like to share, send it to me or you can comment directly on the blog. Please state that you want to have the item published in my weekly note if you email me. You must give your full name and what you say must be polite and not attack any individual. I am very open to ideas and opinions that don’t match mine but I do reserve the right to publish what I want. Contact me at KimWillis151@gmail.com

I write this because I love to share with other gardeners some of the things I come across in my research each week. It keeps me engaged with people and horticulture. It’s a hobby, basically. I hope you enjoy it. If you are on my mailing list and at any time you don’t wish to receive these emails just let me know. If you know anyone who would like to receive a notification by email when a new blog is published have them send their email address to me.  KimWillis151@gmail.com


Tuesday, June 27, 2017

June 27, 2017, Kim’s Weekly Garden Newsletter

Hi Gardeners
 
Calla lilies
I am so mad right now.  My daylilies, Asiatic and oriental lilies are just starting to bloom.  I walked out to the bed farthest from the house to get some pictures and found that last night the deer had eaten all the buds and flowers off the daylilies and some of the smaller Asiatic lilies.  It’s time to kill some deer!  They haven’t bothered those up by the house- yet.  I took down my twinkling solar lights after the tulips were done; I guess maybe I need to put them back up.

It’s not like the deer don’t have anything to eat right now.  Everything is lush from all the rain we’ve been having.  My flowers were just dessert I guess.  They left the buds on the tall trumpet lilies; I hope they don’t notice them.  I thought lilies were supposed to be poisonous- I hope they were poisonous.

Well besides the lilies the beebalm and buddleia are beginning to bloom.  My pot of rain lilies is blooming. Echinacea and helenium are blooming and the clematis are going strong.  The roses are blooming still too.  The groundcover sedums and hens and chicks are blooming.  The fields are covered with ox eye daisies and by the large pond a wild sweet pea is blooming all over with deep pink flowers this year.

We got the first ripe tomato out of the garden yesterday, with more soon to follow.  It’s an Early Girl from my cheater plant, the extra-large plant I buy every year to have early tomatoes.  We will actually have tomatoes while the lettuce is still good this year.  I usually have some by the 4th of July but we are a bit early this year.  This one was cut in wedges, smeared in salad dressing and wrapped with bacon. (We seldom eat bread).  It was deep red, juicy and delicious.

My mulberry tree has been full of birds and the birds here are going through 2 suet cakes a day at my feeders.  All the babies are coming to the feeder and the parents feed them suet.  The sunflower seeds are going fast too.  It gets expensive feeding them this time of year but I enjoy seeing all the different kinds of birds that come for the food.

I had another animal problem today.  My fault.  We had a litter of baby kittens in the barn under the chicken nest boxes.  A duck had decided to share the space with them and laid a pile of eggs under there too.   The kittens were starting to explore and I thought I would put a little dry cat food under there for them to find.  That was a bad move.  I came out this morning to find the duck eggs had been raided and eaten by a coon.  I quickly checked for the kittens and they were still there, unharmed it seems. 

I think the coon smelled the cat food and went looking for it.  I shouldn’t have put any near there. I’m not too upset over the duck eggs; they weren’t sitting tight on them yet.   Mama cat decided not to take any chances however and moved her kittens up by the deck, in the tall daylilies there.  (They can’t get under the deck.)  Now I have kittens toddling across the deck that I have to worry about stepping on. One keeps trying to follow me. Gizzy was way too interested in them too.  He gets along well with some cats but I’m worried he’ll be too rough on the baby kittens. They are toy sized.  I’ll have to watch him carefully.  Hopefully momma cat will move them along somewhere else soon.
 
Baby downy woodpecker getting fed suet

Next week the 4th of July holiday falls on Tuesday and I won’t be putting out a newsletter.  Look for one July 11th.

Mulberry trees

I personally don’t find mulberry fruit very appealing, it’s pretty bland.  But the birds and a lot of different animals consider mulberries as candy.  If you enjoy bird watching, plant a mulberry tree; just make sure it’s a good ways from your clothesline or where you park your car.  And some people enjoy the fruit themselves.

The red mulberry Morus rubra is native to Eastern North America from Canada south to the gulf.  It was once very common and widespread but is now listed as endangered in Canada, Connecticut and Massachusetts and threatened in Michigan and Vermont.  If you like attracting butterflies the red mulberry is the host or larval plant for the Mourning Cloak butterfly.

White mulberry

The white mulberry Morus alba is native to China and was brought to North America in an attempt to start a silk industry because silk worms feed on the leaves.  It has escaped cultivation and has naturalized in many places.  Some areas consider it an invasive plant.  There are, however cultivars of white mulberry such as ‘Pendula’ that are used as landscape plants.

Both mulberries are smaller trees growing to about 35-40 feet high at maturity.  They prefer full sun conditions in good loamy soil but will grow in partial shade.  Red mulberry is more tolerant of shade and often found in the wild in the partial shade of larger trees.  In the wild both are often found along streams and on the edges of woodlands, white mulberry is more common in open sunny fields. White mulberry has been used for erosion control.  Trees have rounded crowns, with abundant branching and branches close to the ground.  Branching is alternate.

Both mulberries have oval leaves to lobed leaves, lobed leaves usually are on younger branches.  Red mulberries leaves are rough feeling to the touch and dull green, while white mulberries are smoother and have a glossy surface.  Red mulberries have a hairy back surface and a finely serrated edge.  White mulberry leaves have deeper serrations on the edge and are larger than red mulberry leaves. The bark of red mulberry trees is flat scales of red brown, often young trees have a reddish sheen when wet.  White mulberry bark has raised ridges with a yellow- tan inner bark showing between the ridges.

The flowers of both mulberries are inconspicuous long catkin like clusters of greenish white and are wind pollinated.  Here’s the confusing part.  Some references list both species as being dioecious, having male and female flowers on separate trees.  Others list both species as having separate male and female flowers on the same tree.  Some references state the trees can be either type of flowering.  The pollen of mulberries is very allergenic so if you have allergies you may not want a tree nearby.

Personally I have never seen a mulberry without fruit, which would indicate it’s a male tree.  All the mulberries I have known always have fruit in season, which means they were all female and I never saw the male, or they have both male and female flowers.  I know my current tree has both sexes of flowers.  It’s a white mulberry.

Anyway in both red and white mulberries the flowers turn into long blackberry like fruit in early summer.  Despite its name most white mulberry trees fruit ripens to deep red or purple.  Red mulberry fruit ripens to purple- black.  A few white mulberry trees have white or pink fruit when ripe.  The fruit is sweet and perfectly edible.  Beware it can stain hands and things the berries land on, as can the poop from birds eating the berries.

Identification of mulberries can be tricky as the two species can hybridize although no one knows how common this is.  There are other species of mulberry that are sometimes brought in as cultivated plants.

You can start mulberries from seed quite easily, although they need a period of cold stratification.  Mulberry cuttings also root easily.  Most gardeners will want to start with a small tree, which will grow rapidly and fruit in just a few years.  Some nurseries sell mulberry trees, usually white mulberry cultivars.

Mulberries have few pests or diseases.  They only need fertilization in the poorest soils and are moderately drought tolerant once established.  While they will grow in partial shade fruiting is best in full sun.

Uses of mulberry

The fruits of mulberry have been used for centuries in jams and jellies and to make wine.  They can be eaten fresh too.  They can be turned into pies and cobblers.  To collect the fruit people often put something under the tree like a sheet and then shake the tree.  Birds adore the fruit and animals like squirrels, raccoons, opossums also like them.  Box turtles will eat the fallen fruit.

Mulberry syrup was often used to hide the flavors of medicines.  Mulberries were used in both Native American and Chinese medicine.  Fruits were used to cure constipation and other digestive problems, for urinary tract problems, in the treatment of fatigue and weakness, and for blood sugar control among other things.  Mulberry juice was used to treat baldness and graying hair.

The inner bark of red mulberries was separated into fibers that were woven into clothing by Native Americans.  Shoots were woven into baskets.  Mulberry wood makes good fence posts and the wood is used to smoke meat and give it a sweet pleasant taste.

The shoots, leaves and unripe fruit of mulberries is mildly toxic and may result in severe digestive upsets if eaten.

Talking about ticks

Black legged or deer tick
Wikimedia
Ticks have been in the news a bit lately; it seems like tick populations are up in many states.  There are also some rare tick borne diseases that are popping up more frequently.  In a well maintained yard and garden gardeners aren’t very likely to experience ticks.  However if you garden near woody, brushy areas or unmown fields, are clearing land or like to walk in wilder areas you may have a dreaded tick encounter.

There is at least one species of ticks in every US state. Ticks won’t however, be in every area of a state. While every tick doesn’t carry disease some tick bites can infect you with some very serious or deadly diseases.  Lyme disease is the disease people hear about the most and probably the most common disease ticks carry.  Lyme disease can have serious long term effects on people.  But there are many more serious diseases ticks carry.

Most tick borne diseases have no cure, supportive care is needed to prevent complications.  Tick diseases commonly begin with flu like symptoms and fever and progress to affect various organs.  Encephalitis and arthritic pain are common in many of the diseases.  Some cause anemia or cardiac problems.  Rashes of various forms, including the famous bulls eye rash of Lyme disease, are associated with many tick borne diseases. Deaths can occur with many tick diseases. 

Tick borne diseases can be hard to diagnose, especially if the sick person doesn’t know they were bitten by a tick.  Because a lot of tick diseases require the tick to feed for a while on a human to transmit the disease, many people do know when they get a potentially bad tick bite.  If you find a tick that is engorged, full of your blood, on you, it’s a good idea to keep the tick and have it identified.  If you get any flu like symptoms or a rash shortly after the encounter notify your doctor you were bitten by a tick. 

To save the tick for identification, which requires an experienced, trained person, put them in a jar of alcohol after removing them (see below) or freeze them in a plastic bag.  Call your local health department or your County Extension office to find out where to take or send a tick for identification. Tell them if you were traveling when you acquired the tick and where.  Identifying the tick and knowing the area the tick came from can help narrow down what diseases the tick may be carrying.

Here are some of the diseases ticks cause in the US and the species of ticks that transmit them.  Not all species of ticks and or all of these diseases are found in every state.  Some state will have several species of ticks.  The brown dog tick is found in every state.

Anaplasmosis, blacklegged tick (Ixodes scapularis) and western blacklegged tick (Ixodes pacificus)
Babesiosis- blacklegged tick (Ixodes scapularis)
Borrelia mayonii blacklegged ticks (Ixodes scapularis)
Borrelia miyamotoi- blacklegged tick (Ixodes scapularis)
Colorado tick fever -Rocky Mountain wood tick (Dermacentor andersoni).
Ehrlichiosis- lone star tick (Ambylomma americanum)
Heartland virus infection- lone star tick (Ambylomma americanum)
Lyme disease blacklegged tick (Ixodes scapularis) and western blacklegged tick (Ixodes pacificus).  30,000 cases a year. 
Powassan disease blacklegged tick (Ixodes scapularis) and the groundhog tick (Ixodes cookei).
Rickettsia parkeri rickettsiosis - Gulf Coast tick (Amblyomma maculatum).
Rocky Mountain spotted fever (RMSF) American dog tick (Dermacentor variabilis), Rocky Mountain wood tick (Dermacentor andersoni), and the brown dog tick (Rhipicephalus sangunineus).
STARI (Southern tick-associated rash illness) the lone star tick (Ambylomma americanum).
Tickborne relapsing fever (TBRF)
Tularemia- dog tick (Dermacentor variabilis), the wood tick (Dermacentor andersoni), and the lone star tick (Amblyomma americanum).
364D rickettsiosis (Rickettsia phillipi, proposed) the Pacific Coast tick (Dermacentor occidentalis). This is a new disease that has been found in California.

The lone star tick, Amblyomma americanum also causes an unusual allergic reaction to red meat.  After people have been bitten by this tick they may have a severe allergic reaction when they eat red meat.

Removing a tick

The CDC recommends removing ticks as soon as possible, the longer a tick stays on you the more likely it will transmit a disease.  They also recommend that you do not use Vaseline, nail polish or similar products to smother them or use a lighter or fire on the tick. Smothering takes too long and fire is too dangerous.

Do not yank the tick out quickly, if you break it in two and leave the head imbedded it can cause an infection.  Use a pair of tweezers and grab the ticks head as close to the skin as you can.  Pull up with a slow steady movement.  You can buy a special tick removal tool that looks like a little spoon with a notch in it.  If you frequently have to remove ticks you may want one. After removing a tick clean the area with alcohol or soap and water.

If you do break off a tick head in your skin flush the area with alcohol and then use some antibiotic cream.  Dispose of pulled ticks in a cup of alcohol, a jar with a tight lid or flush them down the toilet. 

The tick life cycle and habits

Ticks have 4 life stages, egg, larvae, nymph and adult. Larval ticks are very small and only have 6 legs.  Nymph ticks have 8 legs and look like small adult ticks.  Adult ticks are the largest and are able to mate and produce eggs. Eggs are generally laid on the ground by female ticks in the thousands. 

After hatching ticks require blood meals at every stage of life.  Some ticks will feed on the same species of animal throughout their life stages; others require different species of animals at different stages.  Ticks can feed on any warm blooded creature including birds and they also feed on reptiles and amphibians in some species, but they have their preferred species. Humans aren’t a preferred tick food but they readily accept us to feed on in the adult and in some species, nymph stages.
Life stages of the Lone Star Tick
Photo from the CDC

Ticks don’t jump like fleas and they don’t fly.  What they do is climb up on grass or weeds and hold out their first pair of legs to grasp any animal passing by.  They sense movement, animal body heat or breath, vibrations and other things depending on the tick species in order to find their preferred host species. When they haven’t eaten in a while ticks can be very small and hard to see, especially in the larval stage.  They are the size of a period in this article.

When it finds a body to feed on ticks may attach quickly in some species, or they may crawl on the host looking for a good spot.  They seem to like hairy spots with thin skin.  It can take 10 minutes to 2 hours for a tick to firmly attach itself and begin feeding.  The tick inserts a feeding tube into the victim’s skin and then produces a glue-like substance to keep it there.  Some ticks also have barbs on the tube. The front of the tick head will seem to be buried in the skin when it’s attached.  The salvia of the tick is injected into the wound and this has an anesthetic in it which keeps the host from feeling the tick feeding.

Ticks can feed for several hours or even days.  As they fill with blood they get larger and easier to see.  Some adult engorged ticks will be as big as a penny.  When full they drop off, maybe lay some eggs, digest their meal and then look for another one.  The longer a tick stays on you feeding the more likely you will be infected with a disease so it’s important to remove them as soon as possible.

Treating the yard and garden

A product that kills ticks is called an acaricide.  There are several on the market. Read and follow the label directions carefully and only use them if you know ticks are on your property.  Many of these products are harmful to birds and aquatic animals and can harm beneficial insects too.  They should only be used near human habitation.  A professional pest control company often uses high pressure sprayers that penetrate debris and weeds for better coverage.

Many people recommend getting guinea hens (a type of poultry) because they like to eat ticks.  They do eat ticks but won’t get them all.  Guineas roaming in brushy areas where ticks are found are also food for other animals.  They are also very noisy and your neighbors may prefer the ticks.  Chickens and ducks will also eat ticks when they find them, but be aware that ticks can also feed on birds too.  Poultry alone is rarely sufficient to completely control ticks.

Opossums and ticks

You may have read on the internet that opossums help kill ticks.  This is true to some extent.  Opossums groom themselves like cats and eat ticks that attach to them; scientists estimate they may eat 5,000 ticks a week in heavily infested areas.  They don’t hunt for ticks, but it may be a good idea to let them live around your property if they aren’t bothering anything else so they can act as a tick magnet.

But just like guinea hens don’t count on a possum population to totally control ticks.  And there may be other reasons that discouraging possums would be wise.  Horse owners know opossums can transmit diseases to horses so they often eliminate them from barns.

Keep deer and mice away

Feeding the deer is a good way to bring ticks on your property.  Deer are excellent transporters of ticks.  Anywhere deer congregate should be avoided and walking on narrow trails deer make through fields is also a good way to get ticks.

Mice are the hosts for some types of ticks in their early life stages.  Clean up any areas that attract and hide mice and try to eliminate them from your home and yard. You can buy tubes filled with treated nesting material for mice.  It doesn’t kill the mice but when they carry the nesting material away and sleep in it the ticks are killed. One such product is Damminix Tick Tubes.

Treat dogs/ pets with flea products that also repel and or kill ticks

Dogs can get many of the same diseases from ticks that people do.  And dogs are the frequent way ticks are brought inside or to the yard after they have been exploring in the woods and fields.  Check your dog after every field trip.  If you live in tick infested areas use one of the many products that kill and repel ticks on your dogs from early spring through fall.  If your dog gets sick after being fed on by ticks see a vet.
 
Dog Tick
Wikimedia commons
Other pets can get ticks too.  Don’t use dog tick repellents on other animals like cats because many are toxic to other species. Check with a vet before applying tick products to any animal. Cats usually groom them off themselves.  Pet tortoises have been known to pick up ticks.  Rabbits also get them.

Horses on pasture often get ticks and can get several diseases from them. Some fly repellents also repel ticks.  Remove ticks found on horses like you would for a human.  Check with a vet if horses seem ill after being bitten by ticks.

Keeping ticks off you

Use a repellent that contains 20 percent or more DEET, picaridin, or IR3535 on your exposed skin.  If you expect to run into ticks do not take risks with home and “organic” remedies.  These products also protect you from mosquitoes and biting flies.

You can also treat clothing and things like camping gear, with a product containing 0.5% permethrin.  Don’t use this on your skin.   These products remain through several washings.  You can also buy pre-treated clothing and some of those items will repel ticks for a long time. Permethrin must be applied to clothing 48 hours before it’s worn and allowed to dry.  Using permethrin on shoes and other clothing reduces your chances of getting ticks by about 70% according to research.

Try to stay on mowed/cleared paths, in the middle of them preferably,  and out of deep grass and brush.  Around the home keep the lawn short and brush and weeds cleared away.  Pick up any litter or rubbish that can hide mice and or ticks. Make a 3 feet barrier of wood chips or gravel between wooded or brushy areas and the lawn or garden.

Wear long pants, socks and shoes when working or walking in areas where ticks may be. Tuck pants into socks or boots.  If you are bending down pulling weeds or other chores wear long sleeves with a wrist band.

When coming in from working or walking in tick prone areas immediately inspect all your skin surfaces, including body cracks and crevices and your scalp.  Ticks tend to climb upward and like warm hairy places on the body best. Check your scalp. You may need to use a mirror.  Strip and take a shower with hot water if you can.  Inspect anything you carried inside like a jacket or backpack for ticks too.  And check your dog if it’s been out there with you.

Throw your clothes in the washer and wash them with HOT water.  If you have one of the machines that doesn’t let the water get very hot you’ll need to dry clothes on high heat for 60 minutes or more.  If you can’t wash the clothing put it in the dryer for 60 minutes on high heat. 

Remember most gardeners won’t have to worry about ticks in regularly tended gardens.  And don’t panic if you do get a tick bite.  Most people will not get a disease from the bite.  But if ticks are common in your area it’s best to protect yourself and be on the look-out for them.


Keep kitchen and bath products out of the garden

It simply amazes me what gets passed around as garden tips.  Every imaginable food, beverage, spice, and cleaning product seems to have found some miraculous use in the garden.  Even human medicines are being side tracked to the garden.  Most of these folk remedies are harmless but useless.  Some however can harm plants or even people and pets.  The remedies are often touted as organic or safe although some are neither.  

Often these garden remedies are generated because someone has misread and/or misapplied some research published on a promising new product using something similar to a product found in the home.  For example there are tips floating around now that cornmeal, the kind you bake with, can kill weeds.  This came from studies using corn gluten meal, a different product made from corn you won’t find on grocery shelves.  Some studies found that corn gluten meal will suppress the germination of some weed seeds.  There is at least one commercial product on the market featuring corn gluten meal but the remedy has never really taken hold among professional growers or farmers because it isn’t that effective and there are many drawbacks to its use.

People reading the research came to the wrong conclusion that sprinkling cornmeal in the garden would suppress or even kill weeds.  It doesn’t.  What cornmeal does is mold and attract mice and other animals.  There is currently some debate among researchers as to whether corn gluten meal is actually an effective weed suppressor anyway.  It seems to be ineffective in some areas.  The corn gluten meal has a high nitrogen content, which makes things grow well, but it may not be so great for the environment when excess nitrogen leaches into the water supply and forms nitrates.  Here are some links that give both sides of the corn gluten debate.


Remember corn gluten meal is different from the cornmeal found in your kitchen.  Don’t use cornmeal in the garden.

Let’s talk about some other household things used in the garden

Epsom salt- this is probably one of the most misused products in the garden ever.  It is recommended freely and often as a remedy for killing bugs, weeds, fungus infections, plant diseases, as a fertilizer, to make fruit or vegetables taste different, to make flowers prettier and more abundant, to reduce transplant shock and to make the sun come out on a rainy day.  It doesn’t do any of these things, despite all the testimonials.  Every research study has found it useless.  Epsom salt is simply magnesium and sulfur.  The only thing it could do is correct a magnesium deficiency in the soil, which is rare in the home garden.

Epsom salt is not harmless either.  If too much magnesium builds up in the soil it can alter how other nutrients in the soil can be used by plants.  Other nutrient deficiencies may occur with its use.  Some plants are sensitive to it being used on leaves and will suffer damage.

Vinegar is probably the second most recommended useless product for the garden.  It’s purported use as a weed killer comes from some research using a very strong commercial concentration of vinegar, not the kind that comes from the grocery store.   Mixing edible vinegar with baking soda, dish soap, Epsom salt, beer or other things doesn’t make it any more effective.  Straight vinegar applied to the foliage of some plants may kill the foliage, but won’t kill the roots.  Kitchen vinegar won’t harm some weeds. Vinegar won’t cure plant fungal infections like powdery mildew, fungal infections can’t be cured, only prevented.

Commercial strength vinegar if you can find it, is difficult and dangerous to work with, it can cause severe burns and eye damage.  Any type of vinegar may harm plants you don’t want harmed if it splashes on them.  And that means you can’t use vinegar to kill bugs on plants, not only will that not work but it will harm the plants.

Cinnamon is another useless home remedy.  While cinnamon does have some anti-microbial properties sprinkling it on plants or the soil will not do anything.  It won’t kill insects or cure fungal problems or keep deer away.

Coffee and coffee grounds are both fairly harmless but also pretty much useless as a remedy for anything.  Coffee isn’t a balanced fertilizer although it may contribute some nitrogen. Coffee doesn’t kill insects.  Coffee grounds add some organic matter to soil. They don’t even budge the soil pH (make it more acidic) in any significant way.  The only thing pouring coffee on plants does is give them some water.

Sugar of any kind is not needed by plants, they make their own.  It does not help plant growth.  What it does is attract ants and other insects and animals.

Eggs and eggshells have very limited uses in the garden.  Eggshells can be added to compost or the garden without harm.  But they don’t release calcium very quickly, it takes years for shells to release calcium in any appreciable amount, therefore they won’t cure a calcium deficiency.  Crushed egg shells also do not deter slugs.  Videos have been made with slugs crawling right over them without harm.  Whole eggs take years to decompose.  They are a magnet for animals, like coons and opossums, which can damage your plants digging them up.

Using a spray of raw eggs on plants to deter deer and rabbit damage is only mildly effective and it smells terrible.  Do not use a raw egg spray on edible plants, you may get salmonella or other food borne diseases.

Dish soap is full of chemicals.  It should not be considered an organic product. Just check the label.  Insecticidal soap sold for garden use is vastly different from dish soap, which is actually a detergent.  Insecticidal soap is made with fatty acids which don’t harm plants. While dish soap is harmless to you, it harms plants by stripping them of the waxes and fats which protect plant leaves.  Stripping the protective coating on plant leaves makes them more susceptible to diseases and insects.  Detergents don’t kill all insects and the product must contact the insect for it to work.  Eating leaves with a residue won’t kill insects. Dish soap doesn’t cure fungal infections or any other plant disease.  Adding other things to dish soap doesn’t make it any better.

Dish soap sprayed on plant leaves may also react with sunlight to burn the leaves.  Some plants are quite sensitive to even small amounts and may be severely damaged or killed.  The only good use for dish soap in the garden is to put some in water and knock or pick insects off plants and throw them into it.

Baking soda is another useless remedy in the garden, regardless of what it’s mixed with.  It doesn’t kill fungal diseases, or insects.

Beer has only minor benefit to gardens.  Beer can be used to trap slugs but that’s the extent of its usefulness in the garden.  It isn’t fertilizer; it doesn’t keep bugs, including mosquitoes, away.  In fact it may attract mosquitoes and other insects.  It isn’t a tonic for plants nor can it cure any plant disease.

Mouthwash, cheap, blue, or otherwise is mostly alcohol.  It might kill insects if it contacted them but won’t kill them as a residue on plants. It doesn’t keep mosquitoes away. It doesn’t cure fungal disease.  It can harm plants by stripping off protective oils and waxes from leaves and may burn the leaves when alcohol sprayed leaves are subjected to sunlight.

Aspirin (acetylsalicylic acid) is produced by plants as a defense against insects.  But crushing an aspirin and mixing it with something and spraying your plants doesn’t kill insects.  It doesn’t cure plant diseases either.  In humans it doesn’t cure anything either, it just eases pain and inflammation. Does it help plant pain? Who knows.  But weed (marijuana) growers will tell you it will kill your plants if sprayed on them.

The miraculous effects some people have by applying some of the above folk remedies can be attributed to a placebo effect, or giving the plant more water in a mixed solution or just chance.  And folk remedies aren’t cheaper if they do no good, they are wasted money. 

Zinnias- Summer Sizzle From South of the Border

Are you growing zinnias in your garden? You may have seen zinnias growing in your mother or grandmothers garden.   Zinnias fell out of favor for a while with home gardeners but they are back with a vengeance.  The new and improved varieties are carefree and excellent for beginning gardeners and children.  

Zinnias are excellent as bedding plants for masses of color, in the back of mixed borders for late summer color and for cutting flowers.   Some of the newer, compact varieties look nice in containers and provide continuous color in hot spots. Zinnias make excellent cut flowers; the more you cut the more they bloom. 


Zinnias are annual plants, meaning that they complete their life cycle in one year.  Native to Mexico, zinnias are not frost hardy, but they will grow anywhere where they have a few frost-free months. Zinnia leaves are dark green, with a long pointed oval shape and feel rough to the touch. 

Zinnia flowers come in every color and color combination imaginable except blue. The flowers range in size from 1 inch across to 6 inches across.   Zinnias can have single daisy-like blooms or very double, full pom-pom shaped blooms.  Some zinnia varieties also have flower petals shaped like narrow quills. 

Growing Zinnias

Zinnias are one of the easiest flowers to grow from seed.  The seed can be sown in the garden after all danger of frost or started indoors for earlier flowers.  If grown indoors don’t start the plants too early.  Zinnias suffer a little from transplanting and small plants recover faster.   Start the seeds indoors in a warm area about 3 weeks before your last frost.  Zinnia seed will germinate in less than a week in the right conditions.  Or plant zinnia seed outside after the last frost, when the soil is warm.  Cover the seed lightly with fine soil or compost and keep moist.   Thin seedlings or transplant your indoor seedlings to stand about 6 inches apart for small varieties and 8-10 inches apart for tall types.  

Zinnia seedlings are often available in nurseries for sale.  Ones that have started to bloom or have gotten tall and spindly in a small cell pack should be avoided.  Zinnias bloom in 6-10 weeks from seed.

Zinnias require full sun.  They thrive in hot areas as long as they get enough moisture.   They like good rich soil and appreciate a slow release fertilizer in the spring when they are planted and a booster shot of fertilizer in mid to late simmer.    Zinnias need to be watered if there is less than an inch of rain each week, or sooner if they appear to be wilting.  They will reward you with hundreds of colorful flowers for just a little care.

If you are growing some of the older, heirloom varieties of zinnias, a little pinching back in early summer will make them bushier and produce side branches with more flowers.  Many new varieties already have a good branching habit.   You can cut zinnias without a worry for bouquets as this just encourages the plant to bloom more.  Be careful to cut blooms though, not pull at the plant to remove flowers as this may damage the root system.   Deadheading, removing the old flowers before they set seed will keep the blooms coming. 

In late summer you may want to let some zinnias go to seed.  The seeds are easy to collect and store for next year.  Wait until they are fully dry on the plant then clean out the old petals and other junk and store at room temperature.  Use clean dry jars for storage or heavy duty plastic bags.  In mild areas zinnias often re-seed in the garden. You may not get exactly the same flowers as the zinnias this year but they will be colorful and who knows, you may discover something unique.

Zinnias worst problem in the garden used to be powdery mildew, which they are very prone to getting in humid areas.  Modern varieties are very resistant to powdery mildew.   Powdery mildew makes a white powder on the leaves, which then dry up and die.  Plants usually keep trying to produce flowers but much of their energy is used replacing foliage and the dead foliage looks awful.  

Water zinnias early in the day so the foliage dries before night, and try to water at the base of the plant.  Make sure the plants are not too crowded.  Remove all of the dead foliage after a frost and take it away from the garden. If you want to grow some of the beautiful older varieties of zinnias you will probably need to protect them with a flower fungicide, beginning in early summer.

Some Varieties

For low masses of color in borders and beds try the ‘Magellan’ series, which is available as a mix or several individual colors. They have 4-5 inch double flowers on foot high plants.  ‘Dreamland’ series are similar but shorter.  ‘Aztec Sunset’ has 2 inch flowers of mahogany red and bronze on compact plants.   ‘Profusion’ series of zinnia has single, daisy like flowers on compact plants. 

“Zowie’ has 3-5 inch flowers on 3-4 foot stems.  They begin magenta pink and yellow, but change to flame red and yellow as they age.  ‘Big Red’ is big- a 3 foot or taller plant smothered in scarlet red 6 inch flowers.   ‘Envy’ has unusual lime green 2 inch flowers on 3 foot plants.   ‘Candy Stripe’ is an older variety with white double flowers, variegated with streaks of pink and red.  ‘Oklahoma’ series has small 1-2 inch flowers, on 2 foot plants, excellent for cut flowers.  ‘Giant Cactus’ is an old variety with large, 4-5 inch flowers that have narrow petals giving the blooms a fluffy look.  ‘State Fair’ is one of the oldest varieties still on the market.  It has large double flowers in assorted colors.

I’m growing zinnias this year- how about you?

How to make strawberry jam without added sugar

You can make strawberry jam that is without added sugar, but because the sugar in regular jam is what makes it thicken, you need to add a thickener called pectin to get the jam to “jell”.  While this jam is without added sugar it does have some natural sugar from the fruit itself.  And this strawberry jam has fewer calories than regular jam, but is not calorie free.  Each tablespoon of jam will have less than 10 calories.

Jam made with artificial sweeteners needs to be frozen or refrigerated for storage.  The long cooking required to can jam for shelf storage would make the sweetener taste bitter.  This recipe calls for liquid artificial sweetener, available at most grocery stores.  The pectin called for can also be found in grocery stores- they usually have a small canning section near the baking or seasoning products.

Strawberry jam made with artificial sweeteners isn’t the pretty red of jam made with sugar.  To make it more appealing some people opt to add red food coloring, although you can leave it out without harming the recipe.

You’ll need 3 half pint containers with covers that can be frozen or refrigerated safely for this recipe.  They don’t need to be sterilized but should be clean and dry. Freeze the jam if it will take you more than 2 weeks to use it and just thaw one container at a time.  Keep thawed jam in the refrigerator.

Ingredients       

        1 quart of strawberries, washed with caps ( green top) removed.
        3 teaspoons of liquid artificial sweetener- do not use powders.
        1 package of powdered fruit pectin
        1 tablespoon of lemon juice
        red food coloring if desired

Crush the strawberries with a large spoon in a medium saucepan.  Add the rest of the ingredients.  Bring the mixture to a boil, stirring constantly.  When boiling begins, time cooking for 1 minute, stirring all the time, then turn off heat.  Continue to stir until you notice mixture thickening, about 2 minutes.  Pour into your containers and freeze or refrigerate.


Have a happy and safe 4th of July

Kim Willis
 “He who has a garden and a library wants for nothing” ― Cicero

© Kim Willis - no parts of this newsletter may be used without permission.

And So On….
Do you have plants or seeds you would like to swap or share?  Post them here by emailing me. You can also ask me to post garden related events. Kimwillis151@gmail.com


Find Michigan garden events/classes here:
(This is the Lapeer County Gardeners facebook page)
An interesting Plant Id page you can join on Facebook

Here’s a seed/plant sharing group you can join on Facebook

Newsletter/blog information

If you would like to pass along a notice about an educational event or a volunteer opportunity please send me an email before Tuesday of each week and I will print it. Also if you have a comment or opinion you’d like to share, send it to me or you can comment directly on the blog. Please state that you want to have the item published in my weekly note if you email me. You must give your full name and what you say must be polite and not attack any individual. I am very open to ideas and opinions that don’t match mine but I do reserve the right to publish what I want. Contact me at KimWillis151@gmail.com

I write this because I love to share with other gardeners some of the things I come across in my research each week. It keeps me engaged with people and horticulture. It’s a hobby, basically. I hope you enjoy it. If you are on my mailing list and at any time you don’t wish to receive these emails just let me know. If you know anyone who would like to receive a notification by email when a new blog is published have them send their email address to me.  KimWillis151@gmail.com