Tuesday, May 16, 2017

May 16, 2017, Kim’s Weekly Garden Newsletter 

Hi Gardeners
Tulips will soon be done blooming

The hummingbirds are back!  At least one is hanging around my feeders.  I am more worried about the bees now.  Many in my area are reporting few bees and I am noticing that also.  Usually there are dozens hanging around the hummingbird feeders and they aren’t there this year.  I am worried about the apples and other fruit being pollinized.  I guess time will tell if we will get fruit.

Apple blossoms are beginning to fall.  The lilacs smell beautiful but they are at full bloom and this warm weather we are having will quickly wind up their bloom time.  Tulips are also fading. The trilliums are turning pink, a sign they will soon be gone.  Coming into bloom are the alliums and Dames Rocket.  Sweet Woodruff is a carpet of white. Columbine, Jacobs Ladder, and bleeding hearts are blooming. Chives are blooming.  I see buds on the Siberian iris, roses and peonies.

I am slowly moving the hardier things like rosemary, canna and miniature roses out of the house and greenhouse into the yard.  The dahlias are planted out, some are sprouted and some not.  This week I begin transplanting all the seedlings like zinnias, tithonia, marigolds, bachelors buttons and 4 –O-Clocks into my new cutting garden.  It’s going to be tedious work but hopefully worth it.  I am also hoping to get the first sweet corn planted, by the time it germinates frost chances will hopefully be gone.

Weeding and edging are taking up a bit of my time too.  This time of year gets very, very busy.  I also added some new baby chicks into the workload, my replacement layers for the year.  But I wouldn’t trade spring for any other time of the year.

I was down at my pond the other evening, without my camera unfortunately, when I saw an unusual sight.  There was a brown duck on the pond that had a big golden red crest.  She had several tiny ducklings with her.  I thought it was a female wood duck at first, but it didn’t look quite right so I consulted a bird ID guide.  Turns out it’s a Hooded Merganser female.  They nest in tree holes like the wood duck.  My tame ducks were swimming around the family but didn’t seem aggressive to them.  If they stick around I am going to try and get pictures of them. 

We have a cardinal nest and a mourning dove nest in the yard now.  I attached an old newspaper holder, the kind the companies put by your mailbox, to a fence post in the back and I notice the tree swallows are checking it out.  I have a hen sitting on eggs in the barn and two tame ducks sitting so spring is definitely here.

We’ve been able to sleep with the windows open the past couple nights.  Last night we had a little rain and its warm and humid today.  Storms are forecast on and off for the next few days but all in all, it’s nice weather.


Petunias

Are you a plant snob?  I once heard someone remark disdainfully that someone else wasn’t really a gardener because she planted petunias.  When shopping at a nursery one time with petunias in my cart I had an acquaintance come up and ask me why I, of all people, was buying petunias.  I was buying petunias because I like petunias and there are so many beautiful ones out there.  I can’t help myself, I buy some every year and I’m proud to plant them.

Cherry Cha Ching

There is nothing wrong with having petunias in your garden.  Yes they were once the most common garden annual planted.  Older varieties of petunias had to be dead headed and pinched back to keep them blooming all summer and rainy weather turned them into a mess.  But that doesn’t mean petunias don’t belong in modern gardens and modern varieties are much easier to care for than your grandmothers petunias.

Modern petunias trace their genetics back to two major native species, P. axillaris which has large white flowers and is pollinated by moths, and P. inflate which has small purple flowers and is bee pollinated.  Another petunia, P. exserta, has small, true red, star shaped flowers that are pollinated by hummingbirds.  It is sometimes sold by nurseries.  A close relative of petunia, the Calibrachoa, is also gaining in popularity.
Starry Night

Through centuries of domestication and hybridization we have the beautiful petunias we know today.  Petunias belong to the Solanaceae family, which includes peppers and tomatoes.  They are native to South America.

Petunias are excellent choices for containers in sunny hot places, in window boxes and hanging baskets and as a groundcover in sunny areas.  Hummingbirds are attracted to some petunias; I always set out a pot of red petunias, Petunia exserta if I can find it, for them.  Bees and butterflies are moderately attracted to the plant.

Petunias are generally grown as annuals; actually they are short lived perennials in frost free climates. In a heated, well- lit greenhouse you might  be able to over winter a petunia but they don’t over winter well in household conditions.  Gardeners in the far south, zones 9 and above, have reported petunias over wintering in the garden.
 
Rose Star
Petunias have pointed oval leaves.  The leaves and stems are covered with tiny white hairs, and the foliage has a sticky feel to it.  The flowers have fused petals forming a funnel shape.  Flower size ranges from 2 inches across in some varieties to 6 inches across in others.  There are also double flowered varieties. Some petunia flowers are fragrant, particularly purple and blue colored ones.

Cultivated petunias originally came in two colors, white and purple.  They now come in every color imaginable, even a very dark red purple that looks black.  There are star patterned and striped petunias and the newest color pattern is spotted, the petunia ‘Night Skies’  which is deep purple with white spots is an example.  I am old enough to remember when the first true red petunia came on the market, and then the yellow and orange varieties.

Multiflora, Grandiflora, Milliflora, Floribunda, Supertunia, Wave, Surfina, Sweetunia, Tiny Tunia, are some of the “classes” of petunia flowers.  The first four are older types and are the kinds most often planted in the ground in mass.  These can still be found in flats and cell packs for purchase.  Newer varieties are most often used in hanging baskets and containers and are often sold in individual pots. Most petunias have a cascading, vining habit. 
Black petunias

Cultural needs

Petunias need full sun conditions in the north to do their best.  In the south they may do fairly well in partial or light shade.  Petunias are known for being tolerant of heat and drought when planted in the ground.  In containers however they must be watered regularly.  Petunias planted in the ground probably won’t need watering unless it’s been very hot and dry and they are wilting.  Petunias prefer slightly acidic conditions in their native countries but modern varieties adapt to most types of soil.

Most gardeners will want to start with small petunia plants.  Petunias grow rapidly and small plants quickly become larger.  If the petunias are in small cell packs the best plants to pick are compact ones just starting to bloom.  Lanky petunias with many blooms in a cell pack are stressed and may not do well for a while after planting.  In pots petunias that are full yet compact, with a few blooms are the best choices.  Do not plant petunias outside until all danger of frost has passed.

Gardeners can start petunias from seed.  You need to start about 12 weeks from your last expected frost for good sized plants to transplant outside.  Petunia seed is very fine. Sprinkle it on a sterile seed starting mix that has been moistened.  Press seed lightly into the medium but do not cover as petunia seed needs light to germinate.  Bottom heat is recommended for germination, as is watering from the bottom. Seedling petunias need to be in a sunny warm greenhouse or under grow lights.  They rarely develop well on windowsills.

Good and Plenty Orange

When planting don’t place the plants deeper than what they were growing in the original container.  Use a slow release granular fertilizer mixed into the soil at planting.  Modern petunias need regular fertilization to do well.  If you don’t use slow release fertilizers you’ll need to fertilize weekly with water soluble fertilizer.  Do not use Epsom salts on petunias.

Modern petunias don’t need dead heading (picking off dead flowers) to keep blooming but they may look better, especially in containers if you do so.   This is especially true of double flowered varieties. Older multiflora and grandiflora varieties may begin to look straggly in late summer and a light shearing back will rejuvenate them for a few more weeks of bloom.

Gardeners seldom run into disease problems with petunias.  Really rainy weather for long periods and water logged soil can cause various rots and fungal disease as can over watering in containers.  Powdery mildew is an occasional problem.  Good air flow helps prevent this.  If the plants are covered with powdery mildew you could cut them back to 2-3 inches and they may regrow quickly and hopefully without powdery mildew.  Deer and rabbits do like petunias for dessert so be mindful of that.
Petunia exserta

Some writers list petunias as edible plants.  I would not recommend eating foliage; they are members of the nightshade family like tomatoes.  I would not eat many flowers either, although using them as a garnish probably wouldn’t hurt.

Sweet Corn planting tips

There is nothing better than sweet corn you just picked from your garden.  Have some water boiling, go out to the garden and pick the corn, husk it over the compost pile, come inside and put it in the boiling water with a cup of milk in it for a few minutes and then slather with butter.  Until you taste really fresh sweet corn you don’t know what you are missing.  You’ll always want to grow your own corn after that.

Sweet corn is different than field corn and should only be planted after all danger of frost has passed and the soil is warm.  The more wrinkled the seed corn kernel the warmer the soil should be before planting.  The lowest soil temperature that you should plant sweet corn at is 65 degrees F.  You can use a soil thermometer or judge planting time by looking at phenological signs.  The soil is generally warm enough when lilacs are in full bloom and oak trees have good sized leaves.


If you are going to push the soil temperature limit you should buy corn treated with a fungicide, which helps keep seed from rotting in cold wet soil.  These fungicides are usually brightly colored to let you know the seeds are treated.  Don’t let anything eat this treated seed but by the time you are harvesting those delicious ears of corn the fungicide will be long gone and the corn perfectly safe.

You can plant sweet corn inside in flats a few weeks early but I have found that really doesn’t give you much of an edge over seed planted directly in the ground in optimum conditions.  Transplanted corn generally shows a slow-down in growth for a week or two as it adjusts to garden conditions.  Don’t start inside too early, small plants transplant the best.  You must be able to water transplanted corn as its planted and for several days if it’s dry.

Because corn is pollinated by the wind you should plant it in blocks rather than one long row.   Space seeds 6 inches apart and about an inch deep, 2 inches in light sandy soil.  Space the corn rows 18 -24 inches apart.  I have a piece of molding with inches marked on it and I use it when planting.  (You can use a yardstick too.)  This will keep you honest and stop you from either stretching out the seeds too far or jamming them in there to use up the seed packet.  If stooping over a row is hard for you use a piece of plastic pipe to drop seeds down right over the spot you want to plant it.

I soak the corn seed for about an hour in warm water before planting.  After planting I soak the planted area well.  Take a look around after you’ve planted corn seed and make sure no kernels are showing above ground.  If birds see any kernels they’ll be right there looking for more.  If birds, including your own chickens, are a problem you can cover the planted area with netting until the corn has sprouted.

Corn needs lots of nitrogen to grow well.  I always fertilize at planting and again just as tassels are starting to form on the corn.  Use a fertilizer where the first number is the highest, 10-5-5 for example.  Here’s a tip- you can use lawn fertilizer, which is high in nitrogen, on corn- it is a grass after all- just make sure there are no weed killers or pesticides for grubs in the fertilizer you choose.

Corn is the only common garden crop that will have its flavor changed if it is pollinated by the wrong kind of corn.  If a farmer near you is planting field corn your sweet corn may become tougher and less sweet.  If you plant incompatible varieties near each other the corn you harvest for the table may have a less appealing taste.  Near each other means less than 25 feet apart for home garden varieties, about a hundred feet from field corn.  In a small garden you can sometimes get away with two different varieties of corn not intermingling pollen if they pollinate at very different times, such as a very early 60 days to maturity corn and a late variety, 90 days to maturity, corn.

Seed catalog descriptions will help you decide what corn varieties shouldn’t be planted together.  The seed may be marked, su (normal hybrid) se, sh² or sh²/se which refers to the amount of sweetness the variety has and the type of hybrid it is.   Su and se varieties don’t need isolation from each other but sh² and sh²/se should be planted away from other corns.  If they pollinate each other you’ll get edible corn, but not as nice tasting as if you isolate.  Planting old fashioned open pollinated corn or popcorn close to other varieties may also change the taste of both.

To keep your corn harvest going, plant small amounts of corn every two weeks or plant varieties that mature at different times.  I recommend both tactics because just staggering planting times of one variety is rarely successful for me. The later planted batch seems to catch up to the first batch with only a few days difference.  Unless you are selling, canning or freezing it, a lot of corn at one time can overwhelm you.  Corn at every meal is only good for a few days.

When you do plant more than one variety of corn plant each variety in its own section.  That’s because each will be releasing pollen at a different time and you want to maximize pollination so you will have full ears.  Don’t alternate rows of different varieties or alternate different varieties of seed in a row.

If the weather is hot and dry when you plant keep the corn patch watered if possible, until you see the plants have popped up.  Corn should germinate in less than 2 weeks.  Once it’s up watering can be scaled back.  I only water if it’s been very hot and dry and the corn leaves have been rolled up even in the evening. (Corn rolls its leaves when it’s too hot or too dry.)

Keep your corn weeded, especially when it’s small.  When corn is 3 feet or so high you’ll probably not find many weeds still competing.  Some people go down the rows when corn is about 2 feet high and mound soil up around the base of the stalk.  I do some years but others I don’t and it seems to make little difference. 

What about the 3 sisters planting method?

The 3 sisters method is a supposedly Native American style of planting where corn is planted in a circle with beans and squash, sometimes sunflowers are thrown into the mix.  The corn is supposed to be the support for climbing beans, which aid the corn by producing nitrogen and the squash keeps away critters with its prickly leaves and shades the ground to preserve moisture.  It’s usually enthusiastically endorsed by people who have never tried it.

This method sounds great and makes a cute story about native “wisdom”.  I have read a lot about indigenous systems of planting from the actual descriptions of early Europeans observing their agricultural practices. While there was some crop intermingling, most groups of people did not use this method.  Corn was sometimes planted in circles or in mounds of soil but beans and squash were generally separated into their own fields or mounds, which makes tending them and harvesting easier. 

You’ll find that separating the plants will work better in your garden too.  Believe me, I have tried the 3 sisters method in kids gardening programs and it’s rarely as successful as planting each type of plant separately. The type of corn grown in earlier times had stronger and taller stalks for one thing, than our modern corn varieties and might support beans better.  On modern sweet corn beans climbing the stalks inhibit the corn’s growth and make it more likely to “lodge” or fall over in the wind. Some squash varieties will overwhelm and shade young corn too much.  It’s difficult to harvest corn while not stepping on and smashing those prickly squash vines.

Beans cannot give the corn all the nitrogen they need if the soil is deleted in the first place.  Native people either moved gardens to new ground each year or so or if they were a settled agricultural community used other sources of nitrogen such as cover crops or animal manure on corn. 

The “3 sisters” method of gardening is for novelty, to engage kid’s imaginations and interest in gardening, although I wonder if we are doing them a service by teaching this method.  If you are extremely limited on space it might give you a small harvest of each crop if you did this.  But gardeners wanting to get a good harvest in the most practical manner should not try this method.


Rose rosette disease and Knock Out® roses

If you grow roses you may have heard of rose rosette disease a deadly viral disease that infects roses.  And if you have been on social media sites related to gardening you may have heard people warning others about Knock Out® roses being the cause of the problem.  That’s a false rumor that should be put to rest.

Knock Out ®roses, are a brand name for a series of easy to grow, hardy landscape roses were introduced to the market less than 2 decades ago.  Rose rosette disease has been around since at least 1940.  While Knock Out® roses are very susceptible to rose rosette disease,(who coined that name?), so are most other roses.   Since Knock Out® roses are very popular and are widely sold throughout North America, they may be the variety of rose that more people see with the problem, but they are not the source of the problem.

It’s perfectly fine to plant Knock Out® roses in your garden, as long as they are healthy plants.  Any rose you plant should be examined for signs of rose rosette disease because any kind of rose could introduce the disease.
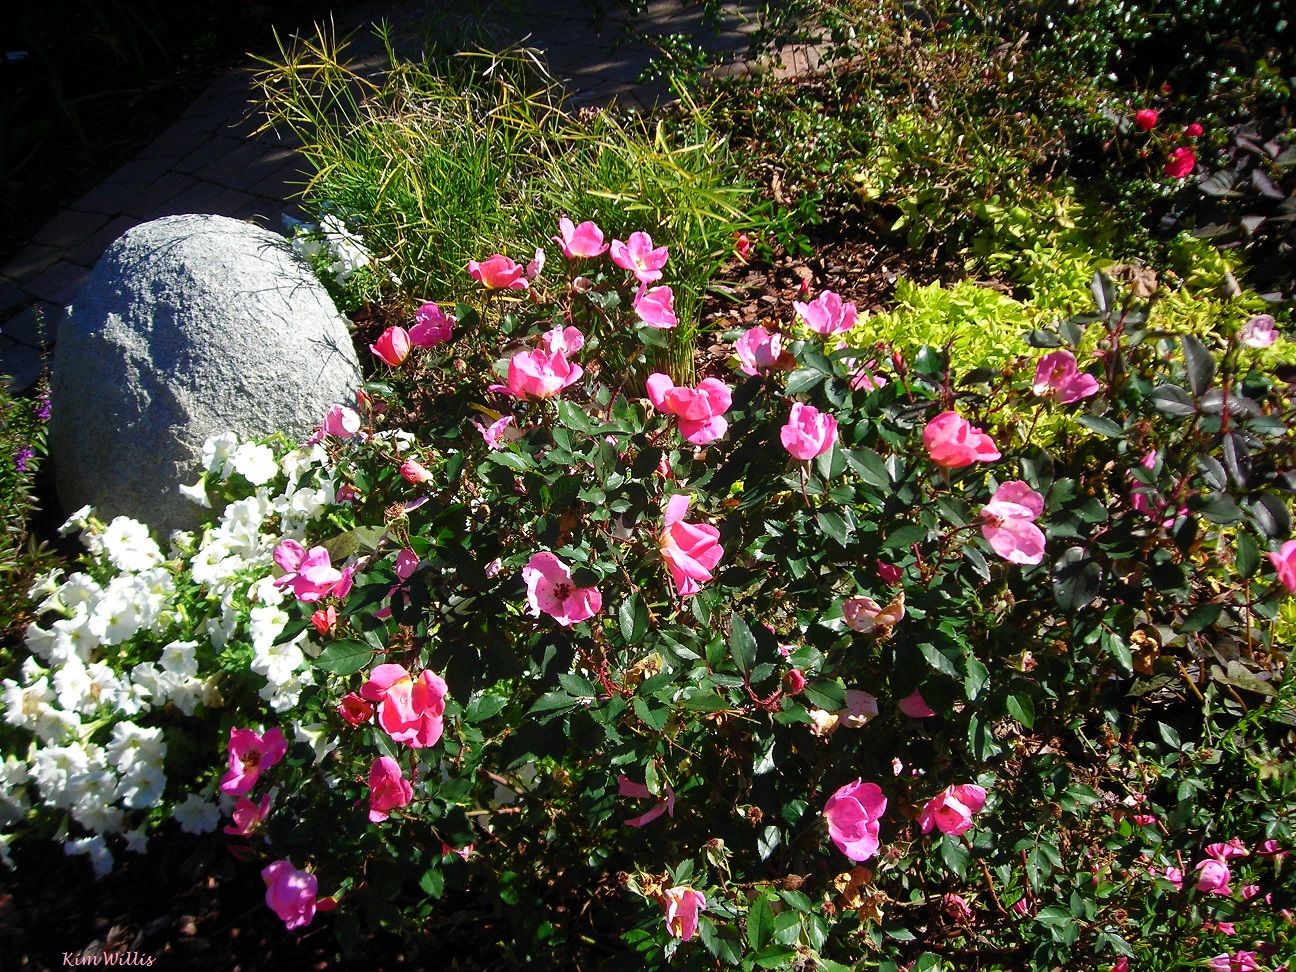
Rainbow Knock Out

The non-native rose, multiflora rose is also cited as the source of rose rosette disease.  Whether the mite that carries the disease was brought in with multiflora roses or brought in later to control that plant is debatable.   It is true that rose rosette disease is very deadly to multiflora roses.  This suggests to me that the disease and the multiflora rose did not originate in the same place as normally if the two co-existed somewhere the rose would have developed immunity.  The idea that multiflora rose is a reservoir for the disease also seems odd.  Something being a reservoir for disease usually means that that plant is able to continue to survive, even if in a weakened state, while carrying the disease.  From what I can read in the scientific literature multiflora rose succumbs to the disease very quickly, usually in the first winter following infection.

There’s no doubt multiflora rose can be invasive and a problem in some areas.  But it was introduced to this country for some of its attributes, it had pretty fragrant blooms that bees love and tiny rose hips loved by birds.  It was used because it spread quickly and formed a thick hedge or ground cover.  And if these roses exist in wild areas near you and they are infected by rose rosette disease the disease could spread to your garden roses.  But the multiflora rose had to get the disease from somewhere; it doesn’t just produce the disease.  Chances are equally good it got the disease from someone’s garden roses as it getting them from other multiflora roses, especially if the disease is new to the area. 
 
Multiflora rose

So if your roses get the disease it could have come from nearby wild multiflora roses.  Or it could have come from a rose you recently bought and planted in your garden or from a neighbors rose.  Removing multiflora roses and any native species of rose in wild areas around you might give you a protective barrier if no one else is growing roses near you.

Rose rosette disease

Let’s discuss what rose rosette disease looks like and how it’s spread.  The RRD virus is carried from rose to rose in one of several ways.  Tiny mites, not visible to the naked eye are the most common route.  These mites can crawl from rose to rose or worse, because they are so light, blown for long distances on the wind.  They carry the virus in their bodies and transmit to roses when feeding on them, much the way a mosquito carries West Nile virus to humans.  The virus can also be transferred by unsterilized pruning tools from plant to plant.  It can be transmitted during a grafting process, many hybrid roses are grafted on to other roots.  There is some debate on this but some researchers also believe the RRD virus can be transmitted between the roots of nearby roses through root grafting.

Rose rosette disease (RRD) is a viral disease and as a virus, is incurable. It only infects roses.  It causes “witches brooming”, thick multi stemmed clusters of stems, and very red leaves and stems that are thicker and more succulent that other stems.  Caution:  many roses have new foliage that is red, especially in cool weather.  If foliage greens up and looks normal in a few weeks it’s not infected.

The stems infected with RRD are usually covered in tiny soft thorns, which make stems look bristly or hairy.  Some roses get yellowed, distorted leaves that look like pesticide exposure.  The roses are weak and sick looking, and do not bloom well.  The plants lose their winter hardiness and generally die over winter if they make it that far.  Some sickly plants do make it to spring though.

RRD can be tricky to diagnose.  Before ripping out plants I suggest you contact your local Extension office, there is one in nearly every county in the US.  Any local USDA office may also be able to help.  Ask them how to submit a plant sample for diagnoses.   There may be a fee, depending on your state.

While keeping mites off the roses is a good idea, killing the mites with pesticides will not help the problem if the roses are already infected with RRD.  Pesticides, including systemic products, cannot cure the viral disease. 

Most experts recommend you don’t even try to save plants.  If you happened to catch the symptoms quickly it’s theoretically possible to prune off the infected stems well down below the reddened area and halt the progress of the virus.  Then treatment with pesticides for mites might save the plants if they quickly kill them before re-infection occurs.  However trying to keep plants with RRD alive is probably a bad idea since they would become that infamous reservoir of disease.

RRD infected roses should be dug out of the garden, making sure to get all roots.  Plants can then be burned or placed in plastic bags and sealed tightly and removed from the site.  Don’t plant roses in the same spot for a few years, other plants are fine.   If you have other roses without symptoms spray them with pesticides that kill mites, (and this is the time to use conventional pesticides and not organic brews,) and watch them carefully.   Epsom salt, baking soda, beneficial bacteria, milk sprays and so on are absolutely useless for treating RRD.

Prevention of RRD

Examine new plants carefully for signs of RRD.  You may want to avoid dumpster diving for plants; even plants that aren’t roses may have mites on them if roses are sold at that location.  Trying to rescue sickly plants on clearance sale carries a risk also.  Isolate all plants like this away from your garden for several weeks if you decide to do these things.

When you visit other gardens, particularly private ones that have roses, you may want to remove your clothing and shoes and clean them before going into your own garden.  Florist rose bouquets probably won’t be a problem, but home grown rose bouquets given to you could pose a risk.

Clean pruning shears after pruning each rose; you can keep wet wipe type products in your garden tool bucket for that. Don’t plant roses where they touch each other and using other plants between roses is also a good idea. If roses die, remove all the plant, including the roots.

Many experts recommend several sprays of horticultural oil or insecticidal soap in late spring/early summer.  May and June are the months when mites are most likely to be present in most of the country and these sprays can kill them.  Many rose experts also recommend cutting back roses severely in the spring, 2/3 of each cane, to try and remove any overwintering mites.  In the north this may be too drastic of a pruning if there has been a lot of winter die back.

Keep a close watch on your roses, and have suspected plants diagnosed quickly. Remove infected plants immediately and dispose of them as described previously.  Since wind can bring in mites that carry RRD from long distances even removing wild roses from a huge area around your garden may not prevent the disease.  However if the disease is known to be present in your area removing wild roses might be good move.

Spinach Soup

Do you have a lot of baby spinach to use up?  It’s that time of year.  Here’s a recipe you try.

Ingredients
8 cups of spinach, chopped and/or sliced
4 cups of chicken broth
10 green onions, sliced thinly
½ cup grated carrot
3 cups cream or half and half
6 tablespoons butter, melted
3 tablespoons flour
1 tablespoon orange zest
1 teaspoon salt
½ teaspoon pepper

Directions

Combine the broth, onions, carrot, salt and pepper in a large pot and simmer for about 15 minutes. 

In a pan over low heat wisk the flour into the melted butter until smooth.  

Add 1 cup of cream, stirring continuously until smooth and thick, about 2 minutes. 

Slowly pour the cream mixture into the broth, stirring continuously and blend until smooth.  Add the rest of the cream, stir and cook 2 minutes.

Add the spinach and orange zest to the pot.  Cook just until the spinach wilts. 

Serve hot, great garnished with cheese and croutons.  Makes 4-6 servings.


Get the sunscreen and mosquito repellant out, the battle is on

Kim Willis
 “He who has a garden and a library wants for nothing” ― Cicero

© Kim Willis - no parts of this newsletter may be used without permission.

And So On….
Do you have plants or seeds you would like to swap or share?  Post them here by emailing me. You can also ask me to post garden related events. Kimwillis151@gmail.com
Join the
LAPEER AREA HORTICULTURE SOCIETY on our 35th ANNIVERSARY CELEBRATION, JUNE 19th at 6 P.M., SUNCREST DISPLAY GARDENS, behind the Lapeer County Medical Care facility, 1455 Suncrest Drive, Lapeer, Mi.

All Past, Present, and Prospective members are invited to attend this special event. This will be a special time to meet old friends and share some of our memories of the activities of this group.

Guests are welcome.

Displays will be set up showing past activities, as well as old newsletters of the group. Refreshments provided.

For more information contact:
Dave Klaffer at 810-656-7770 or 664-8912

Find Michigan garden events/classes here:
(This is the Lapeer County Gardeners facebook page)
An interesting Plant Id page you can join on Facebook

Here’s a seed/plant sharing group you can join on Facebook

Newsletter/blog information

If you would like to pass along a notice about an educational event or a volunteer opportunity please send me an email before Tuesday of each week and I will print it. Also if you have a comment or opinion you’d like to share, send it to me or you can comment directly on the blog. Please state that you want to have the item published in my weekly note if you email me. You must give your full name and what you say must be polite and not attack any individual. I am very open to ideas and opinions that don’t match mine but I do reserve the right to publish what I want. Contact me at KimWillis151@gmail.com

I write this because I love to share with other gardeners some of the things I come across in my research each week. It keeps me engaged with people and horticulture. It’s a hobby, basically. I hope you enjoy it. If you are on my mailing list and at any time you don’t wish to receive these emails just let me know. If you know anyone who would like to receive a notification by email when a new blog is published have them send their email address to me.  KimWillis151@gmail.com


Tuesday, May 9, 2017

May 9, 2017, Kim’s Weekly Garden Newsletter

Hi Gardeners

Akebia flower
We had a frost Monday morning.  The temperature just nudged 32.  Most things didn’t appear damaged, although it blackened the tops of my newly emerged potatoes.  This morning we had a harder frost/freeze.  Temperatures dipped just below 29 degrees outside my window and further away from the house I am sure it got to 28 or lower. I covered the potatoes last night but I noticed even the tulips were hanging their heads this morning.  They’ll probably recover but I am worried about the fruit tree blossoms.  I can’t tell yet if there’s damage.

When temperatures get to 28 degrees about 90% damage to open fruit blossoms can be expected.  The center of the flower will show a brownish discoloration.  Unopened buds will have less damage. It may take a day or so for the damage to show.  A secondary problem is that freezes impact bees, which seem to be scarce this year anyway, and good pollination may not occur.

A walk around the yard revealed some damage to bleeding hearts, Japanese painted fern and ligularia.  I am glad I took a picture of the Akebia flower you see in the photo because those vines did not look great this morning.  The vines were loaded with flowers this year and I thought maybe I’d get a few fruits, although in this part of Michigan getting Akebia (chocolate vine) fruit is rather rare.  (I have an article about Akebia to the right of the main blog if you are interested in them.)

This week I have the sweet woodruff (article below) joining the Akebia, tulips, Crown Imperials, flowering quince, lilacs, trillium, trout lilies, redbud, bleeding hearts and Forget- me-nots in bloom.  The mayapples, dames rocket and dwarf iris will be in bloom in a few days.  Inside my lemon tree is blooming and my orange jasmine.  My houseplants are really ready for their summer vacation.  Let’s hope warm weather gets here soon.

My paw paw tree is loaded with buds this year.  If they didn’t get killed by the frost I’d like to try and get some of them pollinated.  You are supposed to have two different varieties of paw paw for fertilization.  Ten years ago or so when we planted that tree we did have another.  But it didn’t make it.  Paw paws are scarce in this area; I don’t think there are any growing wild.  If anyone in the thumb area of Michigan or SE Michigan knows of a paw paw tree with blooms could you contact me?  I’d like to get some cotton swabs of pollen to see if I could get my tree pollinated.

Plant sale – Lapeer Michigan area

There’s a plant sale in the Lapeer Michigan area to benefit the Lapeer Area Horticultural Society.  Plants from member’s garden and a selection of nice hanging baskets for Mother’s day will be featured.  It’s on Saturday May 13th 8 am – 4 pm at the intersection of Lapeer road- (M24) and Davis Lake road, just north of Lapeer in the Lapeer Auto and Truck Plaza.  Call Dave for more info @ 810-656-7770.

Practice patience

Mother’s Day is next Sunday and it’s traditional to buy plants for Mother’s Day.  But if you are in zone 6 or lower consider carefully what plants you are going to purchase as our weather is still unsettled.  I’ll be out this week at the nurseries around me to pick some pretty plants while the selection is good but I am prepared to move them inside if frost threatens.  I’ll avoid buying bedding type plants and tender vegetables for a week or two- or three- longer. 

The vast majority of annual plants need frost free conditions to survive.  If you plant them in the ground too soon you will be running around trying to cover them many times before frost danger is gone.  If you forget to bring that beautiful expensive hanging basket inside just one cold night it may die.  If you must buy flowers and veggies now leave them in pots and put them on a cart that you can pull in and out of a garage or shed. 

Our weather has been weird this year.  Normal indicators of planting time such as the lilacs blooming are not in sync with actual temperature fluctuations. I suspect this will be a feature for many years as climate change continues.  The gardener must use patience and pay close attention to weather forecasts.  A few very warm days may not mean it’s safe to plant.  Plants planted in the ground too soon, and then exposed to cold temperatures may never recover enough to be vigorous, productive plants.

I know we all want to get our gardens to look good and we want to see flowers all around us, but buying plants and then having to replace them is a big hit to the soul and pocketbook.  Remember, patience is a virtue.

Caring for hanging baskets

It’s almost Mother’s Day and one of the biggest weeks for the sale of flowering hanging baskets.  Every store will have some beautiful flowering baskets for you to drool over.  But while the baskets are stunning in early spring they often fizzle by midsummer.  Here are some tips to keep your flowering baskets looking nice throughout the summer season.

Tuberous begonia

Right plant - right place

Choose wisely by matching the light requirements of the plants in the basket with those at the site where you intend to place them.  A fuchsia plant that’s popped into full sun will quickly dry up and die.  A pleasing petunia basket will quit blooming and get straggly if placed in the shade.  Hanging baskets generally list the plant names and requirements on a tag or label.  If they don’t, ask a knowledgeable salesperson what conditions the plants prefer.  Don’t buy a hanging basket, no matter how beautiful, if you can’t give it the conditions it needs.

If a plant is listed as performing well in sun or part sun, it generally needs about 6 hours of direct sun or filtered sun all day.  If it says shade or part shade then the plant prefers less than 6 hours of sunlight and that sunlight is generally best if it comes in the early morning or late afternoon. 

Wind can also be a factor when choosing the right plants in a hanging basket.  Some plants are very susceptible to wind damage such as the tuberous begonias.  They should be hung in a protected spot.  The stems are brittle and break easily.   These plants wouldn’t be a good choice where they might get bumped or brushed frequently either.

Water - water -water

Hanging baskets require lots of water.  There are a lot of roots in those full lush baskets and little soil.  Windy, warm days may require that you water the baskets twice a day.  Plan for watering before you hang the pots.  If you can’t access them easily you either won’t water them enough or you will want to get rid of them.  There are pulley systems you can buy or devise that allow you to lower the pots for easy watering and long curved wands that you can attach to a hose to water baskets above your head.

Try not to let the plants wilt, even though they may revive when watered, each time they wilt the plant is stressed.  Water the basket slowly with warm water until water drips from the bottom of the pot.  Try not to let the soil get so dry that it shrinks away from the side of the pot, then the water you add just pours right through the pot, without much absorbing into the soil.  If this happens take the pot down and soak it in a large bucket of water that covers the pot.  Leave it for an hour and then remove it and let it drain. The soil should have expanded to the pot sides again.

If the hanging basket is set into another container that doesn’t allow it to drain freely you could over water your hanging basket.   Cool rainy weather and a container that doesn’t drain well can be a problem. Plants that are over watered generally have a swampy smell.  They will wilt just like a dry plant because the root system is rotting away.  If the soil feels very wet don’t water the plant.  Empty all saucers or catch pots shortly after you water your hanging baskets.  These sources of standing water also breed mosquitoes.

Feed, feed, feed

Nurseries and greenhouses feed their hanging baskets a diluted plant fertilizer almost continuously.  To keep your basket blooming all summer you should feed them too.  Use a flowering plant fertilizer designed to be mixed with water at least once a week.  Follow the label directions carefully and use the directions for container plants.  Do not make the solution stronger than the label recommends or you may burn the roots of your plants.

Many of these fertilizers say they can be sprinkled on the leaves and the plants can absorb them.  They do to some extent but it is better to pour the fertilizer mixture on the soil.  If you plant your hanging basket yourself or repot it, you can add a granular slow release fertilizer formulated for flowering plants and mix it into the potting mix.  Follow the label directions for container plants. This should feed the basket for about 3 months.

Promise to deadhead and protect

Keep dead flowers plucked off to increase bloom.  Trim off straggly and broken ends and generally keep the plant tidy.  Some plants will take a bloom break when the weather gets very hot.  Warning - not every plant can be trimmed back drastically to renew it. This works with plants like petunias, impatiens, alyssum, lobelia and a few other things.  If you are going on vacation for a week or two trim them back to about 6 inches and in a couple of weeks you will have a bushy plant with renewed flowering.   They must be kept watered and fed during the transition too.  Don’t cut back plants like tuberous begonias, fuchsia, and lantana.   For some of the new and unusual plants in hanging baskets, ask an experienced nursery person or your Extension office garden hotline if they can be trimmed back for renewal.

If frost threatens cover your basket or move it inside a garage or shed.  You may extend the beauty of your baskets for a month or so in the fall if you cover them when frost is likely.   A large old sheet may be needed to cover a large basket.  Make sure to remove the cover shortly after sunrise the next morning.


Much about Mulch

In my garden you’ll find little mulch, at least what most people consider mulch, unless it’s on the paths.  That’s my style of gardening; my plants are crowded and intermingled and there’s little room for wood chips or shredded bark.  There aren’t big areas of bare ground.  There are ground covers under most trees.  There may be some bare areas in my vegetable garden between plants but that’s it.

I do allow the leaves from our oak trees to blow into the gardens in the fall and I even re-distribute them from the lawn to the flower beds.  When I’m weeding I often pile the weeds I pulled between plants, a compost in place solution.  The paths between my vegetable raised beds are mulched and one path across the front yard.  I use coarse landscape chips in those places and the path in the front also has landscape fabric under it.
Mulched garden bed

That’s my style of gardening.  Other people prefer the look of plants separated by mulch covered areas.  Or they like the look of mulched edged gardens and mulch rings around trees.  That’s fine too.  But mulch isn’t magic and it’s often misused or overused.  There are also a lot of misconceptions and bad information about mulch floating around.

There are several good reasons for using mulch.  Mulch does deter weeds; it adds organic matter to the soil and it can conserve soil moisture.  It makes a lot of sense for paths you don’t want to cover in cement or stone.  If you are beginning a garden and your plants need time to grow and fill in space covering bare areas with mulch can be a good idea.  A mulched area around trees to keep people from getting too close with the weed wacker or mower protects the tree.  And if you think that mulch just looks good and gives your garden a neat and finished look you may want to add it.

Types of mulch

There are several types of mulch.  There are “landscaper chips” which are the product of cutting whole trees down and chipping them up.  It includes leaves and stems as well as woody areas.  This mulch is actually the kind that many experts recommend for adding organic matter to the soil.  Because there is green matter mixed in some nitrogen is released when the chips are decomposing.   Its best use is right in the flower and veggie beds, to suppress weeds and conserve soil moisture.  And as it breaks down it adds lots of organic matter to the soil.  You can use it for paths and borders too, although it isn’t as pretty as some other forms of mulch.  But it’s generally cheaper than other forms of mulch and sometimes you can get it for free.

Woodchips are another form of mulch.  This can be chipped up trees which has been screened to keep out leaves and twiggy material and sorted to a pretty uniform size.  This is a fairly good mulch material.  Sometimes wood chips can also refer to recycled pallets and other wood materials which have been chipped up. Some of those materials may have been treated with various products to preserve them and those products are now in the mulch. You may not want that type of mulch.

Often wood chips are dyed. The dye isn’t harmful, but it doesn’t look natural to many people.  Some people, however, like the look.  This kind of woodchips, dyed or not, is good for paths and tree rings.  It can be used among plants, but it’s a little harder on plants as it initially breaks down because some nitrogen has to be used from the soil, which could cause a shortage for plants.  It will eventually become good organic matter however and will return the nitrogen to the soil.

Bark chips and shredded bark are another kind of mulch.  If you are using mulch to help conserve moisture bark products aren’t the best choice.  They do not absorb water and if this mulch is mounded water may run off.  They are sometimes added to potting mixes just to improve drainage. Bark sometimes floats away in heavy rain too. Bark products break down quickly but their value as organic material isn’t as good as landscape and wood chips.  Some people do like the look of this finely textured product so use it on paths and tree rings.  Be aware that it tracks in on shoes more than wood chips.

Cocoa mulch is sold in some places.  It’s the shells from cocao beans.  It smells like chocolate but that’s probably its best trait.  It’s light and can blow or wash away.  If dogs eat it cocoa mulch may harm them, although most dogs probably wouldn’t eat it.   It’s generally more expensive than other mulches and in my opinion not worth it.  It won’t harm plants but it also does not protect them from insects or slugs as some claim. 

Straw, hay, coir, pine needles and other products can be used for mulch.  These don’t look as nice in flower beds and on paths although chopped straw might be ok.  Hay and straw may actually introduce some weeds into the garden especially hay.  There is a musty smell when hay and straw get wet and begin breaking down.  Straw can be good mulch in vegetable gardens if applied deeply and it does add organic matter as it breaks down. Mice and snakes looking for mice may use straw and hay mulches more than other types of mulch, if that’s a problem for you.

Pine needles are slippery when wet, so they are not a good mulch for paths.  They may wash away in rain.  If you have lots of them mulching flower and vegetable beds would be fine.  They won’t make the soil acidic as some claim.  Coir is fibrous material pulled off coconut shells.  It’s expensive in some areas of the country.  There’s no advantage in it over other mulches so if it’s expensive use another mulch. 

Other things are available as mulch in some areas, rice hulls, and so on.  The only advantage to most of these over wood chips is that they can be cheap or free.  Lightweight materials may blow or wash away.  You can use compost as mulch, and its great organic matter for soil, but it does not suppress weeds very much.  Sawdust is not for mulching around plants as it compacts and matts, impeding water and air.  You could use it for a path if you like the look.

Stones, gravel, and rocks are sometimes used as mulch.  For paths these may be fine if they aren’t uncomfortable to walk on.  But for plants you need to use care when using rock or stone mulch.  Not all plants will do well with rock or gravel mulches.  Large rocks compact the soil.  A border of them is fine but using them among plants is good only if you are making a rock garden and selecting suitable plants for that garden.

The problem of using white stones and other pebble type mulches is that they collect debris, leaves, grass clippings, twigs and so on and start to look dirty and messy over time.  It’s very difficult to clean them up. And rock mulches don’t add organic matter to the soil.  When they are knocked into mowed areas they can become projectiles. 

Plastic mulches are fine for vegetable and small fruit production.  Some are perforated to drain moisture, others are not.  They won’t add organic matter of course but are very effective at keeping weeds down and fruit and vegetables clean.  To make them look better you can cover them with a light layer of another, organic mulch.  Black plastic gets the soil warm quickly in the spring.  For home gardeners you’ll need to devise a way, such as drip irrigation, to get water under the plastic.  

Newspaper, cardboard, landscape fabric

Older gardening references often advocate layers of newspaper or cardboard as mulch or under mulch around plants to help suppress weeds.  Some landscapers tell you to use landscape fabric, which is a perforated plastic or heavy paper material, under mulch.  Modern plant and soil scientists say you should not do this.  These layers compact the soil, limit air flow and water and impede the working of soil microorganisms.

Yes paper products will break down and do contribute organic material over time.  But the amount and type of microorganisms under these heavy layers is less than where there are no layers.  You want lots of microorganisms of many types in healthy soil.  The soil can remain too damp or too dry, depending on circumstances.  Heavy “sheet” layers can encourage mice and voles which hide under them.   All mulch should allow for good airflow and water transfer to soil or to the air.  For plant and soil health don’t use sheet layers under mulch in garden beds. 

Use layered material under paths that are permanent or at least long term, if you want.  Stone/gravel paths may need these layers to keep them from sinking into the soil.
 
Garden with no mulch except fallen leaves and needles.

Misconceptions and problems with mulch

Mulch is not necessary in most gardens although it can be very helpful. Don’t let people tell you that you must have it.  Using a variety of plants close together of different heights and growing patterns prevents bare ground and if you use leaves and organic matter on the garden in the fall and winter and allow them to break down you’ll have plenty of organic matter in the soil.  You can use groundcover plants under trees to avoid mowing there or bare areas.

Some people use mulch to protect the roots and crowns of plants during winter.  Mulch can limit freezing and thawing cycles which can heave plants out of the ground.  In this case the mulch should be applied after the ground is frozen.  You may want to pull back mulch after spring has settled in to allow the soil to warm up.

Mulch doesn’t prevent all weeds.  Some weeds will grow in and through it.  Although you may save some time weeding when using mulch you will spend time and money placing the mulch and then keeping it replenished.   Mulch will need to be replenished as often as every year, depending on the type of mulch. As it breaks down mulch actually makes some pretty good planting medium.  I scrape up decayed mulch and add it to my potting mixes for outside plants and throw decayed mulch from my vegetable garden paths up on the beds each spring.

Most mulch don’t harm plants but on occasion you may notice signs of nitrogen deficiency (usually yellowing foliage) in plants when new mulch is breaking down as the process uses nitrogen.  This generally corrects itself in time as the composted mulch eventually adds nitrogen to soil. But you may want to add some nitrogen rich fertilizer for your plants when adding new bulk wood mulch without green material like leaves mixed with it.  Most bagged mulch has been sitting a while and won’t cause a problem.

Loading and unloading mulch and distributing it around the garden can be hard for some gardeners.  Don’t feel guilty if you can’t do it.  Your plants will be fine.  If you like the look, get help with mulching.  Add organic matter that’s light like leaves, or chopped straw in late fall to help improve soil if you don’t use mulch.

Mulching can conserve soil moisture if you use the right mulch.  If it’s been really dry water the ground well before adding mulch.  If you have really deep absorbent mulch your soil may not get as much water as un-mulched areas because water is absorbed by the mulch before it reaches the soil.  Don’t make your mulch deeper than 3-4 inches.

As mentioned earlier some mulch may actually shed water but it may also be better for low rainfall areas, if applied thinly, as water will move through it instead of being absorbed. 

Mulch should be spread evenly and not heaped like a volcano. Don’t let mulch actually touch the trunks or stems of plants.  Wet mulch against plants can cause stem rots or rotted areas on bark.  It can also hide rodents who munch on thin barked tree trunks in winter.  Don’t pile mulch too deeply around trees, 3-4 inches is enough.  And never put newspapers, cardboard or landscape fabric under trees and cover it with mulch.  The roots of trees need oxygen and thick layers of material impede air flow.  This practice can cause a decline in tree health, which shows up over several years.

Some gardeners believe that mulch may encourage slugs, snails and certain insects when used around plants.  There’s little scientific evidence this is true but many hosta growers for example, limit their mulching, preferring the soil dry out and discourage slugs around their plants.  Your climate and soil type may be factors in this decision as well as your plant species.

Fresh wood mulch can occasionally heat up from decomposition and actually smoke or burn.  This occurs in mulch piles.  Get those piles spread out as soon as possible.  Occasionally a type of fungus called “dog vomit fungus”, which looks like its name, will pop up on fresh mulch.  It’s harmless and will go away after the mulch has aged some more.

There are some mulches that are being sold that are treated with a weed killer.  Do not use these in your flower and vegetable beds, they can harm the plants.  It’s ok for around large trees and on paths.

Mulch can be helpful to gardeners and good for the soil if applied properly.  But mulch isn’t right for all situations and for all gardeners.  Consider the pros and cons of mulch and rather its right for your garden before investing time and money on it.


Sweet Woodruff

Sweet Woodruff
Sweet woodruff, Galium odoratum,(alternate Asperula odorata)  is a widely planted herb or groundcover that is native to Europe.  It is also known as sweet scented bedstraw, or wild baby’s breath.  In Germany where use of the herb is prominent it is called Waldmeister or “master of the woods.” It has naturalized in a few places in the northern US and Canada in wooded areas.  Some native plant advocates will tell you it’s invasive; however its value as a groundcover for shade and it’s herbal uses make it well worth planting in the home garden.

Sweet woodruff is a lovely groundcover for shade or partial shade.  It is rarely bothered by deer or rabbits and will grow under black walnut trees as I can attest.  It looks good as an understory plant for larger shade plants such as Japanese Maple, large hosta, astilbe, heuchera and tiarella.  In my garden evening primrose grows up through it at the edge of the shaded area.

Sweet Woodruff is a perennial plant that is hardy in planting zones 4-8. The plant has small, blade shaped, dark green leaves that are arranged in whorls of 6-8 around a square stem.  It grows from 8-12 inches tall.  The plant spreads by runners and in good conditions will fill in an area quickly.

In early spring sweet woodruff is covered by small white 4 petal flowers carried in clusters at the top of the plant.  Its bloom time is generally May in northern areas and the plant is associated with May celebrations.  After blooming the flowers turn into small brown seed pods.  Each pod has a tiny hook that allows it to hitch a ride on fur or clothing to a new growing location.

The sweet smell associated with sweet woodruff is not very prominent in growing plants or flowers.  The smell does become apparent when plants are wilted or dried.  It is described as a vanilla or hay scent and most people find it appealing.  The smell is caused by the chemical coumarin, of blood thinner fame.

Getting sweet woodruff growing

Gardeners will generally find sweet woodruff for sale as small plants or “plugs”.  Sweet woodruff likes moist, humus rich soil.  Plant them in full or partial shade in early spring, setting them about 6-12 inches apart.  (This plant will not do well in full sun conditions.)  In good conditions they will quickly fill in and cover the ground.  In the first year it’s important to keep the new plants well-watered. 

After establishment sweet woodruff will tolerate moderately dry shade, but in very hot and dry conditions it may go dormant and die back to the ground.  It will begin new growth in cooler, wetter fall conditions.  However if you want your ground cover to look good all season you may want to water it when it’s hot and dry.  Sweet woodruff has no major pests or diseases. In sandy, nutrient poor soil it may need fertilization in early spring, but in most places it does not need fertilizer.

Mowing around the area where you want sweet woodruff contained is generally sufficient to confine it.  If you are worried about it spreading to wild areas keep a mowed strip between it and any wooded areas.  If you only want a small amount of the plant for herbal use you could grow it in a container sunk in the ground.

Uses of sweet woodruff

Sweet woodruff has many, many, herbal, culinary and other uses and has been used since the earliest times in Europe.  It is dried and used in mattresses, pillows and strewn on the floor to impart its sweet scent.  It is used in potpourri and incorporated into perfumes and scented soaps.

Culinary uses include May wine – sweet woodruff flowers and foliage are steeped in white wine with sliced oranges and strawberries and the mixture is drank at May celebrations.  Sweet woodruff is used in beer making (Berliner Weisse), and in jellies and jams.  It’s used to flavor ice cream and sherbets and is said to pair up very well with strawberry dishes.  The Swiss flavor chocolates and other candies with it.

There is an important caveat here about using sweet woodruff in foods.  Too much sweet woodruff can be toxic.  It can cause bleeding problems and liver damage.  The use of sweet woodruff has been banned in commercial foods in many countries for this reason.  If you decide to experiment with it in foods use it lightly and infrequently.

The herbal uses of the plant are numerous but once again caution is urged.  It is a mild sedative and can be added to tea for insomnia or for nervousness and hysteria. It’s a diuretic and the Coumadin in it thins the blood so it is often used for circulation and heart problems in herbal medicine.

Sweet woodruff is used for migraine treatment but it also causes severe headache if too much is taken.  It is used for nerve pain, to loosen chest congestion and help with stomach pain and cramps.  It is used directly on the skin as a poultice for skin diseases and as a salve to shrink hemorrhoids.

Caution:  Sweet woodruff should not be used if you are on blood thinner medications and it may interfere with other prescriptions.  You should always inform your doctor if you are taking sweet woodruff.  You should not use it if you are going to have surgery within 2 weeks.  Pregnant and nursing women should not use sweet woodruff.

Sweet woodruff should be used in food and as a medication in moderation and infrequently.  Over use can cause bleeding disorders, liver damage, fainting and severe headaches and could cause serious medical issues.

Buckwheat

Have you eaten buckwheat? The Japanese sing songs about it, it is a Hindu holy food, Hans Christian Andersen wrote a story about it and at one time it was identified as an American breakfast staple.  Yet few people in the United States today know what buckwheat tastes like, much less what it looks like.  That’s a shame because this plant is easy to grow and can provide some fine eating.

Buckwheat field,   Credit Wikimedia commons.
Buckwheat, Polygonaceae Fagopyrum sp., is an annual plant, one of the few grain crops that do not belong to the grass family. It is related to rhubarb and knotweed. It is native to central China but was widely grown throughout cooler areas of the old world.  Early settlers brought the seed to America, where it grew well in the northern states.  

Buckwheat has rather spindly stems but may grow to 2’ tall.  The leaves are heart shaped or arrow shaped, and the flower clusters rise up out of the junction of leaf and stem.  The flowers are rather pretty- small fluffy white clusters somewhat resembling Alyssum. Bees and butterflies love them. The honey made from Buckwheat flowers has a distinctive dark color and pleasant taste that make it highly prized.  Buckwheat keeps flowering and producing seeds until frost kills it.

Buckwheat seeds are hard, brown and triangular in shape.   They will ripen at various times and several harvests may be needed.  The hard shell is ground off before preparing the seed to eat.

Planting and harvesting buckwheat

Buckwheat would be an ideal small “grain” for home gardeners to grow.  It’s easy to grow and hardy and a small area can produce a lot of grain. It could become a specialty crop for those looking for an organic “niche” market.

Plant buckwheat seed in late spring, about the time of the last frost in your area.  You want it to emerge after the last frost as it is frost tender. Plant in full sun.  Buck wheat isn’t fussy about soil, it will grow even in poor soil.  It’s suggested to plant about a peck and a half of seed per half acre.  Sown thickly weeds will not be a problem and the crop rarely requires fertilizer.

Buckwheat can be harvested several times in late summer by stripping ripe, hard seeds off by hand into a pouch or basket.  Or when a lot of the crop seems to have ripe seed whole plants can be pulled and let in the sun for a few days and many of the green seeds will ripen.  The seeds can then be stripped off the plant. 

Uses of buckwheat

In earlier days buckwheat cakes were a common breakfast staple for Americans, as well as many Northern Europeans. Over a million acres of Buckwheat were grown in the late 1800’s in the United States.  Now only a few thousand acres are grown, primarily for specialty flours and birdseed mixes. Canada grows a bit more, primarily for export to Japan.  American farmers find the crop hard to harvest with machinery since it does not ripen all at once like other grains, and the stems may collapse from storms.

The Japanese call buckwheat  ‘Soba’ and make a variety of noodles and other popular dishes from it.  The USDA has found that buckwheat is nutritionally superior to all other grains because of its amino acid composition and lysine content.  Buckwheat seeds can be ground in a coffee grinder or powerful food processor to make flour.  The flour is gluten free.

Buckwheat makes an excellent fodder crop for livestock and is grown on soils with low fertility to improve them.  It can be used by gardeners as a smother crop or as a green manure. Buckwheat hulls are used in pillows and are said to improve sleep.  They are also used as mulch.

Buckwheat is used to make beer in some places and buckwheat flowers will make a good brown dye.

In herbal medicine buckwheat is used to lower blood sugar and modern medicine confirms it does have some effect on lowering blood sugar. It can be taken in a tea or in capsules or as a food product. Dosage recommendation is 70-100 grams of buckwheat flour daily.  It is also used to help with varicose veins.  In herbal medicine buckwheat is also used to help treat eye ailments/vision problems.  Buckwheat is also helpful in curing chronic diarrhea.

Buckwheat tea can be made from roasted seeds or from flowers and green parts that are dried.  Put one tablespoon of roasted seed in 1 ½ cups water and bring to a boil.  Then let steep 10 minutes and drain.  Or use 2 tablespoons of dried flowers/leaves to a cup of boiling water and steep 10 minutes.  You can buy buckwheat tea products in some stores.

Buckwheat pancakes
Credit: simple wikimedia
Cautions: some people are allergic to buckwheat, particularly if they also have an allergy to rice.  It can cause sun sensitivity and sunburn when consumed in large quantity. If you take medicine to lower blood sugar you should inform your doctor if you are using buckwheat medicinally, and not just as an occasional food product.  Buckwheat can cause constipation in some people.

Buckwheat may have fallen out of favor with American cooks because the flour is a gray color and doesn’t store as well as other flours.  In American supermarkets buckwheat flour is usually sold as a pancake mix, mixed with wheat or other flours. Why not look for some and try some buckwheat pancakes?

Rhubarb and pineapple cake

The rhubarb season is in full swing and here’s a way to use that bounty. This cake is fairly easy to prepare and tastes delicious.  You could frost it, but it’s great with a scoop of whipped cream or vanilla ice cream, especially while warm.  It’s not as sweet as some cakes, but soft, moist and flavorful. This makes a good potluck dessert, something different.  Rhubarb and pineapple cake also freezes well.

Ingredients

2 cups of peeled, sliced rhubarb
3/4 cup of sugar
3 tablespoons butter (or margarine)
1 yellow cake mix
1, 20 oz. can of unsweetened crushed pineapple, don’t drain.
 3 eggs

Directions

Rhubarb and pineapple cake.
Grease a 13x9 inch cake pan.  Preheat oven to 350. 

In a microwave safe bowl combine rhubarb and sugar.  Cover bowl and microwave on high for about 3 minutes.  The rhubarb should look like the consistency of the crushed pineapple. 

Add the butter to the rhubarb bowl and let it melt.  In the meantime combine the cake mix, 3 eggs and can of pineapple in a big bowl.  Pour in the rhubarb-butter mixture.

Beat with the electric beaters until the cake mix and other ingredients are well combined, about 2 minutes.  Pour into greased pan and bake for about 35 minutes- until a knife inserted comes out clean.  Cool slightly and serve.

It’s May plant something every day!

Kim Willis
 “He who has a garden and a library wants for nothing” ― Cicero

© Kim Willis - no parts of this newsletter may be used without permission.

And So On….
Do you have plants or seeds you would like to swap or share?  Post them here by emailing me. You can also ask me to post garden related events. Kimwillis151@gmail.com

Join the
LAPEER AREA HORTICULTURE SOCIETY on our 35th ANNIVERSARY CELEBRATION, JUNE 19th at 6 P.M., SUNCREST DISPLAY GARDENS, behind the Lapeer County Medical Care facility, 1455 Suncrest Drive, Lapeer, Mi.

All Past, Present, and Prospective members are invited to attend this special event. This will be a special time to meet old friends and share some of our memories of the activities of this group.

Guests are welcome.

Displays will be set up showing past activities, as well as old newsletters of the group. Refreshments provided.

For more information contact:
Dave Klaffer at 810-656-7770 or 664-8912

Find Michigan garden events/classes here:

An interesting Plant Id page you can join on Facebook

Here’s a seed/plant sharing group you can join on Facebook

Newsletter/blog information

If you would like to pass along a notice about an educational event or a volunteer opportunity please send me an email before Tuesday of each week and I will print it. Also if you have a comment or opinion you’d like to share, send it to me or you can comment directly on the blog. Please state that you want to have the item published in my weekly note if you email me. You must give your full name and what you say must be polite and not attack any individual. I am very open to ideas and opinions that don’t match mine but I do reserve the right to publish what I want. Contact me at KimWillis151@gmail.com

I write this because I love to share with other gardeners some of the things I come across in my research each week. It keeps me engaged with people and horticulture. It’s a hobby, basically. I hope you enjoy it. If you are on my mailing list and at any time you don’t wish to receive these emails just let me know. If you know anyone who would like to receive a notification by email when a new blog is published have them send their email address to me.  KimWillis151@gmail.com

The information in this newsletter is copyrighted.  Feel free to share the blog link but if you wish to reprint anything you find on this blog site please ask for permission.  This includes photos with my name on them.