May 24,
2016, Kim’s Weekly Garden Newsletter © Kim Willis
Hi Gardeners

Get ready, set, grow! It’s setting up to be a perfect planting weekend. Temperatures look warm if not hot through the
end of the month now; it’s likely most of us in zone 5-6 have passed the last
frost. However it’s not unheard of to
have frost in early June in upper zone 5 so keep listening to the weather
reports as we pass this warmer period.
But generally it should be safe to plant tomatoes, all your annuals and
just about anything else in the next few days.
I would wait another week or two before moving the houseplants and other
tropical plants out though.
Not only will it be warm, but potentially wet, and we need some rain at
this point. I planted sweet corn this
week but the soil was really dry. A good
soaking rain is what we need to get it growing.
Rainy weather, with some cloud cover, helps get transplants off to a
good start as long as we can get outside between the storms to plant them. If we don’t get much cloud cover it always
helps to shade transplants like tomatoes and peppers for a day or two. You can use a single sheet of newspaper like
a teepee. My grandfather used to make
newspaper “hats” for his tomatoes. And
make sure to keep things watered if we don’t get good soaking rain.
This time of the year always feels rushed to me but the cold spring
backed up some of my usual projects as well as me being sick most of last week,
so it feels like a marathon of planting ahead for me. I can’t keep up with the weeding even though
my husband has been helping. I start to
plant something, see weeds, and before you know it have spent an hour weeding and
cleaning up when I should be planting.
And I still need to get to the greenhouse for a few more things.
The lilacs are in full glorious bloom, the bearded irises are beginning
to bloom, the alliums, and the dame’s rocket.
I call this the purple time of the year because a lot of things blooming
seem to be that color. The pink of the
bleeding hearts is a welcome contrast. I
have green onions to harvest and the lettuce is growing well so harvest should
begin soon on that.
The rhubarb is in bloom, I think rhubarb makes a great ornamental
plant. My strawberries have set fruit
and I need to find time to get some netting around them. Maybe I’ll get more than the birds- although
I say that every year and it seems I have to compete with everything for them.
My paw-paw tree is blooming this year; I won’t get fruit because the one
I bought to pollinate it died years ago.
It took the tree 10 years to grow from 3 feet to 8 feet. I have thought of buying another but I don’t
know if it will get big enough, fast enough for me to ever see fruit. The flowers are interesting, little dangling maroon
cups. I’ll get a picture and show it
next week if possible.
Birds are definitely nesting. They
are going through lots of suet, many species love to feed suet to their young
and if you keep suet out this time of year you’ll see a lot of birds. Keep the hummingbird feeders filled too. We had baby ducks hatch this week, and I have
both baby parakeets and canaries in the house.
There are lots of noisy babies begging for food around here.
I have a solar powered butterfly that flits around on my deck. It’s blue which may be why I looked out
Sunday morning and saw a bluebird sitting on the post that holds it. Hopefully they will nest in one of my boxes
again this year.
The frogs are still singing, and the turtles are crossing the road- see
the article below. I saw a fawn this
week. Baby kittens are showing up in the
barn. It sure looks like summer is here.
With warm humid weather comes the possibility of storms. Keep an eye on the sky and the weather
report. And get inside if you see
lightning. Mosquitoes are out in force
now so use that repellant too.
Bleeding Hearts
Bleeding heart, Dicentra
spectabilis, is an old fashioned charmer that belongs in every garden. It’s charming and also deer resistant, a
great combination for most gardeners.
Bleeding heart is also known as Dutchman’s breeches or trousers.
Bleeding heart has been reclassified in some references as Lamprocapnos spectabilis

Classic bleeding heart has clusters of 1-2 inch pink and white heart
shaped flowers with a little upward curl on each side at the bottom. Flowers dangle along tall stems over
fern-like blue-green foliage. Bleeding
heart blooms in early spring about the time mid-season tulips and daffodils
bloom and in cool springs may continue blooming through June. Some newer varieties will re-bloom several
times if kept moist.
Gardeners will find bleeding heart offered in the catalogs and stores as
bare root plants and as potted plants. If bare root they can be planted in the
spring as soon as the soil has thawed.
Potted plants already blooming should be planted out about the time
forsythia blooms. Bleeding heart is
hardy to zone 4, which makes it safe for most of Michigan.
There are now varieties of bleeding heart that have white or red flowers
and even a variety with lighter, yellow green foliage. Some of the newer, more
sun tolerant varieties of bleeding heart have more tubular shaped flowers
rather than heart shaped flowers.
‘King of Hearts’ is a red
flowered, heat tolerant hybrid. ‘Aurora’ is a white flowered
variety. Rosy pink ‘Bacchanal’ is said to be the most sun
and heat tolerant bleeding heart. “Gold Heart’ is the variety with golden
leaves.
Old fashioned bleeding heart can get to 2 feet tall in a favorable spot
but many new varieties are more compact and get 15 -18 inches high. Clumps slowly enlarge over the years. Give bleeding heart plenty of room so it can
develop its graceful arching form.
Traditional bleeding heart likes to be under deciduous trees where it
will get some sunlight in early spring but then be shaded when the trees leaf
out. Newer varieties on the market will
take some sun later in the season if they are kept moist. Still, a partly shaded to light shade
location is the preferred planting spot.
Bleeding heart prefers a rich, moist organic soil. If the soil is good fertilization probably
isn’t necessary. A nice layer of leaf
mulch or finely shredded bark would keep the soil moist and cool around the
plant’s roots.
Keeping bleeding heart plants well-watered will ensure the best show of
flowers. If the plants are subjected to
too much heat and dry out they will go dormant and the foliage will die back to
the ground. This tends to happen to
older varieties anyway by mid-summer. They
generally return in the spring when conditions are better, so don’t forget to
mark their spot.
To prolong bloom and encourage repeat bloom in some of the newer varieties
keep bleeding heart flowers trimmed off as they fade.
Leaf miners are bleeding hearts biggest pest. These tiny worm-like critters leave white
trails across the leaves. A systemic
insecticide could be used on the plants but the miners seldom do any serious
damage to the plants health.
Bleeding Heart mixes well with spring bulbs and shade lovers like hosta
and heuchera. It is a cottage garden
staple but looks good in any shady location.
Growing Tomatoes
If you are a vegetable gardener chances are you are growing
tomatoes. There is nothing like the
taste of a vine ripened tomato - those hard supermarket things sold as tomatoes
are no match. And tomatoes are an easy
start for beginning vegetable gardeners.
They can even be grown in containers and hanging baskets.
Tomatoes are native to South America.
When they were brought back to Europe by early explorers they were first
grown as ornamental plants and were considered to be poisonous. And all parts
of the plant except the fruit are poisonous.
It took many years before they became part of local cuisine but now most
countries of the world have popular dishes that feature tomatoes.
Tomatoes are actually tender perennials and in tropical zones or a sunny
greenhouse they can grow for several years.
Most Michigan gardeners however, treat them as annuals; planting them
after the last frost in the area and letting the first hard frost kill
them.
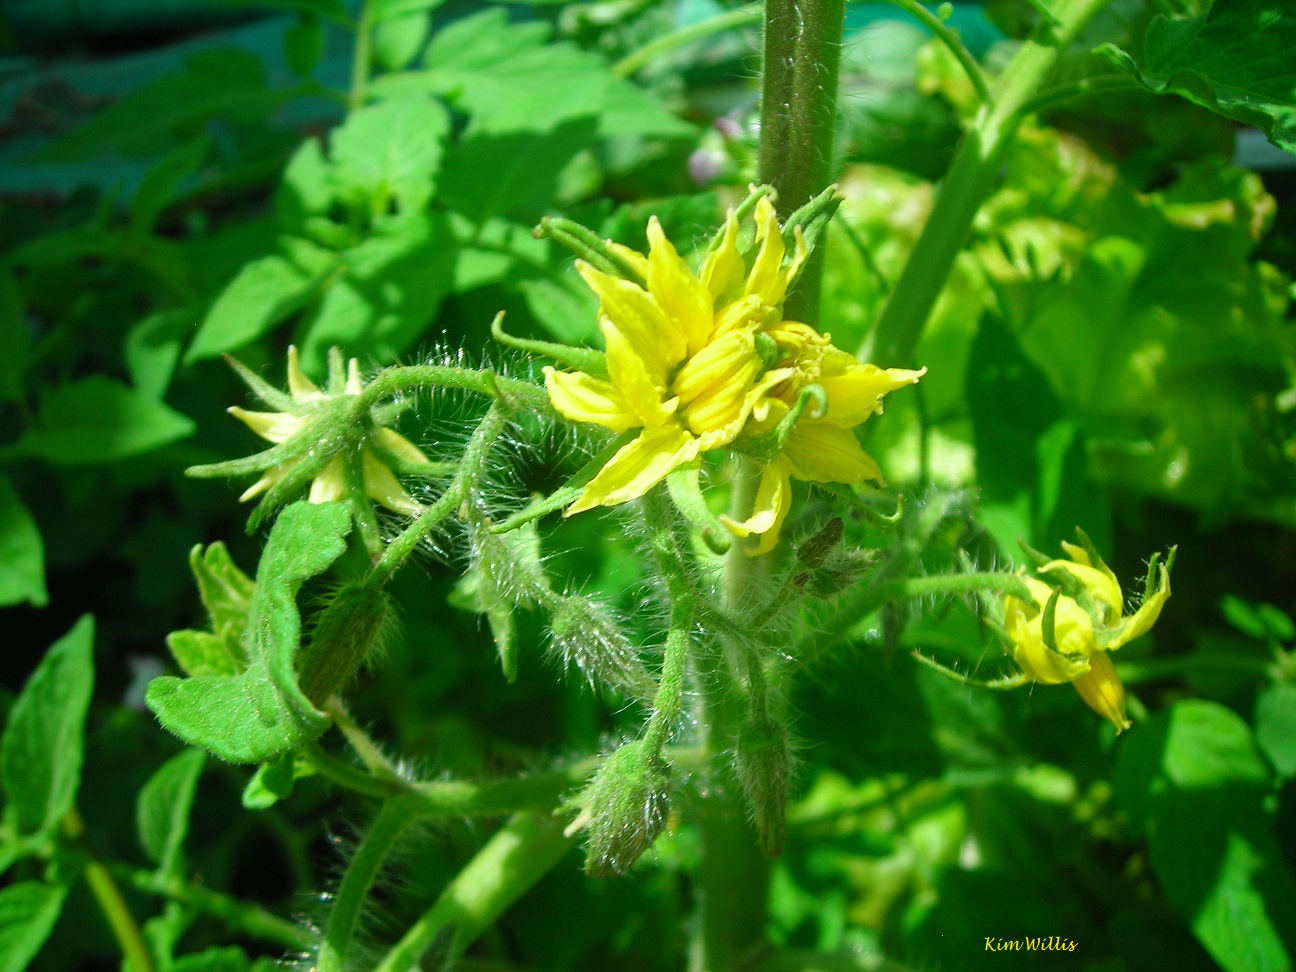 |
| Tomato flower |
Tomato flowers are yellow shooting star like blooms that occur in
clusters. Tomatoes can be pollinated by insects or by vibration of the plants
which knocks pollen off to land on nearby flowers. Tomato fruit starts off
green and although red tomatoes are the most familiar and the most popular,
ripe tomato fruit can be any color but blue.
The stems of tomato plants have the ability to produce roots from tiny
bump like nodes anywhere the stems touch the soil. Tomato plants can be anywhere from 2 feet
high to over 6 feet high. The leaves of
tomatoes are somewhat variable. There
are two main types- normal and potato leafed.
A few unusual leaf forms do exist.
Indeterminate tomato plants keep growing and producing fruit until
killed by frost but determinate plants, reach a set size then ripen all of
their fruit in a short time. If you want
to learn about all those catalog and plant tag abbreviations and the specifics
of tomato lingo read this article: http://www.examiner.com/article/learn-how-to-talk-tomato-like-a-pro
Tomato connoisseurs will tell you that each variety of tomato has a
slightly different taste. What all varieties have in common is that the best
tomato flavor develops when fruit is allowed to ripen on the vine. However, tomatoes are different from many
other vegetables and fruit in that they will continue to ripen after picking,
if the fruit is mature size and just starting to change color when picked.
Tomato culture
Most Michigan gardeners buy transplants to plant in the garden after the
soil is warm and there is no danger of frost.
Choose tomato plants with dark green leaves that are sturdy looking. Plants in cell packs should not have blooms
or fruit, these plants are stressed. If
the plant is in a large container it is fine if it has blooms and fruit. If
tomato plants you bought or grew are tall and lanky, you can bury the stem of
the tomato up to the second set of leaves and the stem will develop roots.
You can also start tomato seeds. Plant the seeds indoors about 6 weeks
before you expect your last frost. Plant
the seeds in sterile seed starting mix and keep them warm- above 70 degrees for
best germination. Tomato seedlings need the brightest light possible, a sunny
greenhouse or windowsill or grow lights.
After all danger of frost has passed, choose a shady day to transplant
into the garden or shade the plants with something for a few days and keep well-watered.
Tomatoes like rich, loose soil and must have full sun for best fruit
development. The location where you
plant tomatoes should be changed every year to avoid the build-up of soil borne
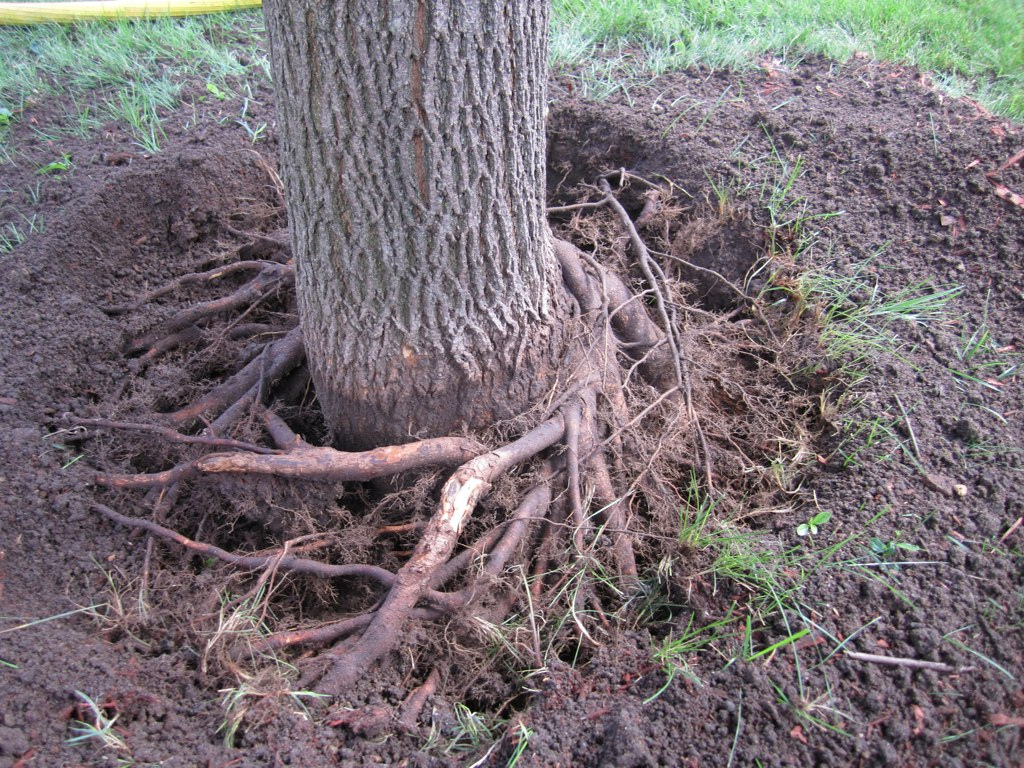
disease. Tomatoes should never be planted where the roots of a Black Walnut
tree may invade their root space, as this will kill them. They are also heavy feeders, and using a
fertilizer formulated for tomatoes is recommended. Here’s an in depth article
on how to plant tomatoes: http://www.examiner.com/list/how-to-plant-tomatoes
Tomatoes have less disease problems and take less space if they are caged
or staked. Use sturdy cages or use
stakes and tie the plants to them. Put
the stakes or cages in when you plant the tomatoes to avoid injuring the plant
later. Prune off any branches or leaves
that touch the ground. If you do allow
the plants to sprawl on the ground, mulch under the plants with plastic or
straw and leave at least 3 foot of space between plants and 4 foot between
rows.
Always water tomatoes at the base of the plant and try to avoid getting
foliage wet. This helps prevent fungal
diseases. Water the tomatoes early
enough in the day so that foliage dries before dark. Water deeply once a week rather than
frequently, but if plants wilt and the soil feels dry, they should be watered
regardless of how long it’s been. Don’t
over water- tomatoes do not like soggy soil.

In early September Michigan gardeners should pinch off any new growing
tips and flowers that develop on their indeterminate tomato plants. This will concentrate the plants energy into
growing and ripening the fruit already on the plant before the first frost.
Tomato
problems
Tomatoes need to be kept evenly moist to help prevent blossom end
rot. This is a large black scabby area
on the bottom of the tomato which if the disease is severe, may spread further
into the fruit and cause a black, mushy rotted area. Research now suggests that a lack of calcium
in the soil does not cause blossom end rot.
Using a fertilizer for tomatoes will generally supply the calcium and
other nutrient needs. DO NOT USE EPSOM
SALTS when planting tomatoes, despite all the internet “wisdom”. Epsom
salts can burn plant roots and too much in the soil binds important nutrients
and keeps them from being used by the tomato plant.
Fungal diseases are the biggest problem tomato grower’s face. They cause spots on the leaves, which then
turn yellow and fall off. They can also
infect the fruit. The plants may quickly
die or remain sickly and unproductive.
Things you can do to prevent disease are; avoid getting foliage wet when
watering, space plants so that there is good airflow around them and plant
disease resistant varieties. Keep
plants off the ground and mulch the soil around them
Early Blight and Septoria leaf spot are common fungal diseases. These two
diseases seldom kill plants outright, leaves die at the bottom but the plant
continues to put out new leaves. However
this makes the plants weak and keeps them from producing the best fruit. In the
last few years Late Blight has become a problem for Michigan tomato growers. It causes blackened vines, leaves and fruit
and quickly kills plants. For more about
late blight read this article. It’s from a previous season but still accurate.
There is no cure for fungal disease, only prevention. Use a garden fungicide safe for vegetables
according to label directions. While many organic products will provide some
protection for early blight, septoria and some other tomato diseases, no
current organic product works well for late blight. Michigan gardeners are strongly encouraged
to protect their tomatoes from late blight.
A product containing chlorothalonil is probably the best option for
homeowners.
Tomatoes seldom have insect problems other than the tomato hornworm. The hornworm is the larvae stage of a pretty
moth called the sphinx moth. The
hornworm is a green fat worm spotted with white that sports a big spine on its
rear end which in Michigan can be red or black.
Tomato hornworms can be hard to see, they are well camouflaged. They eat leaves and fruit and can be quite
destructive. Picking them off a few
plants is probably the best homeowner strategy.
If you have many plants or can’t stand fat caterpillars use a garden
insecticide safe for tomatoes. Here’s an
article about hornworms you might want to read: http://www.examiner.com/article/how-to-recognize-and-control-tomato-hornworms-michigan
What varieties
are best?
There are hundreds of tomato varieties on the market. Why not experiment a bit each year and find
ones you like? Keep in mind that
heirloom varieties may not be very disease resistant and most were developed to
perform well in specific areas of the country.
There are modern hybrids that combine disease resistance with
old-fashioned flavor. The more letters
after a variety name such as VFNTASt, the more disease resistance it has. Pay attention to catalog descriptions such as
days to maturity, and whether the plant has special resistance to cold soil or
where it was developed, to choose varieties right for you. Color and size are
personal preferences; lighter colors are generally lower in acid.
Here is an article that gives you some great tomatoes for Michigan.
Here’s an article about varieties for cooking and canning
Hanging basket care
It’s a tradition for gardeners to pick their hanging baskets and have
them hanging outside by Memorial Day.
Most gardeners will probably buy at least one hanging basket this
season. Michigan is one of the top
producers of flowering baskets in the United States and Michigan gardeners have
a wide selection of gorgeous hanging baskets to choose from each spring. But while the baskets are stunning in early
spring they often fizzle by midsummer.
Here are some tips to keep your flowering baskets looking nice
throughout the summer season.
Right plant -
right place
Choose wisely by matching the light requirements of the plants in the
basket with those at the site where you intend to place them. A fuchsia plant that’s popped into full sun
will quickly dry up and die. A pleasing
petunia basket will quit blooming and get straggly if placed in the shade. Hanging baskets generally list the plant
names and requirements on a tag or label.
If they don’t, ask a knowledgeable salesperson what conditions the
plants prefer. Don’t buy a hanging basket,
no matter how beautiful, if you can’t give it the conditions it needs.
 |
| Fuchsia |
If a plant is listed as performing well in sun or part sun, it generally
needs about 6 hours of direct sun or filtered sun all day. If it says shade or part shade then the plant
prefers less than 6 hours of sunlight and that sunlight is generally best if it
comes in the early morning or late afternoon.
Wind can also be a factor when choosing the right plants in a hanging
basket. Some plants are very susceptible
to wind damage such as the tuberous begonias.
They should be hung in a protected spot.
The stems are brittle and break easily.
These plants wouldn’t be a good choice where they might get bumped or
brushed frequently either.
Water - water
-water
Hanging baskets require lots of water.
There are a lot of roots in those full lush baskets and little
soil. Windy, warm days may require that
you water the baskets twice a day. Plan
for watering before you hang the pots.
If you can’t access them easily you either won’t water them enough or
you will want to get rid of them. There
are pulley systems you can buy or devise that allow you to lower the pots for
easy watering and long curved wands that you can attach to a hose to water baskets
above your head.
Try not to let the plants wilt, even though they may revive when watered,
each time they wilt the plant is stressed.
Water the baskets slowly with warm water until water drips from the
bottom of the pot. Try not to let the
soil get so dry that it shrinks away from the side of the pot, if you do the
water you add just pours right through the pot, without much absorbing into the
soil. If this happens take the pot down
and soak it in a large bucket of water that covers the pot. Push the pot down in the water and hold it
until bubbles stop coming out. Leave it for an hour (and not much longer) and
then remove it and let it drain. The soil should have expanded to the pot sides
again.
If the hanging basket is set into another container that doesn’t allow it
to drain freely you could over water your hanging basket. Cool rainy weather and a container that
doesn’t drain well can be a problem. Plants
that are over watered generally have a swampy smell. They will wilt just like a dry plant because
the root system is rotting away. If the
soil feels very wet don’t water the plant.
Empty all saucers or catch pots shortly after you water your hanging
baskets. These sources of standing water
also breed mosquitoes.
Feed, feed,
feed
Nurseries and greenhouses feed their hanging baskets a diluted plant
fertilizer almost continuously. To keep
your basket blooming all summer you should feed them too. Use a flowering plant fertilizer designed to
be mixed with water at least once a week.
Follow the label directions carefully and use the directions for container
plants. Do not make the solution
stronger than the label recommends or you may burn the roots of your plants.
Many of these fertilizers say they can be sprinkled on the leaves and the
plants can absorb them. They do to some
extent but it is better to pour the fertilizer mixture on the soil. If you plant your hanging basket yourself or
repot it, you can add a granular slow release fertilizer formulated for
flowering plants and mix it into the potting mix. Follow the label directions for container
plants. This should feed the basket for about 3 months.
Promise to
deadhead and protect
Keep dead flowers plucked off to increase bloom. Trim off straggly and broken ends and
generally keep the plant tidy. Some
plants will take a bloom break when the weather gets very hot. Warning - not every plant can be trimmed back
drastically to renew it. This works with plants like petunias, impatiens,
alyssum, lobelia and a few other things.
If you are going on vacation for a week or two trim them back to about 6
inches and in a couple of weeks you will have a bushy plant with renewed flowering. They must be kept watered and fed during the
transition too. Don’t cut back plants
like tuberous begonias, fuchsia, and lantana.
For some of the new and unusual plants in hanging baskets, ask an
experienced nursery person or your Extension office garden hotline if they can
be trimmed back for renewal.
 |
| Tuberous Begonia |
If frost threatens cover your basket or move it inside a garage or
shed. You may extend the beauty of your
baskets for a month or so in the fall if you cover them when frost is likely. A large old sheet may be needed to cover a
large basket. Make sure to remove the
cover shortly after sunrise the next morning.
Should you go organic
or not?
The recent recommendation from experts to spray home cucumber, tomato and
potato plants to protect them from some serious diseases has some dyed in the
wool organic people up in arms. Hot
debates are springing up and people who choose to protect their plants are
feeling a bit guilty as they do so.
While home gardeners should always strive to use as little pesticides as
possible, if you must do so to protect a crop and you always follow the label
directions on the pesticide product, you should put away the guilt.
Why grow produce in the home garden if you have to spray them like
commercial crops some may ask. The
vegetables and fruits you grow are still good for you and taste much better
than crops that have been shipped long distances. And since you know what was sprayed on them
and when, you have an advantage over the consumer who picks up produce at the
local grocery store or even the farm market.
While there are some organic practices that may make produce taste
better, not using pesticides is generally not one of them.
In the home garden pesticides - things that control insects and disease-
should be used sparingly, carefully and only when absolutely necessary. We
should make careful decisions as to whether or not we need to control a pest or
if we can live with a little damage. If
we can still get a reasonable crop and the damage is mainly cosmetic, we can
and should, manage the problem without pesticides.
When a disease such as late blight that will quickly destroy an entire
crop threatens, we either live with the decision to control it with pesticides
or we decide to lose the crop or not grow it. We also need to realize that our
decision to grow a crop and then not protect it may affect other gardeners near
us and even commercial farmers. Once a
fungal disease gets established in an area it may re-appear for years to come
and require even more dangerous and costly controls.
When organic products such as an insecticidal soap are effective they
should be used. Cultural controls like
covering some crops with row covers, mulching, keeping plants fertilized and
watered, weeding and using traps to capture pests are always important to try
first before using pesticides. But for
some problems no effective organic or cultural control exists.
All organic products are not harmless.
Nicotine for example is organic but very, very toxic to humans as well
as insects. It isn’t often sold for that
reason but many people mix up concoctions containing it after reading some
organic article. Mixing up strange
organic brews in the garage may end up being worse for you than using a
pesticide correctly.
The people who are so reluctant to use a little fungicide on their tomato
plants are often the same ones who are spraying their house every two days for
ants, getting pesticides all over surfaces where hands and food rests and
breathing in pesticide vapors. They
think nothing of chasing a fly around trying to blast it with fly spray. Or they use moth balls, a potent carcinogen
that also causes cataracts, in copious amounts to try to keep snakes out from
under the porch, or squirrels from the attic.
When you spray or dust plants in the garden with pesticides most of the
pesticide stays on the surface of the plant, it isn’t absorbed in any great
amount. (Never use systemic products which do enter the plant on food plants.)
So carefully washing all produce should remove that pesticide. It’s a good idea to wash all fruits and
vegetables before eating, even if they have been grown organically. Several food borne illnesses have nothing to
do with pesticides; they come from food becoming contaminated with things like
salmonella, which occurs naturally in the environment.
In every case the pesticides that are sold will have a label, and it is
the law that you follow that label exactly.
Everyday consumers are busy slathering their faces with chemicals,(
make-up, shaving cream), spraying their bodies with chemicals ( perfumes,
deodorants, hairspray), breathing in poisonous vapors, (paints, printer ink,
magic markers, volatizing plastic, nail polish), and eating and drinking dozens
of chemicals. The safe, proper use of
garden pesticides is no more dangerous than any of those things.
Dame’s Rocket
or Wild Phlox
Dame’s Rocket, (Hesperis matronalis) can be found in roadside ditches,
fields and gardens. This pretty plant
spreads a blanket of color in late spring across Michigan. Usually purple, Dames rocket also comes in
white and pink and wild places often show blend of these beautiful colors,
which are natural mutations. It is an
escapee from domestic gardens and has been cultivated since early Romans grew
it in gardens.
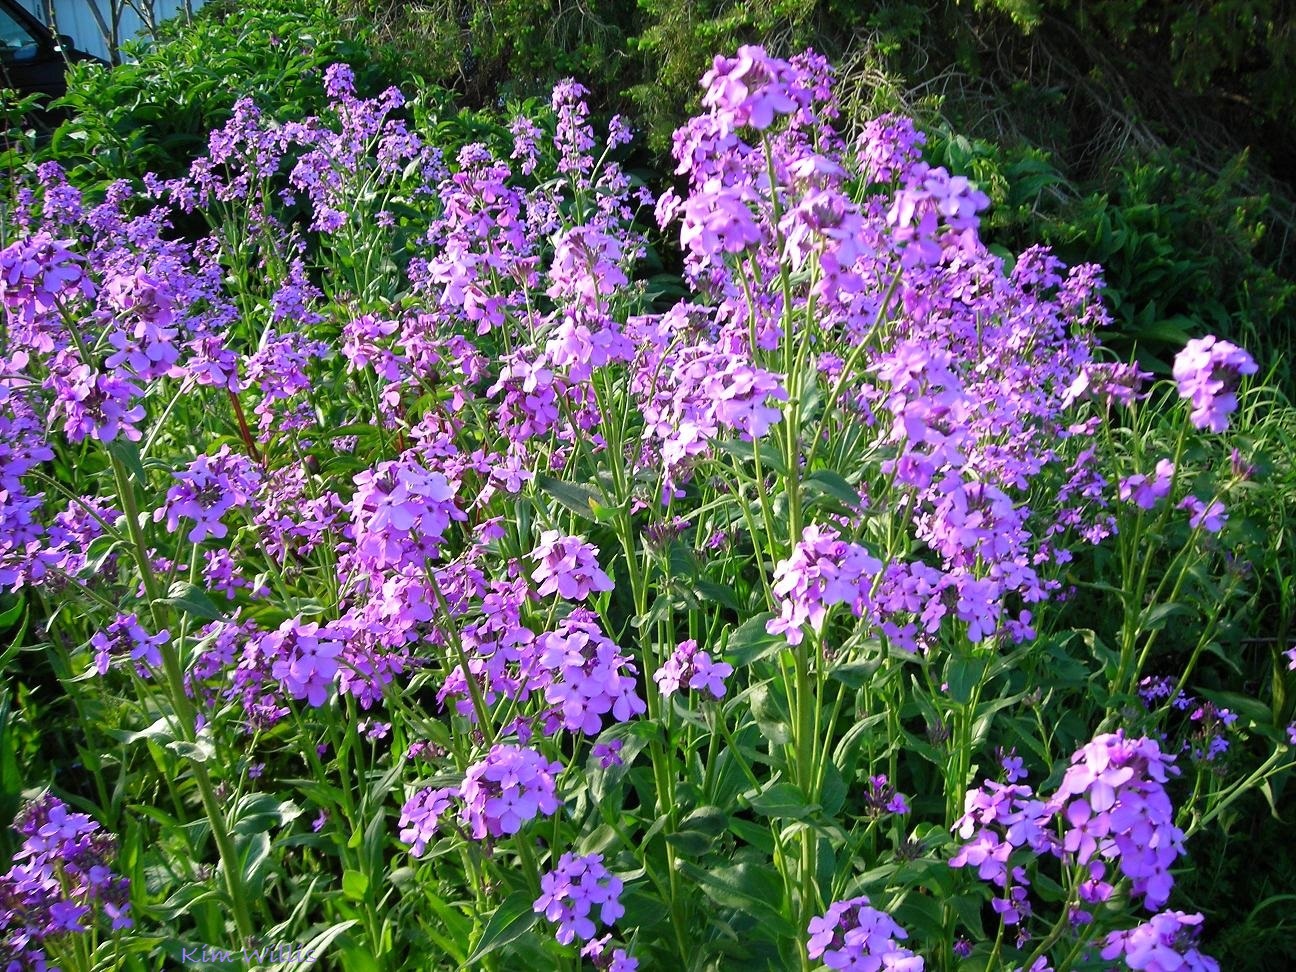 |
| Dames Rocket |
Dame’s rocket is an annual plant, returning each year from seed that is
dropped in late summer. This is a draw
back in gardens because the plants are rather unsightly after bloom stops and
before the seed pods ripen. However if
you want this plant to reseed in the garden just a few seed stalks need to be
left.
The leaves of Dames rocket are long and narrow and a deep green. The plants grow to about 3 feet high and the
flowers arrive on many small stems carrying loose clusters of 3/4 inch, 4 petal
flowers at the top of the plant. The
flowers turn into long narrow brown seed pods.
Dame’s Rocket is not fussy about where it grows, from ditches to wood
edges and will grow in full sun or partial shade. If you would like to encourage its growth in
your garden collect the seed pods in late summer and sprinkle the seeds in the
area you want them to grow.
Traveling
turtles
It’s that time of the year again when turtles seem to lose all sense and
roam across roads like they were trying to commit suicide. It isn’t the heat and it certainly isn’t the
ponds drying up- at least not this year- that causes this seemingly random
wandering. It’s a mother turtle looking
for just the right place to lay her eggs.
All of our Michigan turtles do this, but the ones that are most common
and most often seen are the Painted turtle and the Snapping turtle.
 |
| Painted turtle |
About this time every year mother turtles of all types get the urge to
find a perfect spot for the eggs they’re carrying. They’re looking for moist, loose soil in a
sunny area, preferably not heavily covered with vegetation. Each turtle must have some deep inborn idea
of that perfect spot and off she goes to find it, slowly but surely. She may go some distance from the pond or
swamp she mated in, across hot expanses of asphalt and up and down steep
roadside ditches. Unfortunately many of
these quests for a nursery end in the turtle being squashed on the road.
If the turtle finds a good spot, she digs a shallow hole and lays her off-white
eggs, which vary in size from golf ball to large hen egg size, from oval to
round and from thin and hard shelled to leathery shelled depending on the
species of the female turtle. She then
pushes some loose soil over them and starts her long trek back to where she
came from. Many creatures love turtle
eggs for dinner, particularly raccoons, which sometimes follow turtles and grab
the eggs as they are laid.
If the nest remains undiscovered, the tiny turtles will hatch in 60-80
days and they too, will start a journey.
They will go looking for the perfect pond or swamp to live in. Their instincts guide them toward water and
once again many will perish as they cross roads and are gobbled up by other
critters.
Turtles are becoming increasingly scarce, with some species now
endangered. They take years to become
sexually mature and few baby turtles make it through the first year. As swamps and other wetland habitat is
eliminated in Michigan, turtle numbers have declined drastically. If you can avoid hitting them on the road
please do so. If you want to help them
cross the road, take them in the direction they were traveling, even if it
doesn’t seem like they are going the right way to you. If you take them back to where they came
from, they will just start the journey all over again. Watch for your own safety on roads and don’t
put your life in danger to rescue a turtle.
 |
| Snapping turtle |
Be really careful when handling snapping turtles. Snappers are ugly looking and often covered
with algae or mud. They have long necks
and may aggressively “snap” at anything they perceive as a threat. The large ones have jaws strong enough to
break a finger or take it right off so use extreme care. Picking them up by the tail may hurt them and
they may be able to reach around and bite you.
If you want to move them, dangle a piece of cloth or cardboard in front
of their nose. They will generally snap
at this and when they latch on to the object they firmly hold on. You can then drag or pull them off the
road. On the other side they’ll release
the object they grabbed after a few minutes of quiet.
Snapping turtles won’t chase you and will leave you alone if you leave
them alone. While they are ugly, they
are part of nature’s scheme and don’t deserve to be indiscriminately
killed. Tales of large snapping turtles
attacking swimmers or eating all the fish in a pond are just that, tales. While Snappers have been known to eat an
occasional baby duck, they really prefer fish and frogs. The presence of snapping turtles in a pond or
lake seldom impacts the number of game fish present.
Snappers can get quite large, although the Common Snapping turtle found
in Michigan does not get as large as the Alligator Snapping turtle found in the
southern states. About 40 pounds and a
shell 20” across would be a large Michigan Snapping turtle. Some of these large turtles may be 50 or more
years old. Snapping turtles were a part
of Native American diets and many people still consider them a delicacy.
All turtles are protected from being harvested and sold in Michigan
except for Snapping turtles. The Spotted, Blandings, Wood, and Eastern Box
turtles are protected completely by Michigan law and it is illegal to kill them
or keep them as pets. So when you see
these guys crossing the road don’t capture them for pets.
Have a great Memorial weekend- just keep an eye on the sky
Kim Willis
“He who has a garden and
a library wants for nothing” ― Cicero
Events, classes and other offerings
Please let me know if there is any event or class that
you would like to share with other gardeners.
These events are primarily in Michigan but if you are a reader from
outside of Michigan and want to post an event I’ll be glad to do it.
Do you have plants or seeds you would like to swap or share? Post them here by emailing me. You can also
ask me to post garden related events. Kimwillis151@gmail.com
An
interesting Plant Id page you can join on Facebook
Here’s a
seed/plant sharing group you can join on Facebook
Invitation
If you are a gardener
in Michigan close to Lapeer we invite you to join the Lapeer Area Horticultural
Society. The club meets once a month, 6:30 pm, on the third Monday at various
places for a short educational talk, snacks and socializing with fellow
gardeners. No educational or volunteer requirements for membership, all are
welcome. Membership dues are $20 per year. Come and visit us, sit in on a
meeting for free. Contact
susanmklaffer@yahoo.com Phone
810-664-8912
New- Peonies
Galore Sale Sat,
June 4, 10am, Nichols Arboretum, Angell, MI,
Several
varieties of locally grown heirloom peonies for sale. Call for more info – 734-647-7600, or www.mbgna.umich.edu.
New-Half
Million Ladybug Giveaway, Sat, June 11,
Organic
pest control for the garden! Gardeners can get 1 bag of 1500 ladybugs free with
any purchase at any English gardens location. www.englishgardens.com.
New-MSU Tollgate
Gardens Perennial Plant Sale, Sat, June 4, 9am-2pm, MSU Tollgate Education
Conference Center, 28115 Meadowbrook Rd, Novi, MI
|
We will
be offering Tollgate Nursery grown sun and shade perennials. There will be volunteers to help with
selection and loading. For more
information: 248-347-3860. ext.251.
|
|
|
Annual Perennial Plant Sale Sat, May 28,
10am-1pm, 1535 N Hickory Rd, Owosso, MI
|
|
|
|
|
Sponsored by
Shaiwassee Co. Master Gardeners. Plants for both shade & sun with expert
gardeners to answer questions. More
info: joannemkenyon@yahoo.com.
Novi Spring Perennial Exchange Sat, May 28, 9am-Noon, Fuerst Park,
45175 10 Mile Rd, Novi, MI
Sponsored by Novi
Beautification Commission at Fuerst Park. FREE. Perennial exchange. Bring
plants to share and make new gardening friends. 248-735-5621.
Here’s a facebook page link for
gardeners in the Lapeer area. This link
has a lot of events listed on it.
Here’s a
link to all the nature programs being offered at Seven Ponds Nature center in
Dryden, Michigan. http://www.sevenponds.org/
Here’s a
link to classes being offered at Campbell’s Greenhouse, 4077 Burnside Road,
North Branch.
Here’s a
link to classes and events at Nichols Arboretum, Ann Arbor
Here’s a
link to programs being offered at English Gardens, several locations in
Michigan.
Here’s a
link to classes at Telly’s Greenhouse in Troy and Shelby Twsp. MI, and now
combined with Goldner Walsh in Pontiac MI.
Here’s a
link to classes and events at Bordines, Rochester Hills, Grand Blanc, Clarkston
and Brighton locations
Here’s a
link to events at the Leslie Science and Nature Center, 1831 Traver Road Ann
Arbor, Michigan | Phone 734-997-1553 |
http://www.lesliesnc.org/
Here’s a link to events at Hidden Lake Gardens, 6214
Monroe Rd, Tipton, MI
Here’s a
link to events and classes at Fredrick Meijer Gardens, Grand Rapids Mi
http://www.meijergardens.org/learn/ (888) 957-1580, (616) 957-1580
Newsletter
information
If you would
like to pass along a notice about an educational event or a volunteer
opportunity please send me an email before Tuesday of each week and I will
print it. Also if you have a comment or opinion you’d like to share, send it to
me. Please state that you want to have the item published in my weekly notes.
You must give your full name and what you say must be polite and not attack any
individual. I am very open to ideas and opinions that don’t match mine but I do
reserve the right to publish what I want.
I write this
because I love to share with other gardeners some of the things I come across
in my research each week. It keeps me engaged with local people and
horticulture. It’s a hobby, basically. I hope you enjoy it. If at any time you
don’t wish to receive these emails just let me know. If you know anyone who
would like to receive these emails have them send their email address to
me. KimWillis151@gmail.com